Custom Reliability Prediction Lists
You can add List fields to your Parts Table and define the items in the List. Using lists enables you to control the data entered into your Reliability Prediction by providing a list of valid choices for users to select from, rather than allowing the entry of any text into a field. Your custom Lists will appear as a dropdown list field on your Parts Table. When the dropdown arrow is clicked, the list of items to select from will appear.
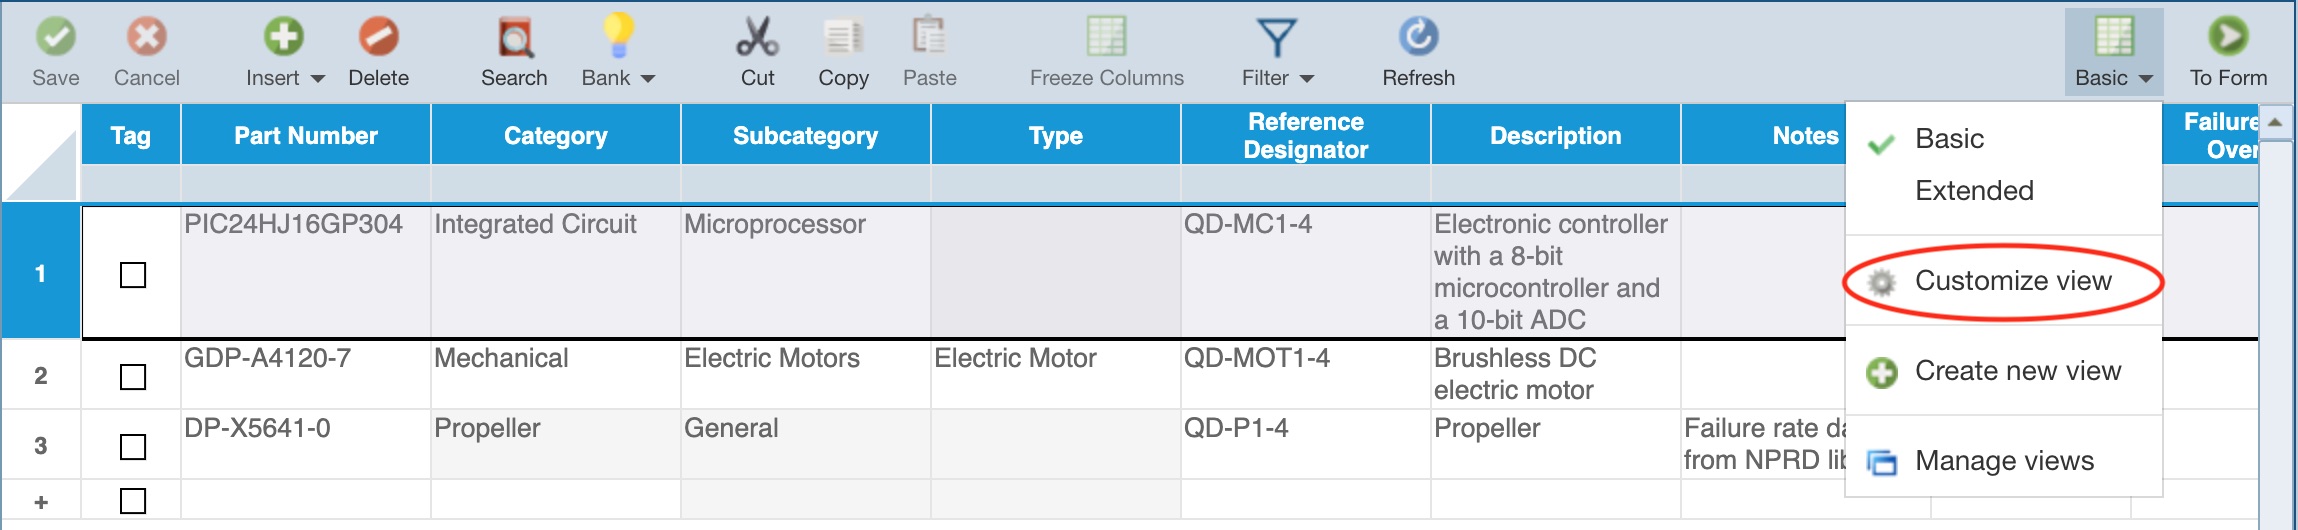
To add a custom List field, use the Customize View feature. To access the Customize View feature, click the Customize view function that appears in the Views dropdown menu that appears in the upper right corner of the Relyence toolbar.
If you are customizing a Relyence supplied View, select either to Change This View or Create New View.
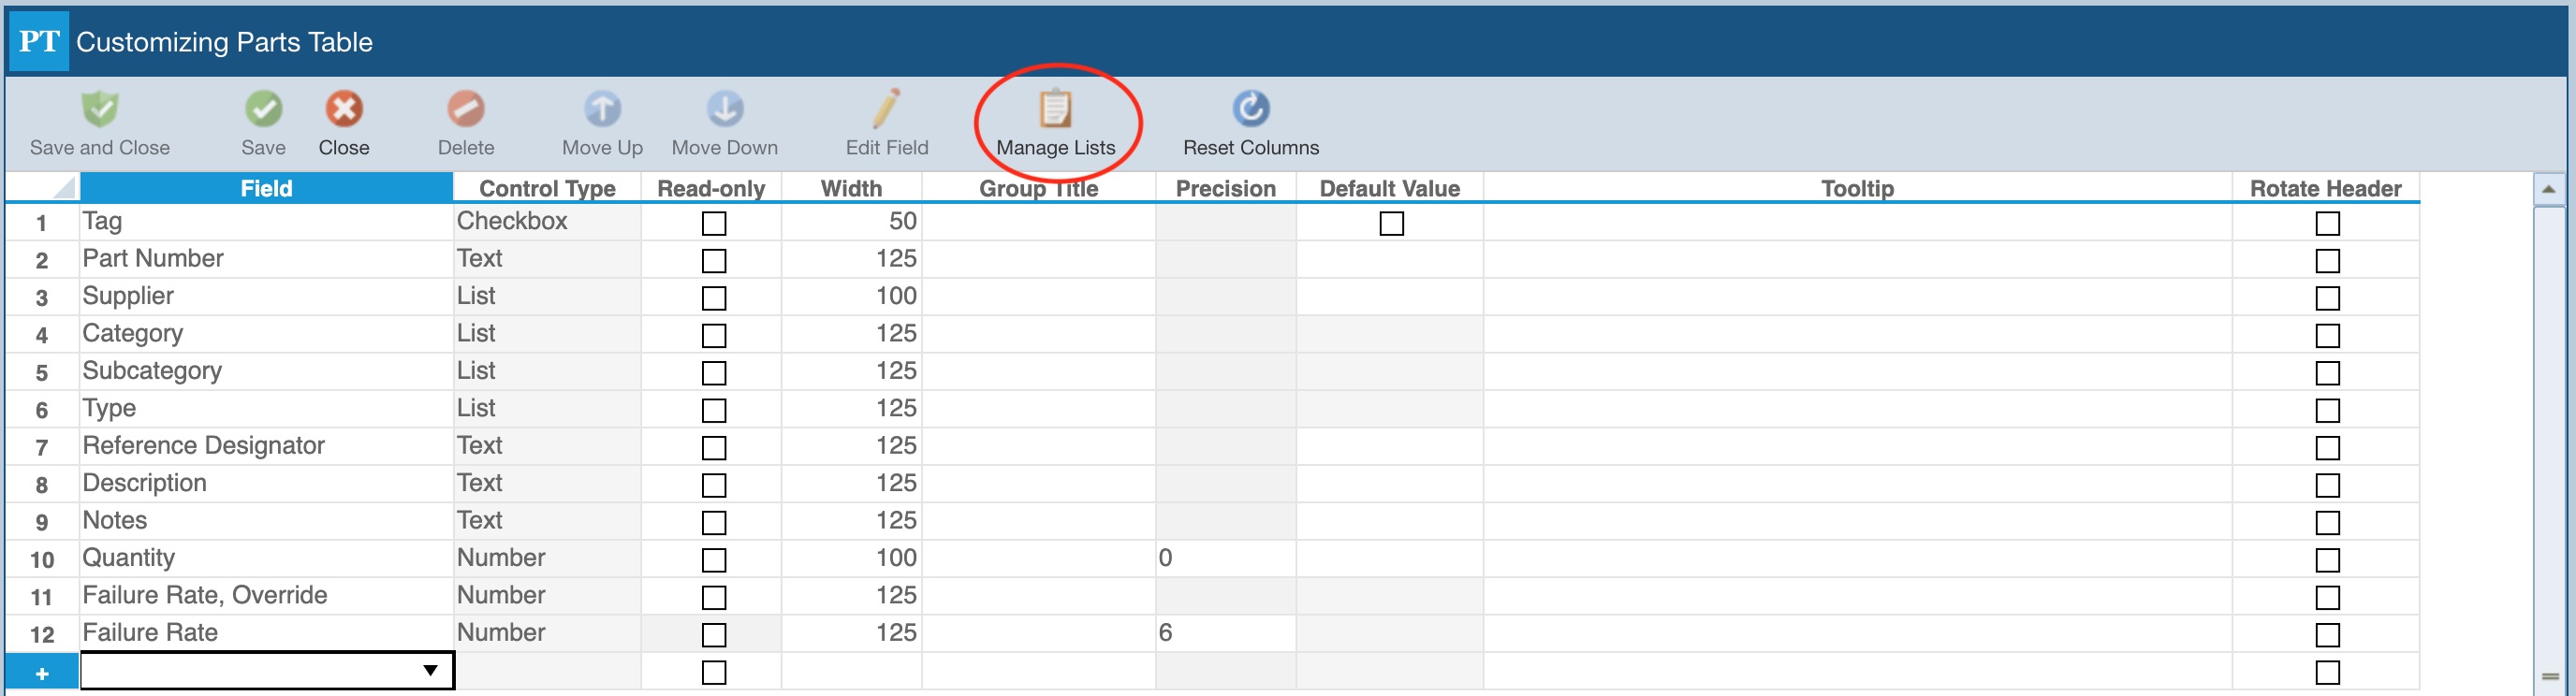
The Customizing Parts Table window opens.
To add a new List, go to the empty row at the end of the Field column, click the dropdown list button to display the list of field names, and select any text-based field; you can also click the + in the last (empty) row and the Field choice list will appear where you can choose a text-based field. Then click the Edit Field button in the toolbar to bring up the Edit Field dialog, and select List for the Control Type.
To change an existing text field to a List, click on the desired field in the Field column to select it, click the Edit Field button in the toolbar to bring up the Edit Field dialog and select List for the Control Type.
The Edit Field dialog allows you to enter the List items. If you are changing an existing field to a List, Relyence will automatically create your List based on the data you have already entered for this field.
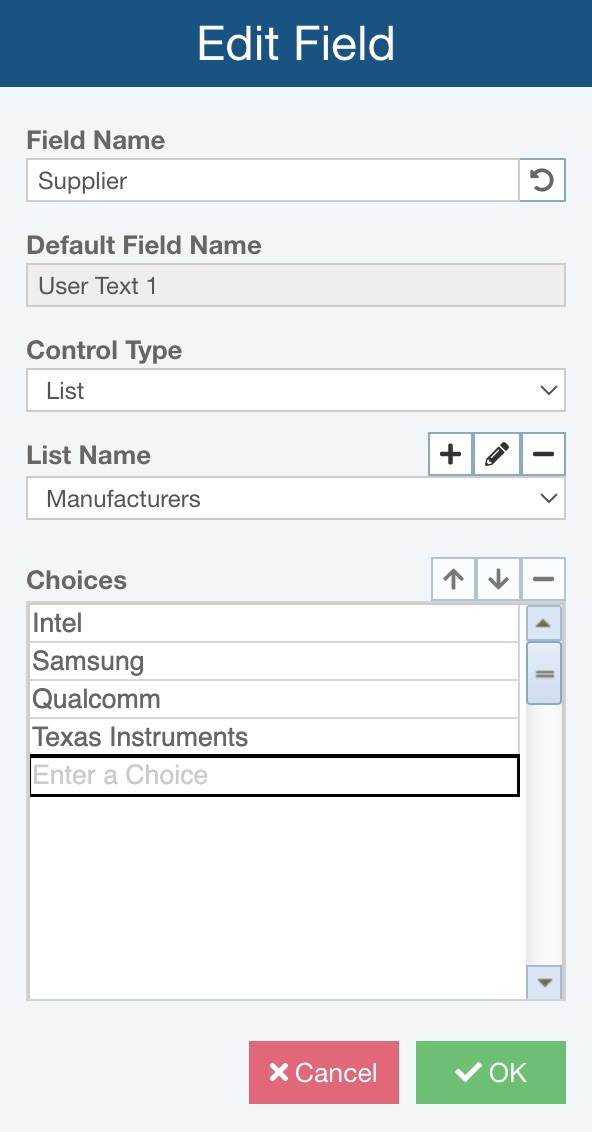
The List Name enables you to manage your Lists. For example, you may want to use this List in more than one place. To do this, you will reference it by its List Name.
You can use the Add (+), Edit (pencil), and Delete (-) buttons by List Name to manage your lists.
In Choices, enter the items for your new List. Use the Move Up (arrow up), Move Down (arrow down), and Delete (-) buttons by Choices to manage the items in the List.
Click OK to save your new List.
To modify a List, click on the field you want to change in the Customize table and click on Edit Field in the toolbar.
Click Save and Close from the toolbar when you have completed customizing your Lists.
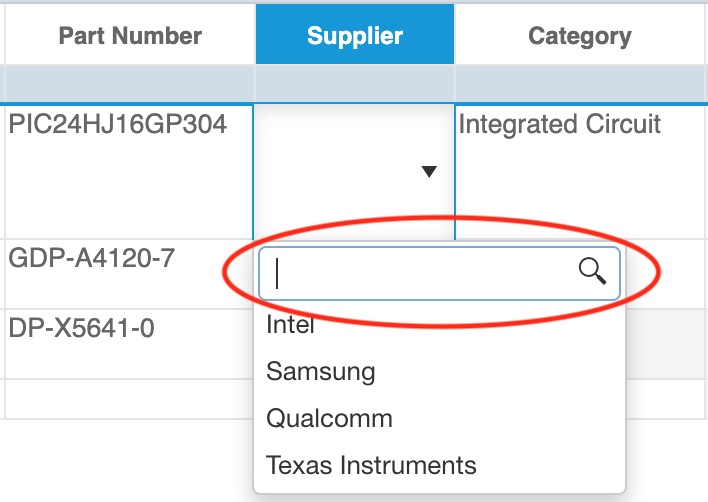
Your List will appear in your Parts Table as a dropdown list.

The search bar appears at the top of the dropdown list for most combo box fields.
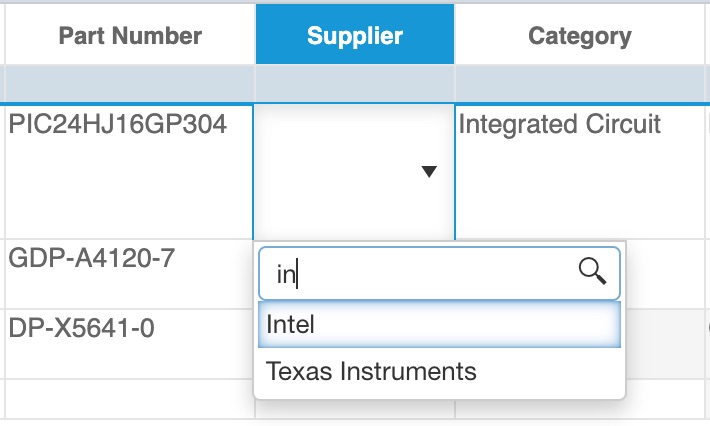
To limit the available choices, enter some or all of the list text you're looking for and click the search button.
Using the Manage Lists Dialog
In addition to using the Edit Field button in the toolbar, you can also click the Manage Lists button in the toolbar.
When you click Manage Lists, the Manage Lists dialog appears.
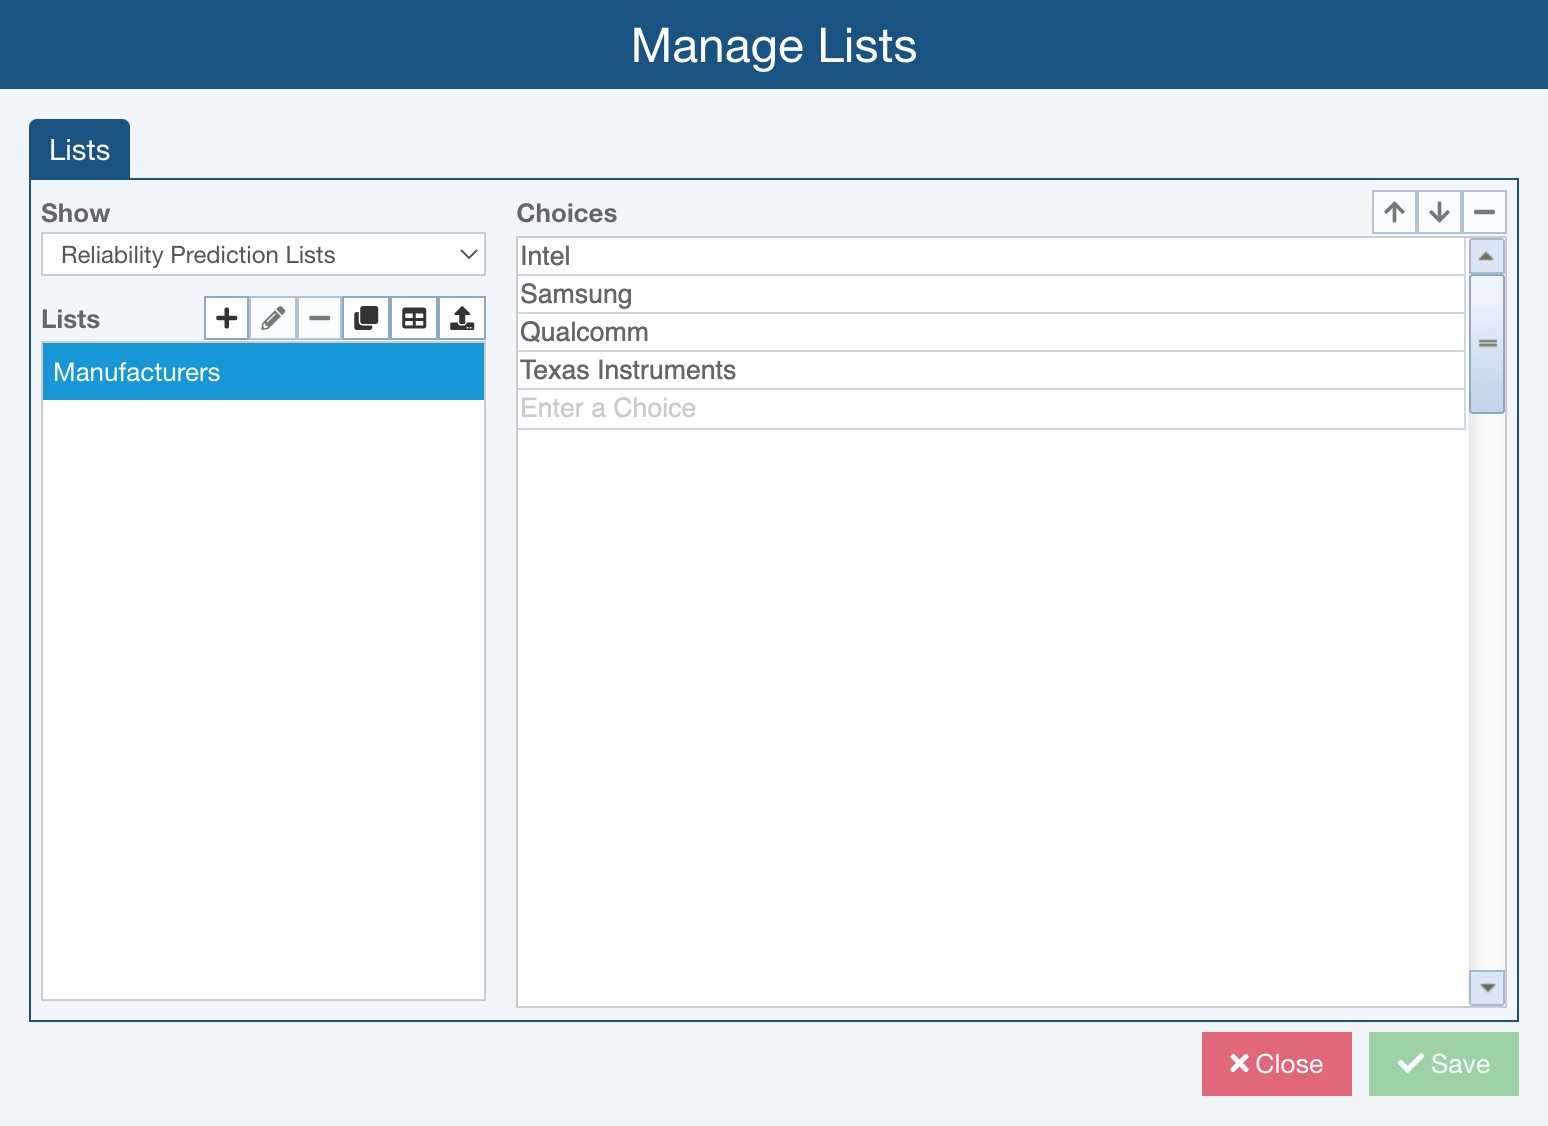
From the Show field, you can opt to display all lists or just those for Reliability Prediction.
In the Lists box on the left, you'll see the Lists set to be shown per Show.
At the top of the Lists box, the toolbar provides options to:
- Add List (+) - allows you to add a new List.
- Edit List (pencil) - allows you to edit the Name of the selected List.
- Delete List (-) - allows you to delete the selected List.
- Copy List - allows you to make a copy of the selected List.
- View Usage - displays the Usage dialog, which identifies the Relyence Product, type of Field, and Field where the list is used.
- Import Lists - gives the option to import list Choices, as described in the Importing Lists section below.
In the Choices box on the right, the choices for the selected List are displayed and you can use the Move Up (arrow up), Move Down (arrow down), and Delete (-) buttons to change the order and/or remove list choices. You can enter new choices in the last row where it reads Enter a Choice.
Importing Lists
Click the Import Lists button to start the process to import list details.
The Import Lists dialog appears.
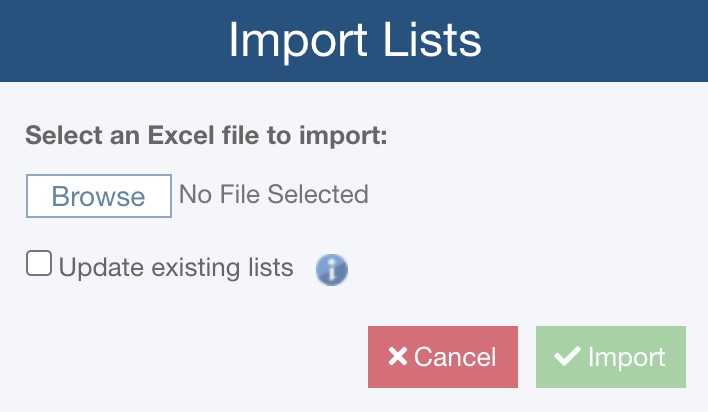
Click Browse to select the Excel file to import. If you want existing Lists to be overwritten with data from the import file, select Update existing lists. Otherwise, duplicate Lists found in the import file will be ignored and your existing Lists will remain intact.
Click Import to import your Lists. When the import is complete, the Import Complete dialog appears with status about the import. You can also review the log file if you desire. Click Close to close the dialog.
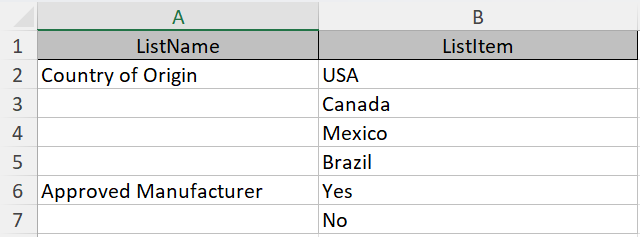
The format for the importable Excel Lists file is simply two columns of ListName and ListItem. You can include as many Lists as you want in the import file.
Once imported, all the Lists will be available in the List Name dropdown choice list. Select the List to use for this data field using the dropdown choice list.
Click the following link if you would like to download the sample Lists import file:
Once lists are imported, you can associate them with any field via the Edit Field dialog.