Customizing RCM Report Headers
You can customize the report headers in your RCM Worksheet reports. Your report header configurations will be saved, so you only need to specify your customization one time and it will be used each time you run the report.
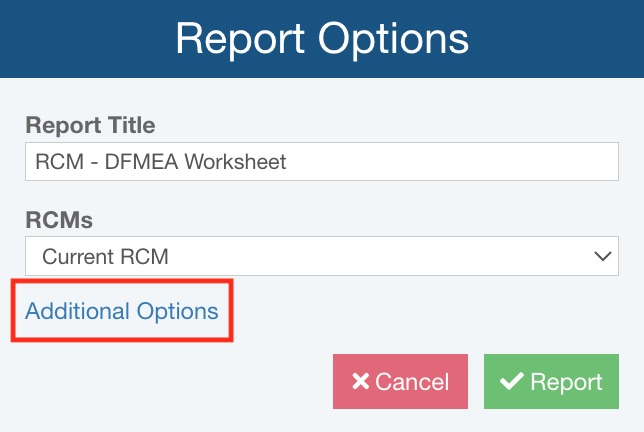
To customize your RCM Worksheet reports, click Report from the Sidebar menu when the RCM Worksheet is active to bring up the Report Options dialog.

On the Report Options dialog, click Additional Options.

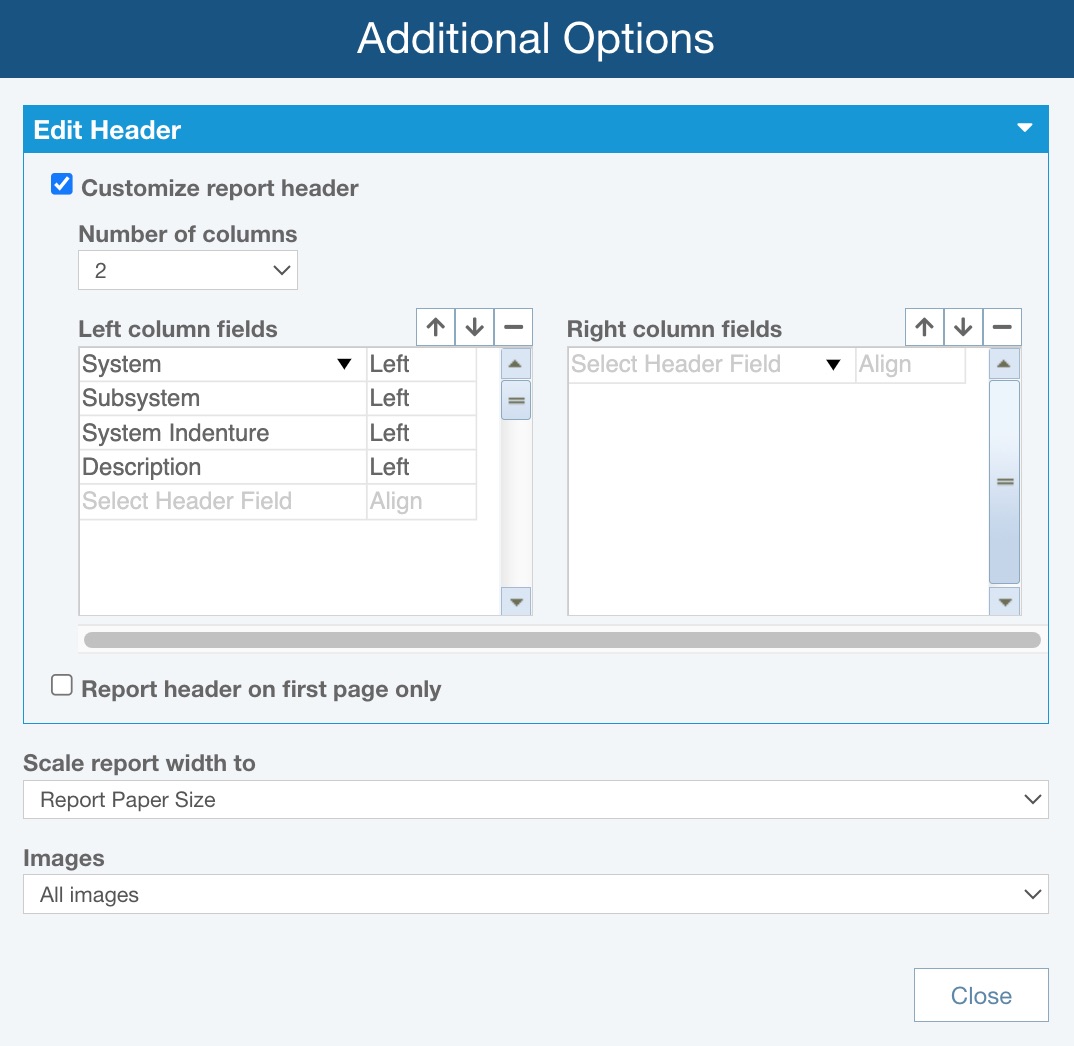
Select the Customize report header option. The Edit Header subsection will appear for you to customize your header.
In the Edit Header section, you can identify which fields should appear in 1, 2 or 3 columns of your report header.
By default there are 2 columns of Report Header data. You can change the Number of columns, if needed.
If there is 1 column, that column appears on the left.
If there are 2 columns, the columns appear on the left and right.
If there are 3 columns, the columns appear left, center, and right.
For each column, specify the fields to be included, the field order from top to bottom, and if the data should be Left, Center, or Right justified.
To add a data field to a column of the report header, click Select Header Field in any column list to bring up the dropdown list of data fields. Select the field you want to include.
To delete a data field from the report header, click the field name in the column list and click the minus (-) symbol.
To reorder the list, click on a data field to move, and use the up and down arrows to position it where you prefer.
You can also replace an existing data field with a different field. Click on the existing field name to select it, and then click the dropdown list arrow to bring up the field list and select the replacement field.