Entering FRACAS data
Note: FRACAS processes vary widely from organization to organization and may even change over time as your process develops. The interfaces used in this guide are just one example. Our implementation team can help you in customizing the Relyence FRACAS interface to meet your needs. We can also aid in defining your process or establishing a new FRACAS. Feel free to contact us for details.
Note: You can change the default terms "Incidents" and "Problems" used in Relyence FRACAS. Therefore, you may see your or your organization's preferred terms instead of "Incidents" and "Problems" in the software. For ease of understanding, the default terms of Incidents and Problems will be used throughout this documentation. For details on customizing these terms see the Relyence FRACAS Settings topic.
To add Incidents to your FRACAS, go to the empty row of your Incident Table and enter the new information in the appropriates columns. Use the Tab key to move along the columns of data in the Incident Table.
![]()
When you enter a new Incident, the Identifier is automatically filled in for you. Relyence FRACAS automatically generates the Identifiers for your Incidents and Problems. You can customize the autonumbering if you would like by clicking Properties in the Sidebar.
Also note that on the Incident Table, Problem Table, and Time Log Table in Relyence FRACAS, keyboard support for Insert is supported using the <Insert> key and <Ctrl>+<Shift>+<NumPad +>.
You can complete Incident data entry by entering detailed information using the Incident form, if desired. Click the To Form button to go to the Incidents Form.
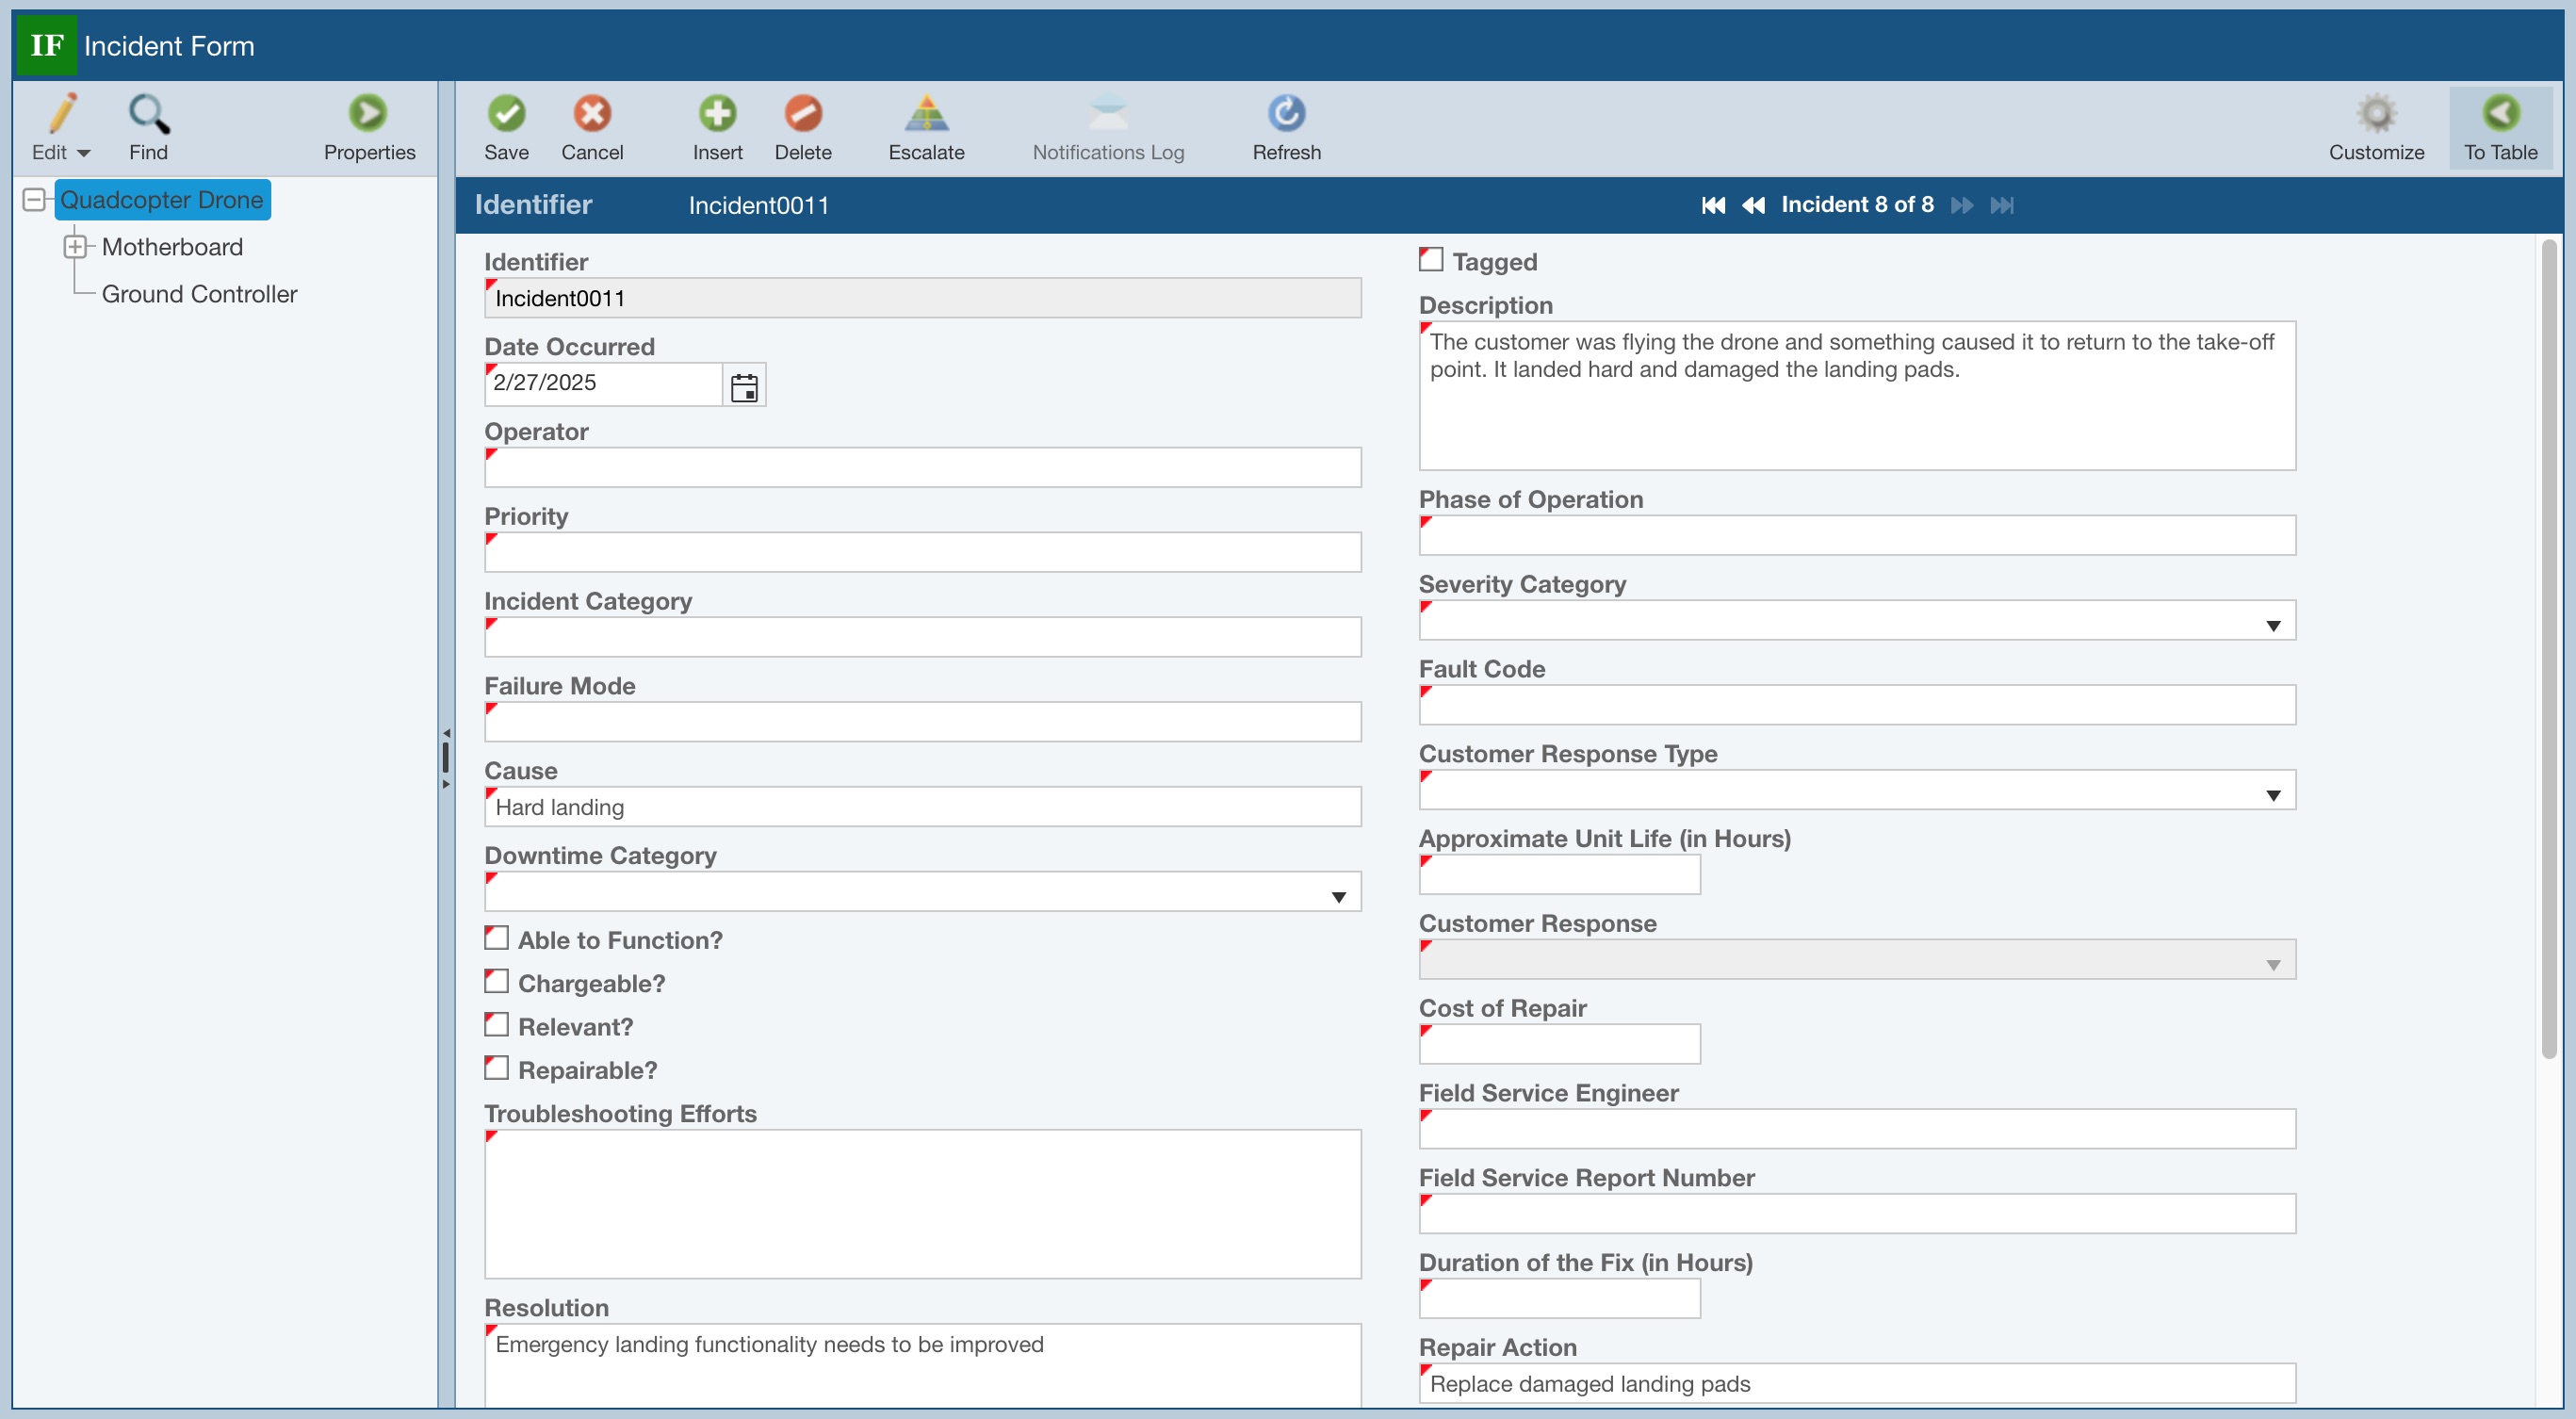
Notice that the Incident data you entered in the Incident Table is filled in. Also notice that the fields are marked with a red mark in the upper left corner, just as they were on the Incident Table. The red marks indicate that this data has not yet been saved.
Note that the fields on the Incident Table and Incidents Forms are completely customizable.
Once the corrective action has been completed, you would close out this Incident by marking is Closed. When you do this, Relyence FRACAS will automatically fill in the Closed Date for you.
Click on the To Table button to return to the Incident Table. Notice that the newly entered data is marked with red tags in the upper left corner of the cells. This indicates that data has been entered but is not yet saved. To save the data, click Save in the toolbar. The data is saved, and the red tags no longer appear.
You can also use FRACAS Problems as a way to group similar Incidents together for more efficient tracking and management. The use of Problems is optional. Click Problems in the Sidebar to display the list of Problems.
To associate an Incident to an existing Problem, click on the row for the Problem in the Problem Table, and then click on the To Form button to display the Problems Form. Click on the left tab labeled Problem Overview.
On the Associated Incidents field, which shows associated Incidents in the table, click the Edit button in the top left corner of the field.
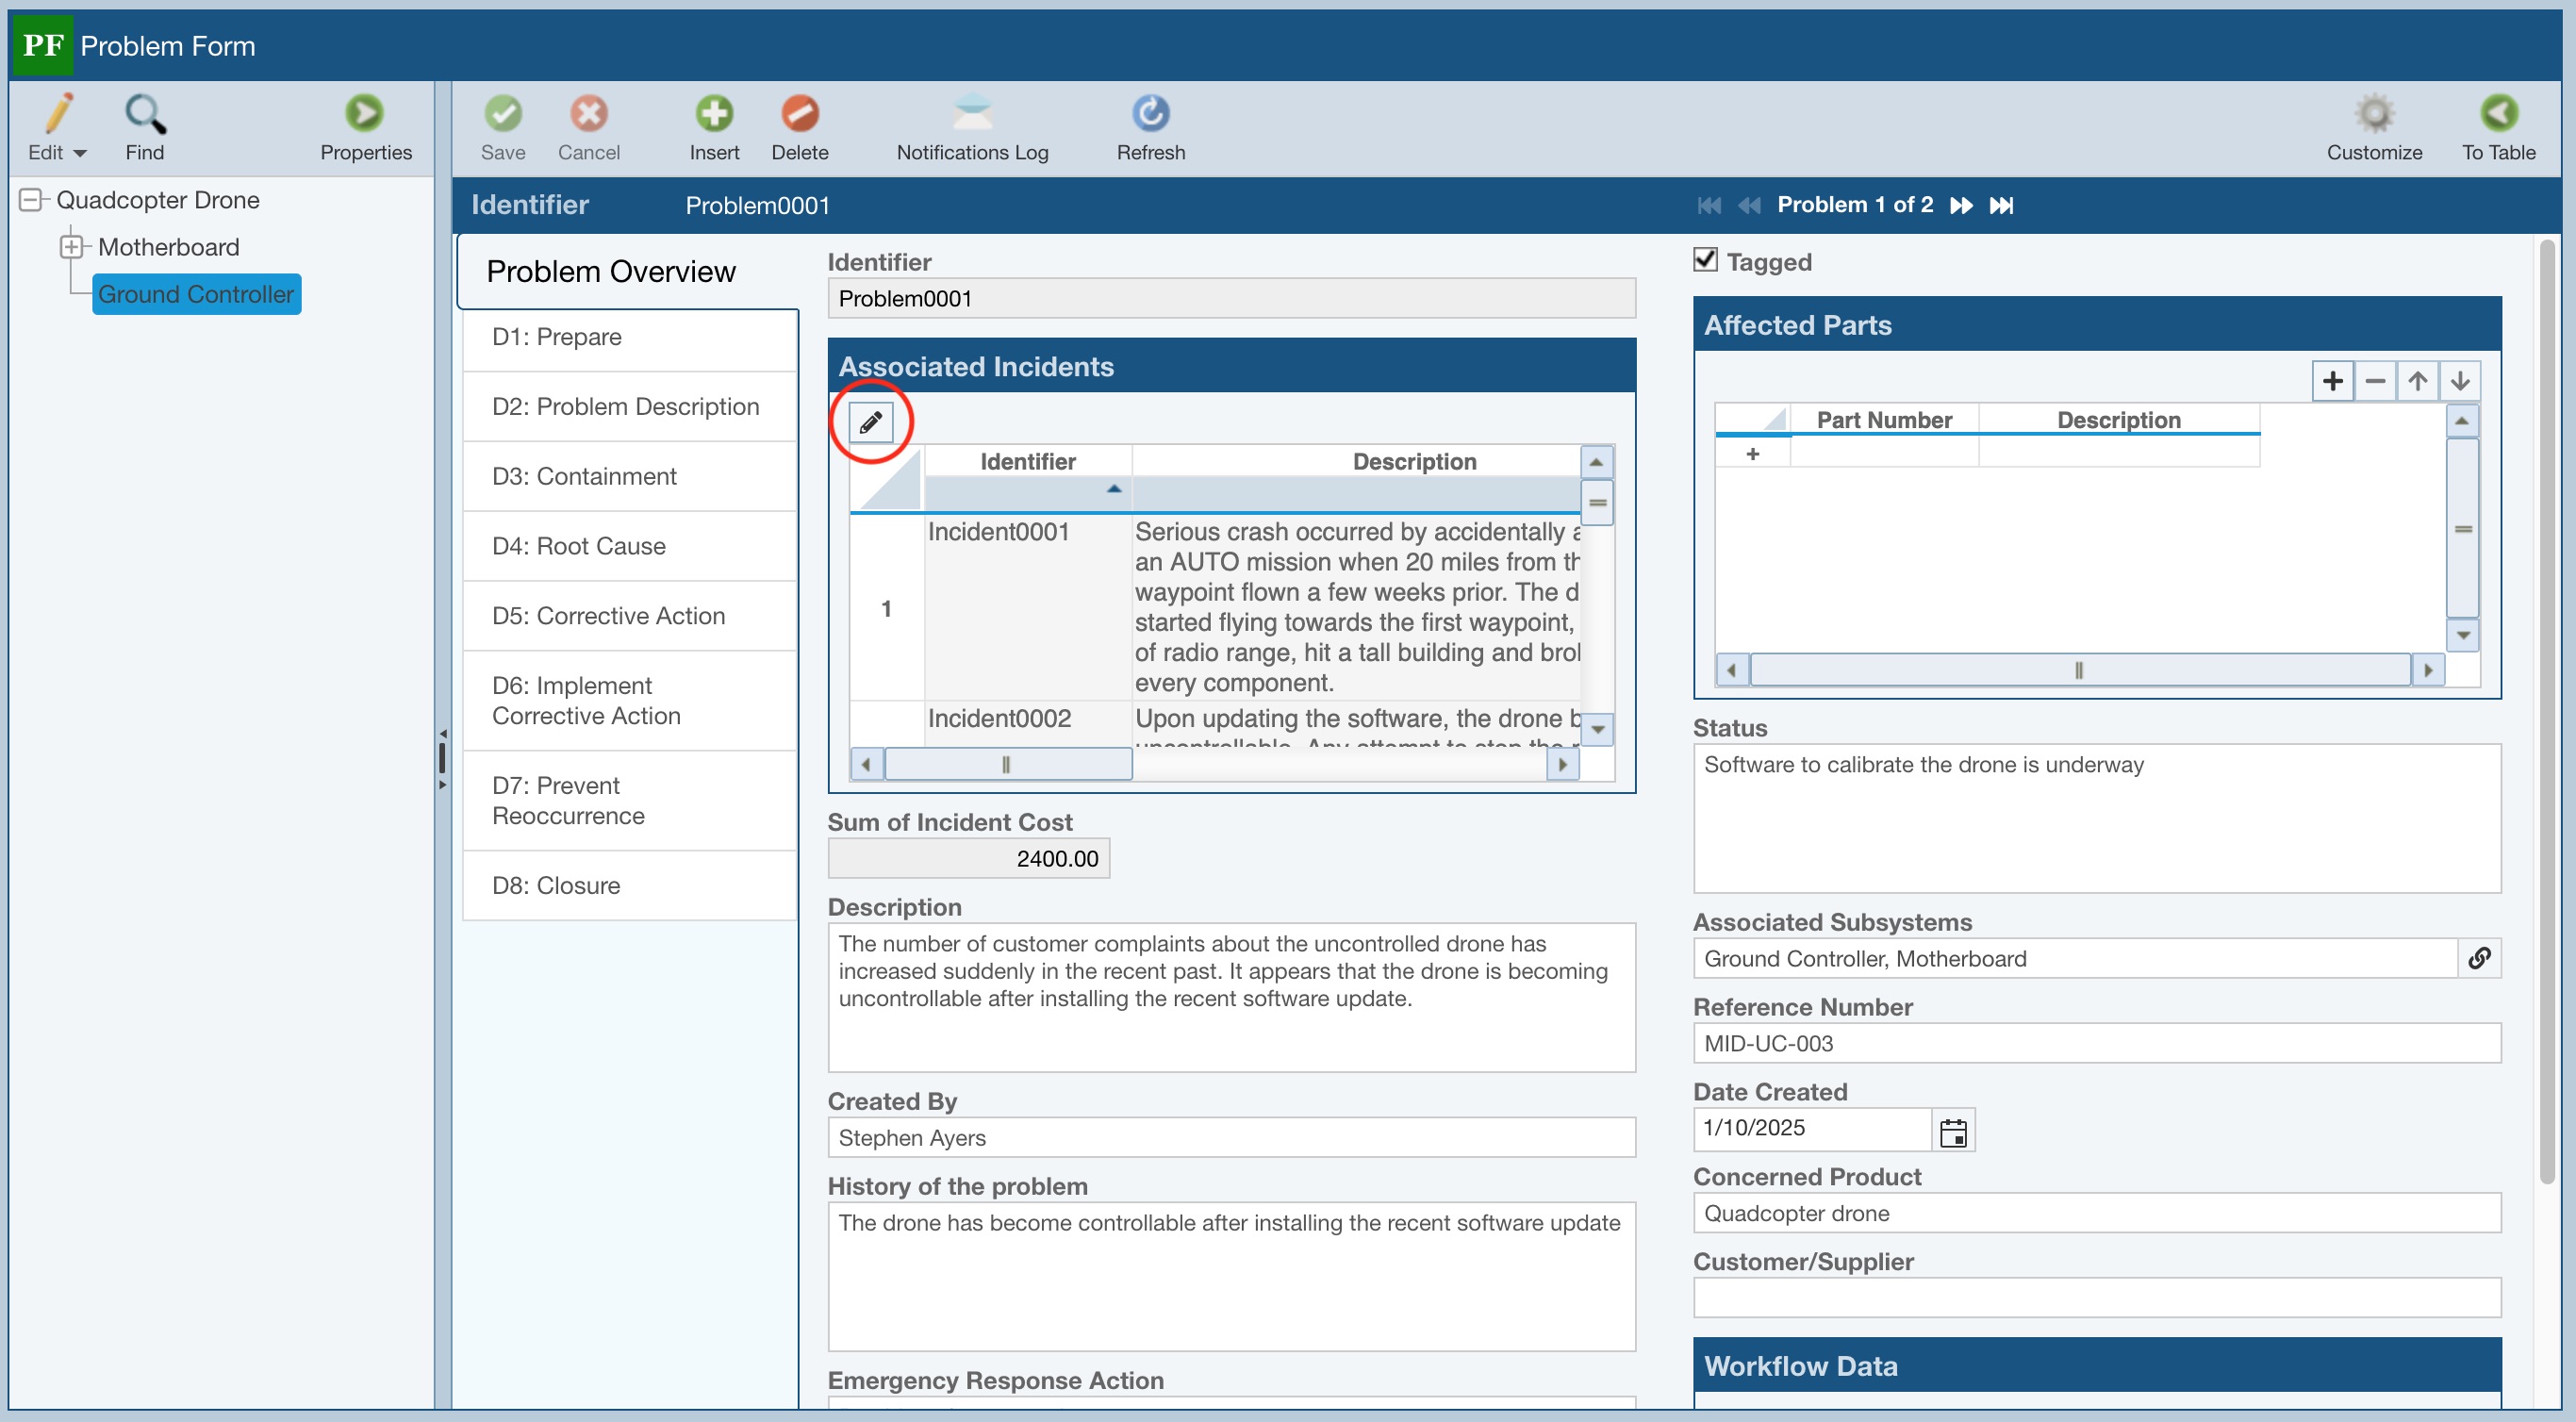
The list of all Incidents is displayed. The Incidents currently associated with this Problem are indicated by a check mark.
Use the Filter Bar (Filtering FRACAS Data) if needed to find the Incident(s) you want to associate with the Problem.
Select the checkbox to the left of any Incident you wish to associate.
Click Close Editor (the checkmark button) to add the new Incident to the list of Associated Incidents and exit the edit mode for the Associated Incidents table.
Click Save in the FRACAS toolbar to save your changes.