FMEA Action Workflow and Approvals
Relyence FMEA supports Workflow and Approvals as a mechanism for you to control your FMEA process for Recommended Actions. Relyence FMEA Action Workflow and Approvals are optional, and by default are not enabled. You can choose not to use FMEA Action Workflow and Approvals at all (the default), or use only FMEA Action Workflow, or use FMEA Action Workflow and Approvals together. You cannot utilize Approvals without Workflow.
First, you define your FMEA Action Workflow steps. For each step you can then choose whether to include an Approval process or not. When Approvals are enabled, the Workflow cannot be advanced to the next step in your process until approval is received. You define who is allowed to Approve, as well as Approval Due Dates.
Defining the FMEA Action Workflow
To define your FMEA Workflow, click Configure>Workflow>Steps from the Sidebar when FMEA is active.
The Workflow Steps dialog appears. Select the Actions tab. By default in a new Analysis, there are no Workflow steps. The image below shows a sample actions workflow, such as that in the sample Drone Example Analysis.
In this example, a 3-step Workflow is defined. The first step is when the Recommended Action is New and just entered into the FMEA Worksheet. Once the team member starts implementing the Recommended Action, they update the Workflow Step to In Progress. Once the Action has been implemented, the team member will it to the final Complete step of the Workflow.
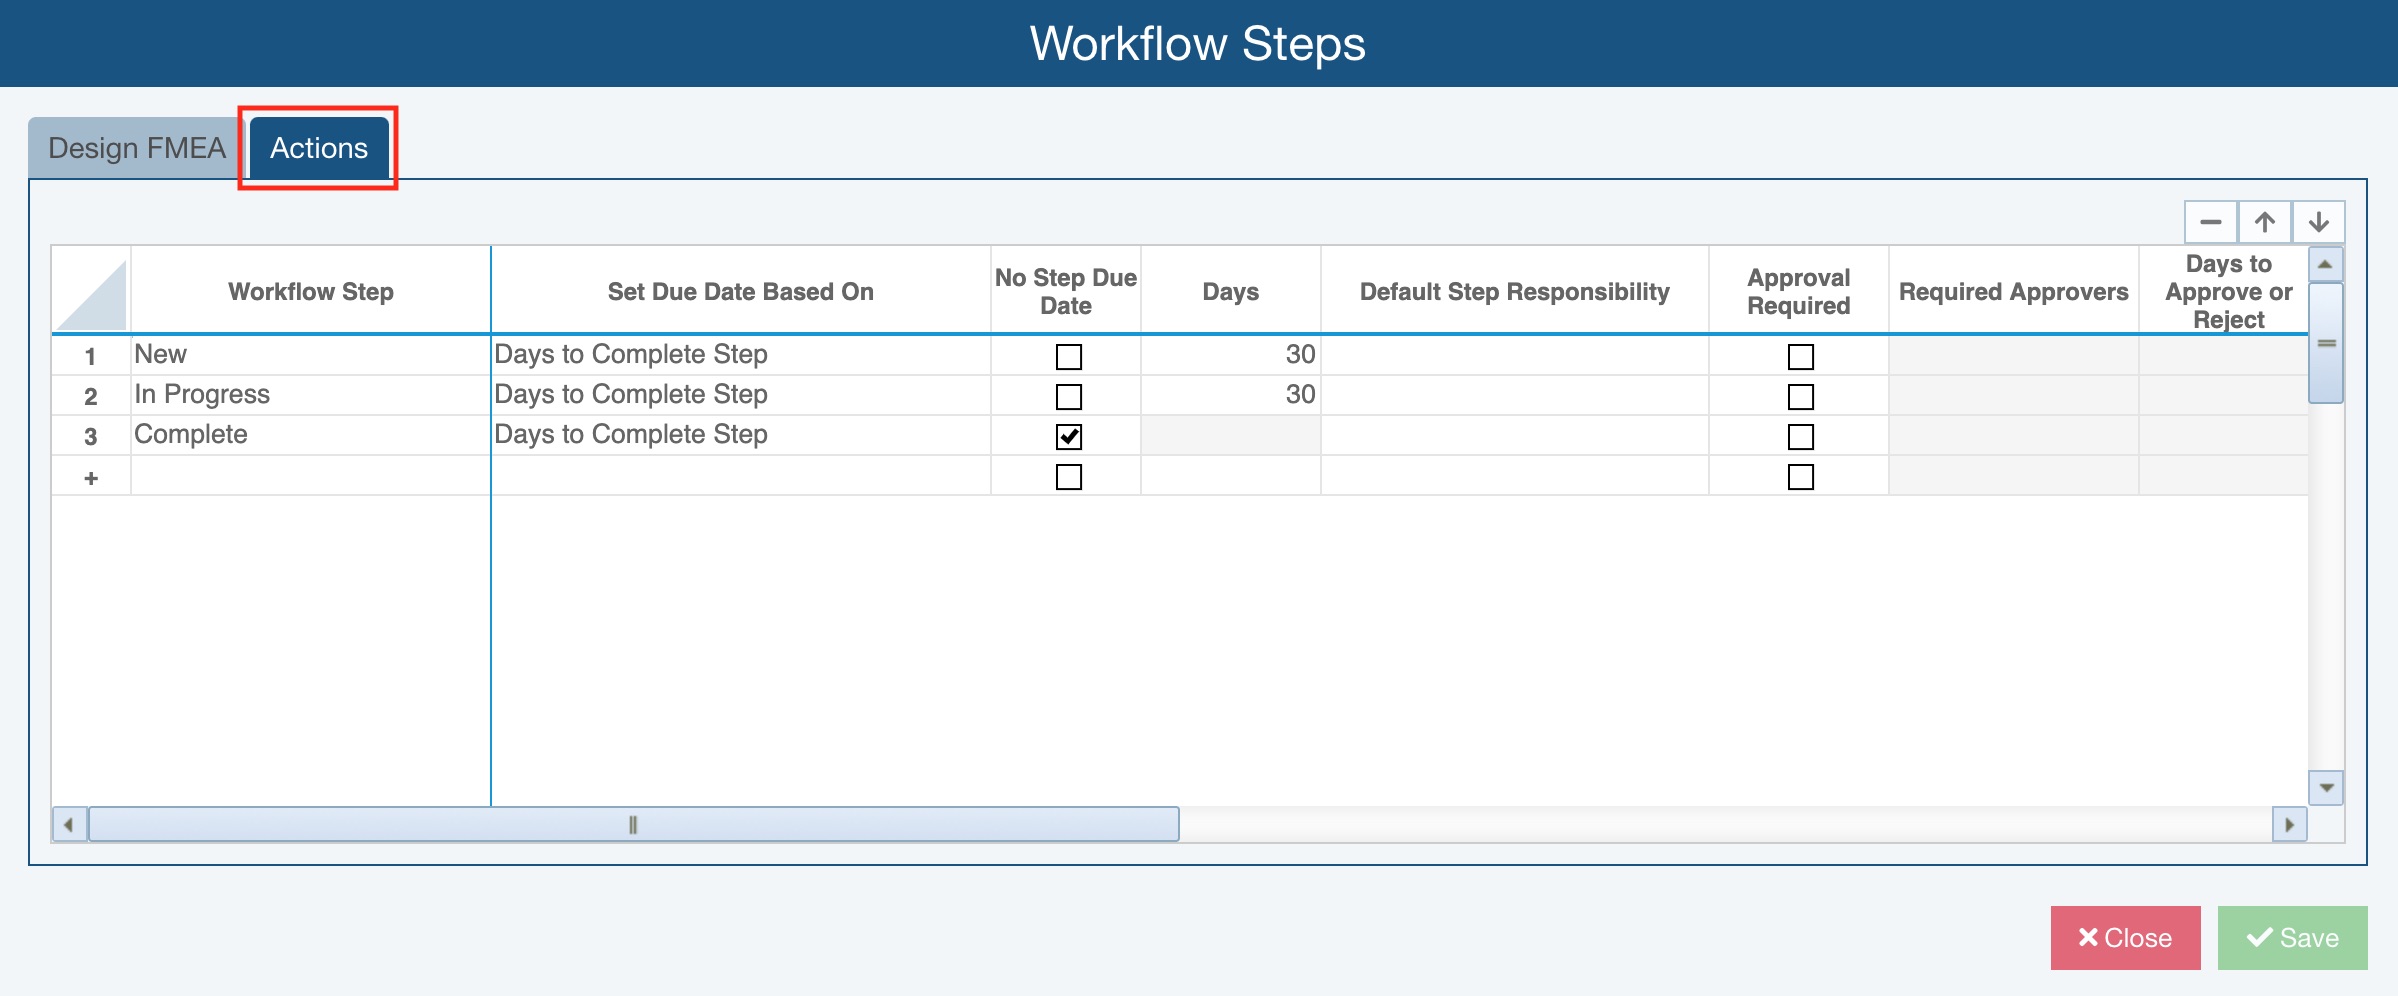
FMEA Action Workflow is set up based on the Recommended Actions portion of your FMEA.
Workflow Step: This is the name of the Workflow Step. For example, you may have the initial step for when a Recommended Action is first entered, named "Action Entered", and the Workflow Step for when an Action is completed, named "Complete".
Set Due Date Based On: Select if you want to set the due date to be referenced from either the "Days to Complete Step" or the "Days Before Target Completion Date." The default is set to "Days to Complete Step."
No Step Due Date: Select No Step Due Date if you don't want to have a Due Date associated with this Workflow Step. Selecting this checkbox will disable the Step Due Date field for this workflow step.
Days: This number is used to set the Step Due Date. If Set Due Date Based On is set to "Days to Complete Step", enter the number of days from the start of this Workflow Step for this step to be completed. If Set Due Date Based On is set to "Days Before Target Completion Date", set the number of days prior to the completion date you want this Workflow step to be completed. For example, if you want a Workflow step to be done within 30 days, set Set Due Date Based On to "Days to Complete Step" and enter "30" for Days. If you want the Workflow step to be completed two weeks before the target completion date, set Set Due Date Based On to "Days Before Target Completion Date" and enter "14" for Days. The default number of days is set to 30. If desired, you can set up Notifications to be sent to the responsible team member based on the specified number of days. For example, if you set up a Notification to occur once the Step Due Date has passed, the team member responsible will get notification emails when their task is overdue.
Default Step Responsibility: The name(s) of team members who are responsible for completing the tasks in this Workflow Step. This is optional. You can enter the responsible team members directly on the FMEA forms if you prefer.
Approval Required: Select Approval Required to enable approvals for this Workflow step. If Approval is required, the Workflow step cannot be advanced until approval is made.
Required Approvers: You can indicate if approval is required by just a single approver by selecting One Approver or if approval by all approvers is required by selecting All Approvers. When All Approvers is selected, the Workflow will not advance to the next Workflow Step until all Approvers have approved.
Days to Approve or Reject: This number is used to set the Approval Due Date. The default number of days is set to 30. If desired, you can set up Notifications to be sent to the Approver based on the Approval Due Date. For example, if you set up a Notification to occur once the Approval Due Date has passed, the permitted Approvers will get notification emails when the approval is overdue.
Default Permitted Approvers: The name(s) of team members who are allowed to Approve the work for this Workflow Step. This is optional. You can enter the responsible team members directly on the FMEA forms if you prefer.
When you have completed defining your FMEA Workflow, click Save. You can make modifications to your Workflow at any time. When complete, click Close.
To be most effective, especially if using Approvals, FMEA Action Workflow should be used in conjunction with FMEA Action Notifications. FMEA Action Notifications provides a way to team members to receive notifications when they are assigned tasks, their approval is required, due dates are overdue, etc. For more details, see the FMEA Action Notifications topic.
Adding the Workflow Data Control to your FMEA
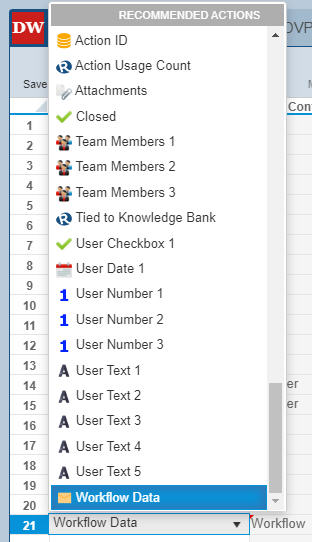
The FMEA Workflow controls for recommended actions are not on the supplied FMEA Worksheets and Forms by default. In the Drone Example Analysis, you do have the option to switch to the Recommended Actions or Action Workflow Views, which do include the Workflow Data field. If you add a FMEA Action Workflow, you will need to add the Workflow control to your FMEA View. Use the Customizing the FMEA Worksheets function to do this. The Workflow Data control will appear in the data field list under the Recommended Actions section.
Once added, the Workflow Data control will appear on your FMEA Worksheet and Form. In either case, the Workflow dialog is the same.
When you are on the FMEA Worksheet, you can click the Workflow Control button to bring up the Workflow dialog to view and update the Workflow data.

The Workflow dialog appears with options to either advance or regress the workflow or request approval as needed. The example Workflow dialog shown here shows a case where approval is not required.
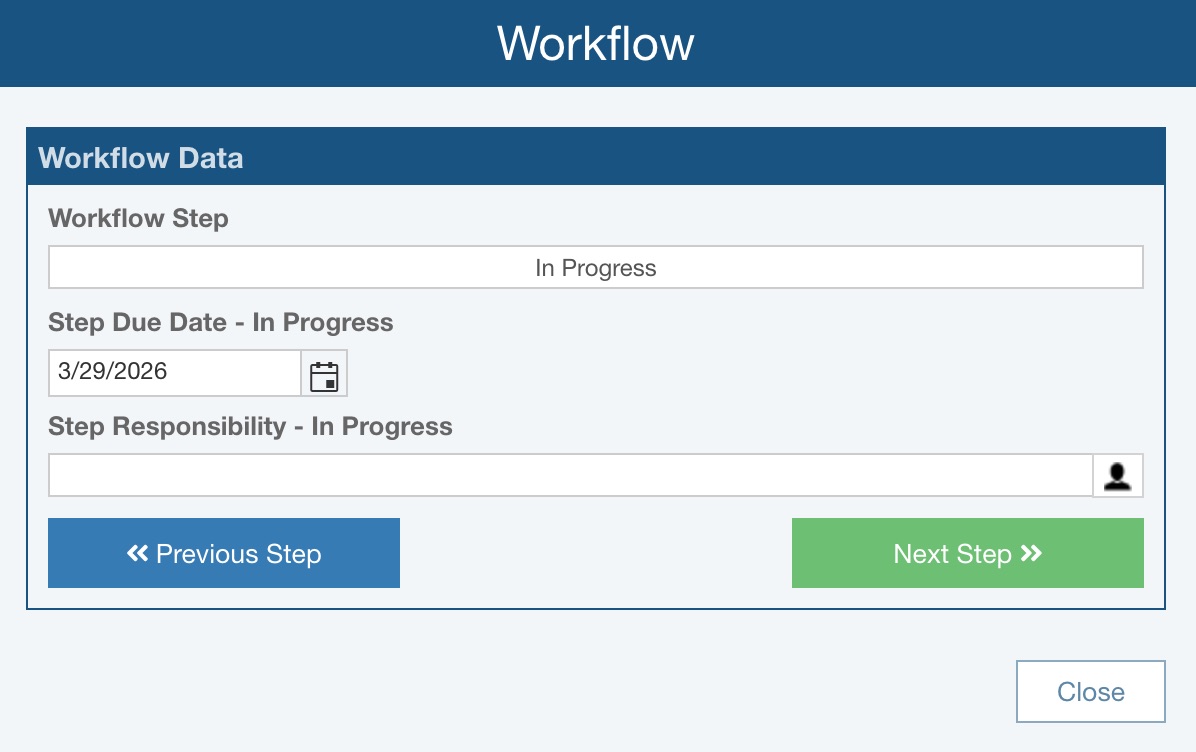
Update the data as needed, click << Previous Step or Next Step >> and click Close to close the Workflow dialog. Click Save in the FMEA toolbar to save your updated information.
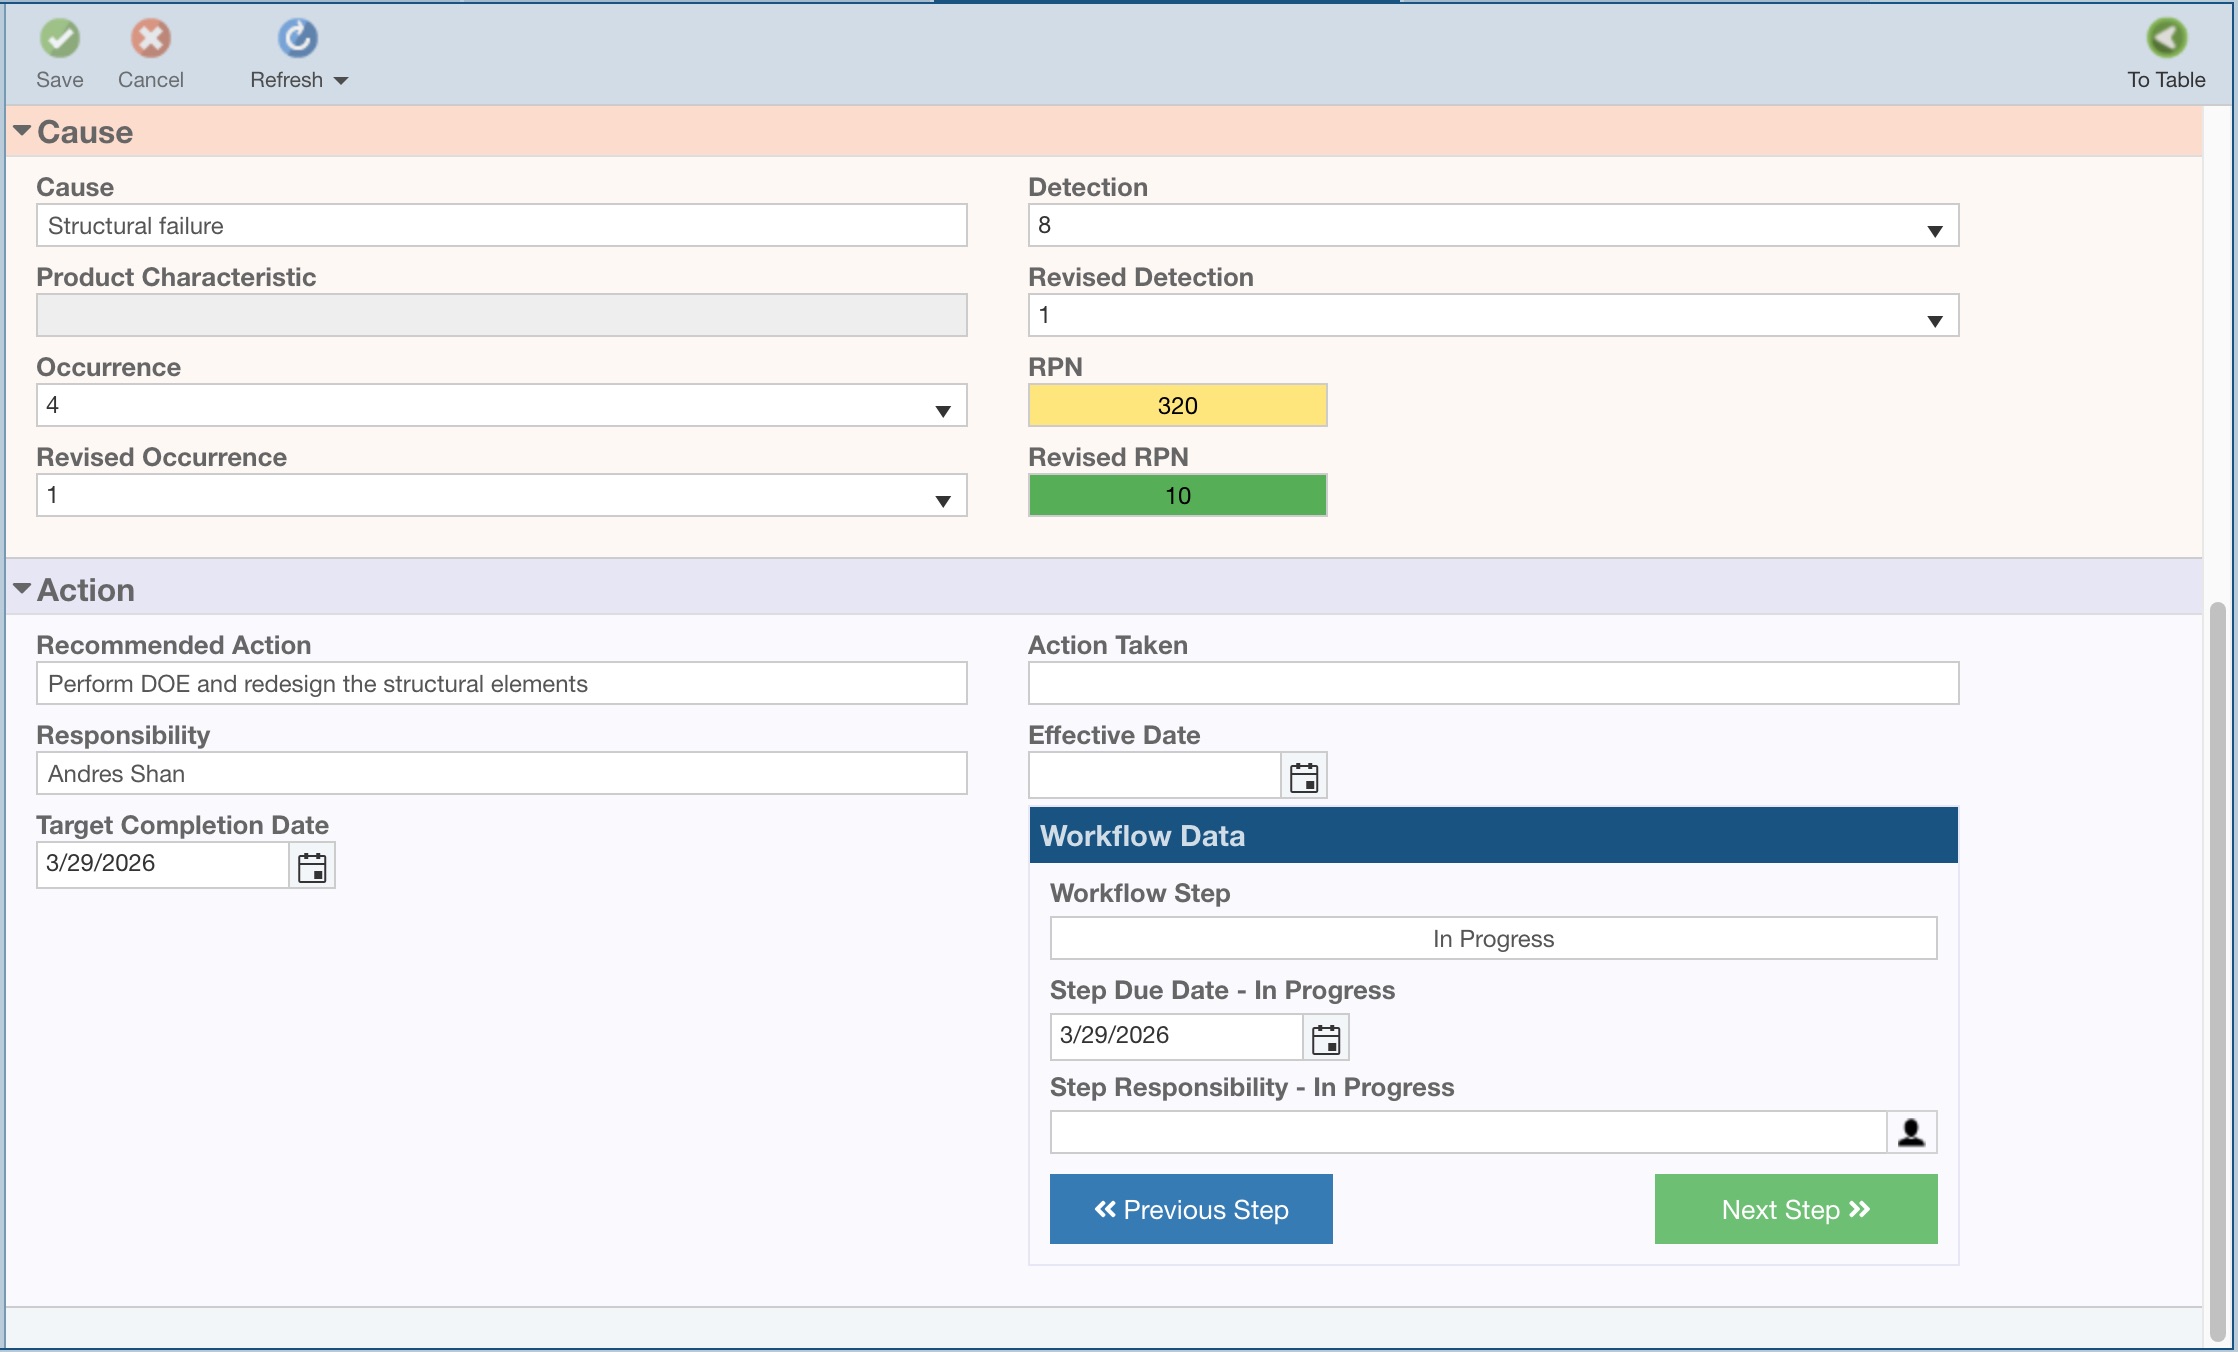
When on a FMEA form, the Workflow control will appear in the Action section.
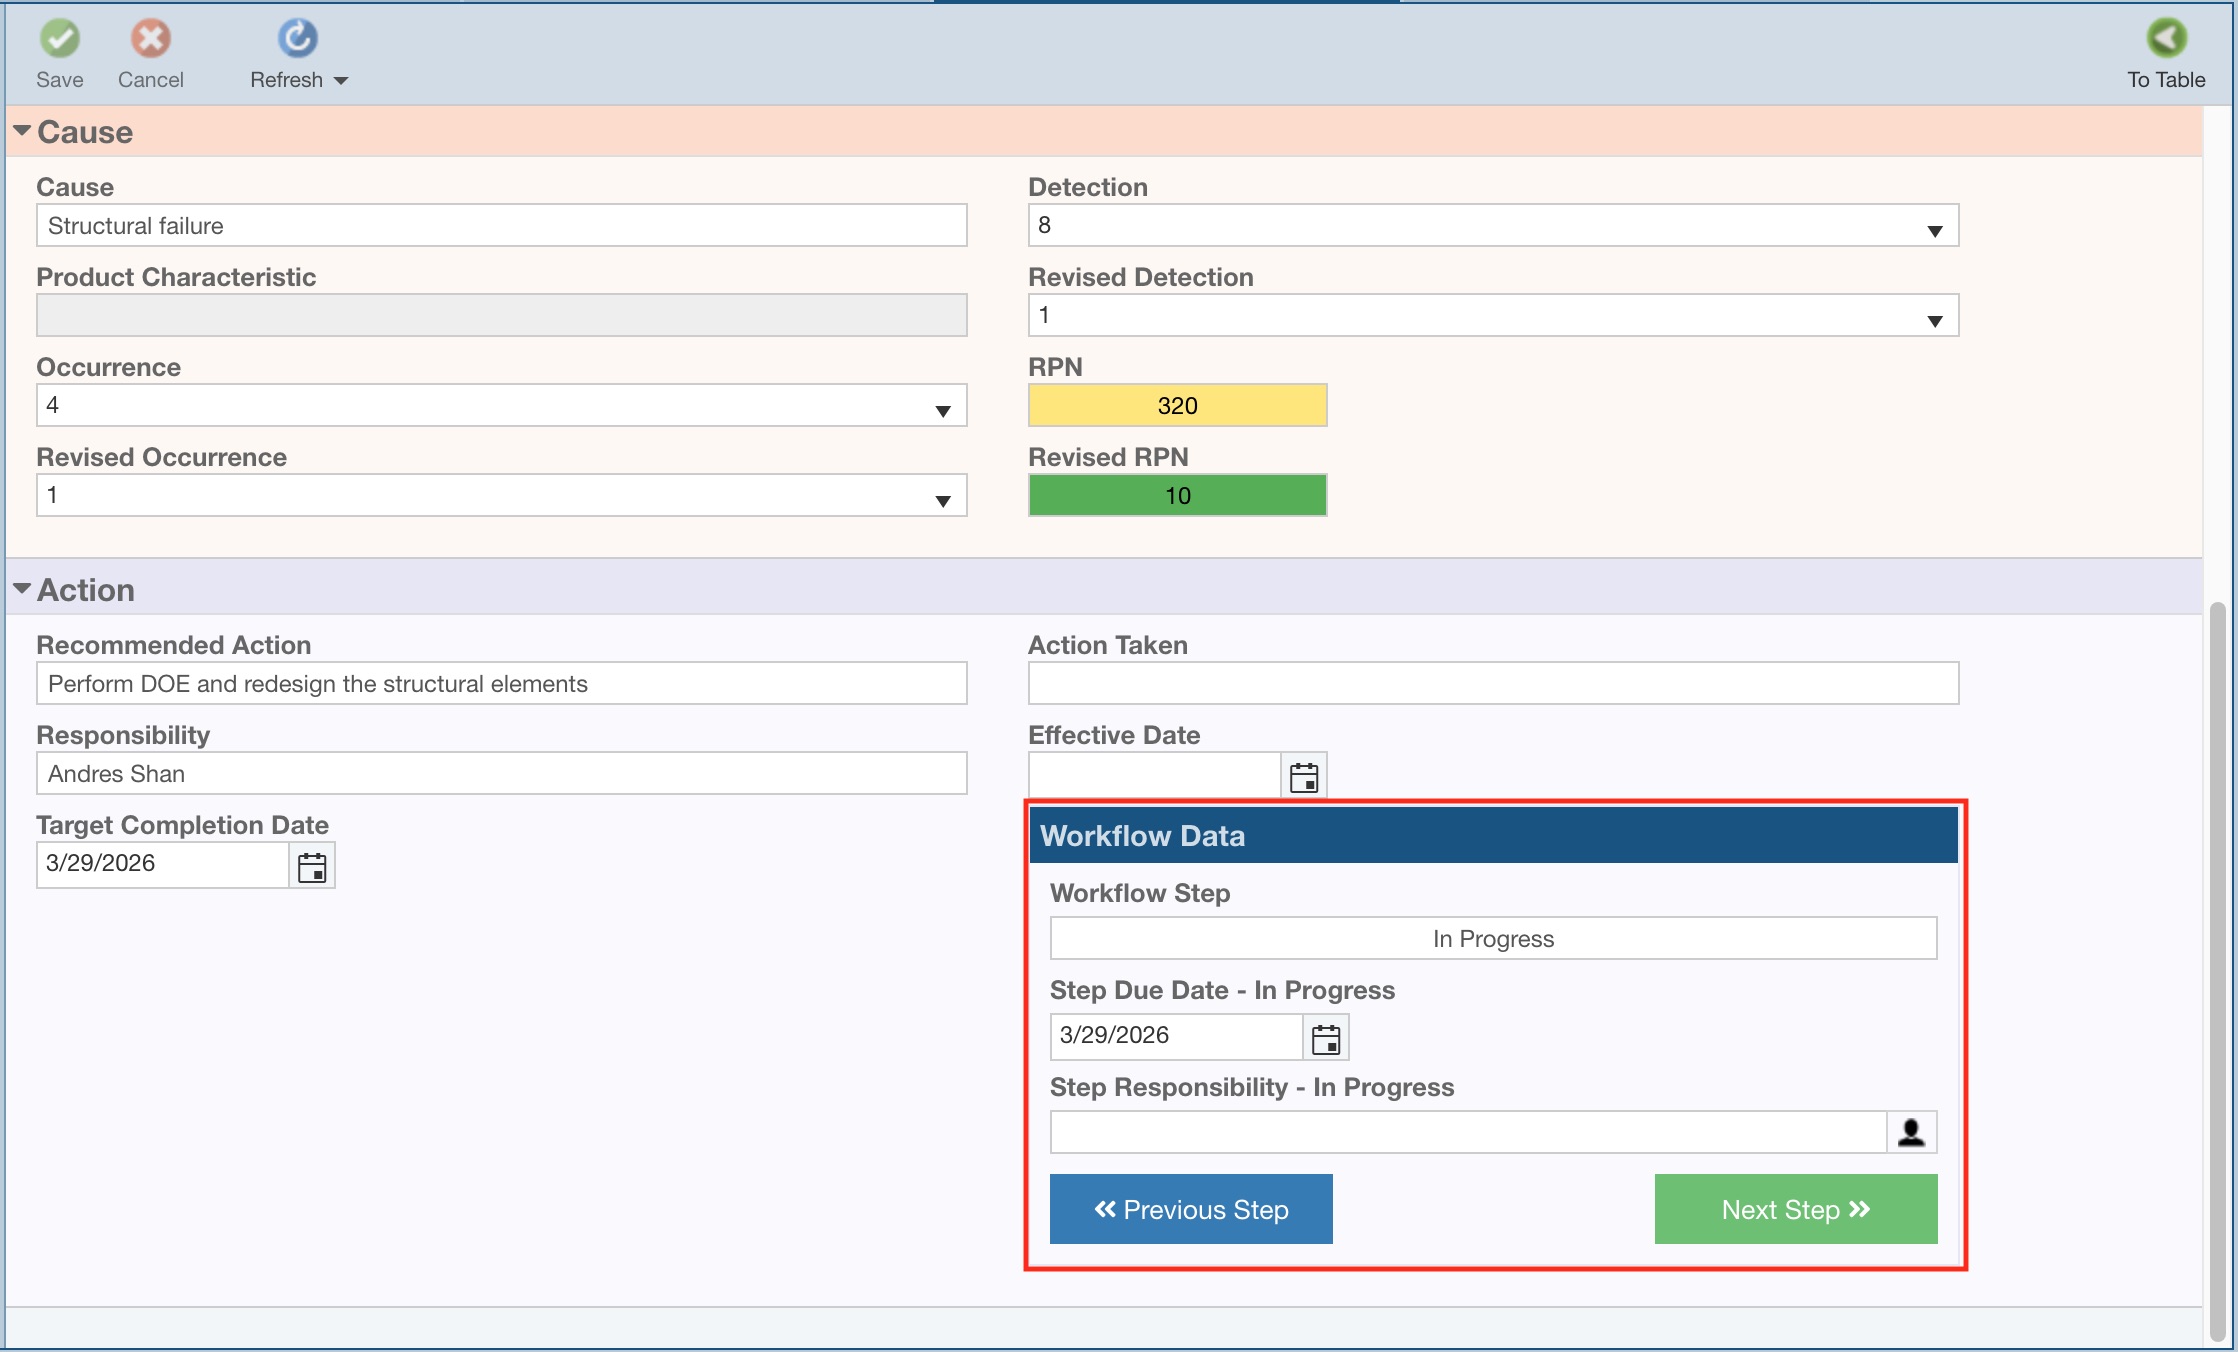
Once you make the necessary changes to the Workflow Data, click Save in the toolbar to save your modifications.
Using the FMEA Action Workflow
Once your FMEA Action Workflow is defined and added to your Views, you can use the Workflow as part of your FMEA process for Recommended Actions.
You use the << Previous Step , Next Step >> or Request Approval buttons to move your Action through the steps of your Workflow. The sample data shown below includes a Workflow Step which does not require approval, thus only the << Previous Step and Next Step >> buttons are shown.
If a particular step of your Workflow requires Approval, the Workflow cannot be advanced to the next step in the Workflow process until Approval is made. In this case, the Next Step >> button in the Workflow Data is replaced by the Request Approval button.
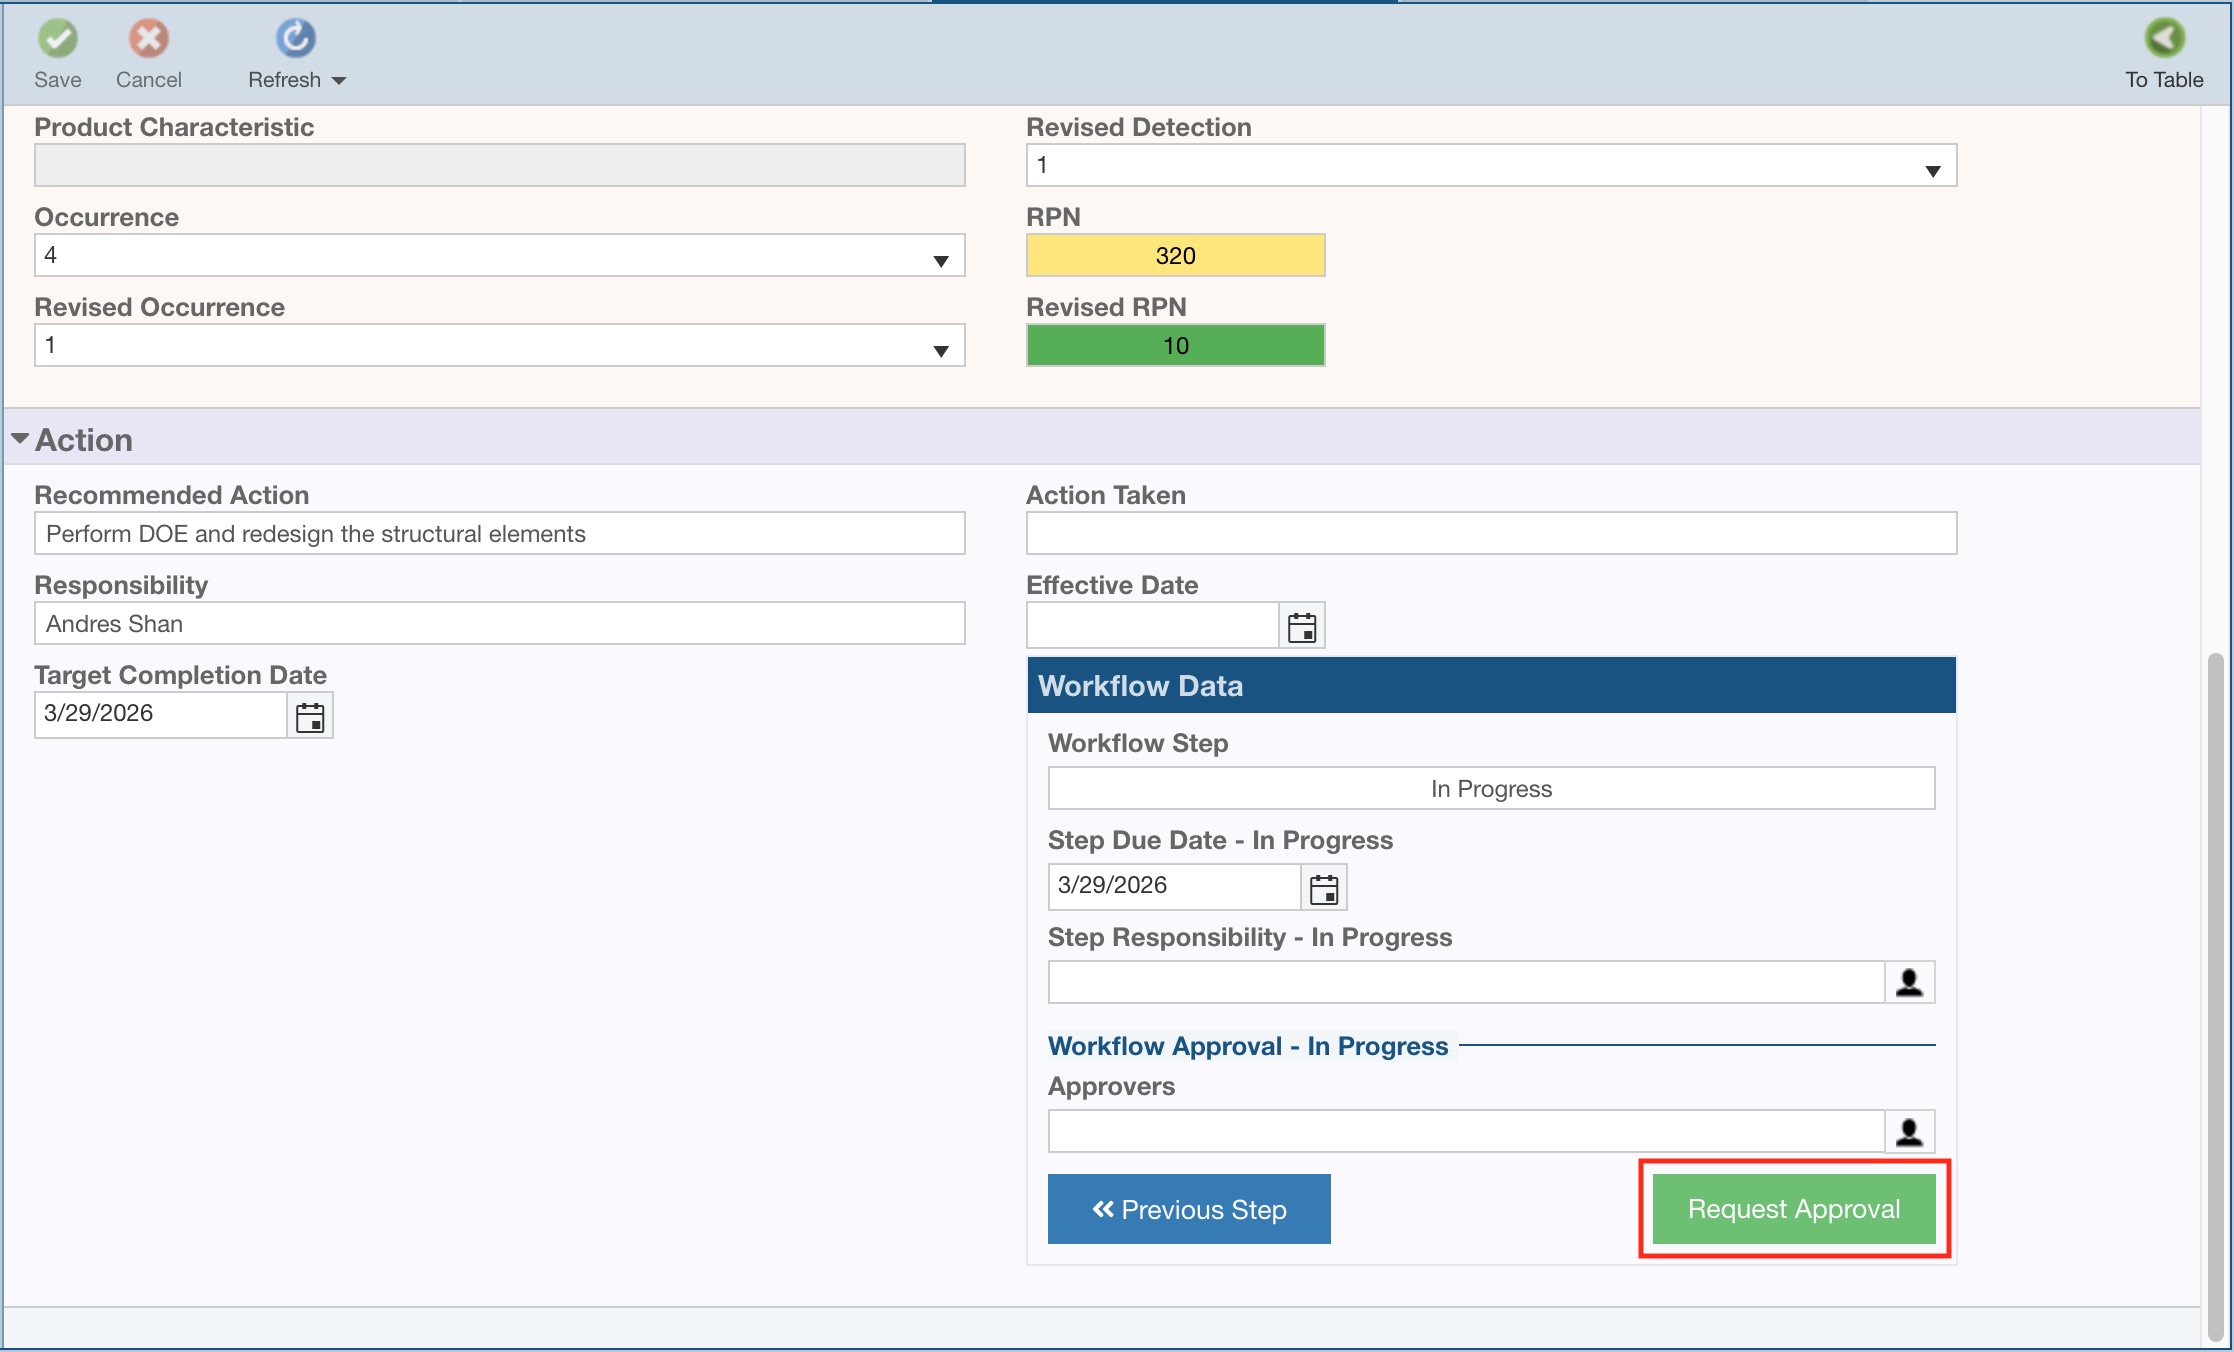
Click the Request Approval button to initiate the approval process.
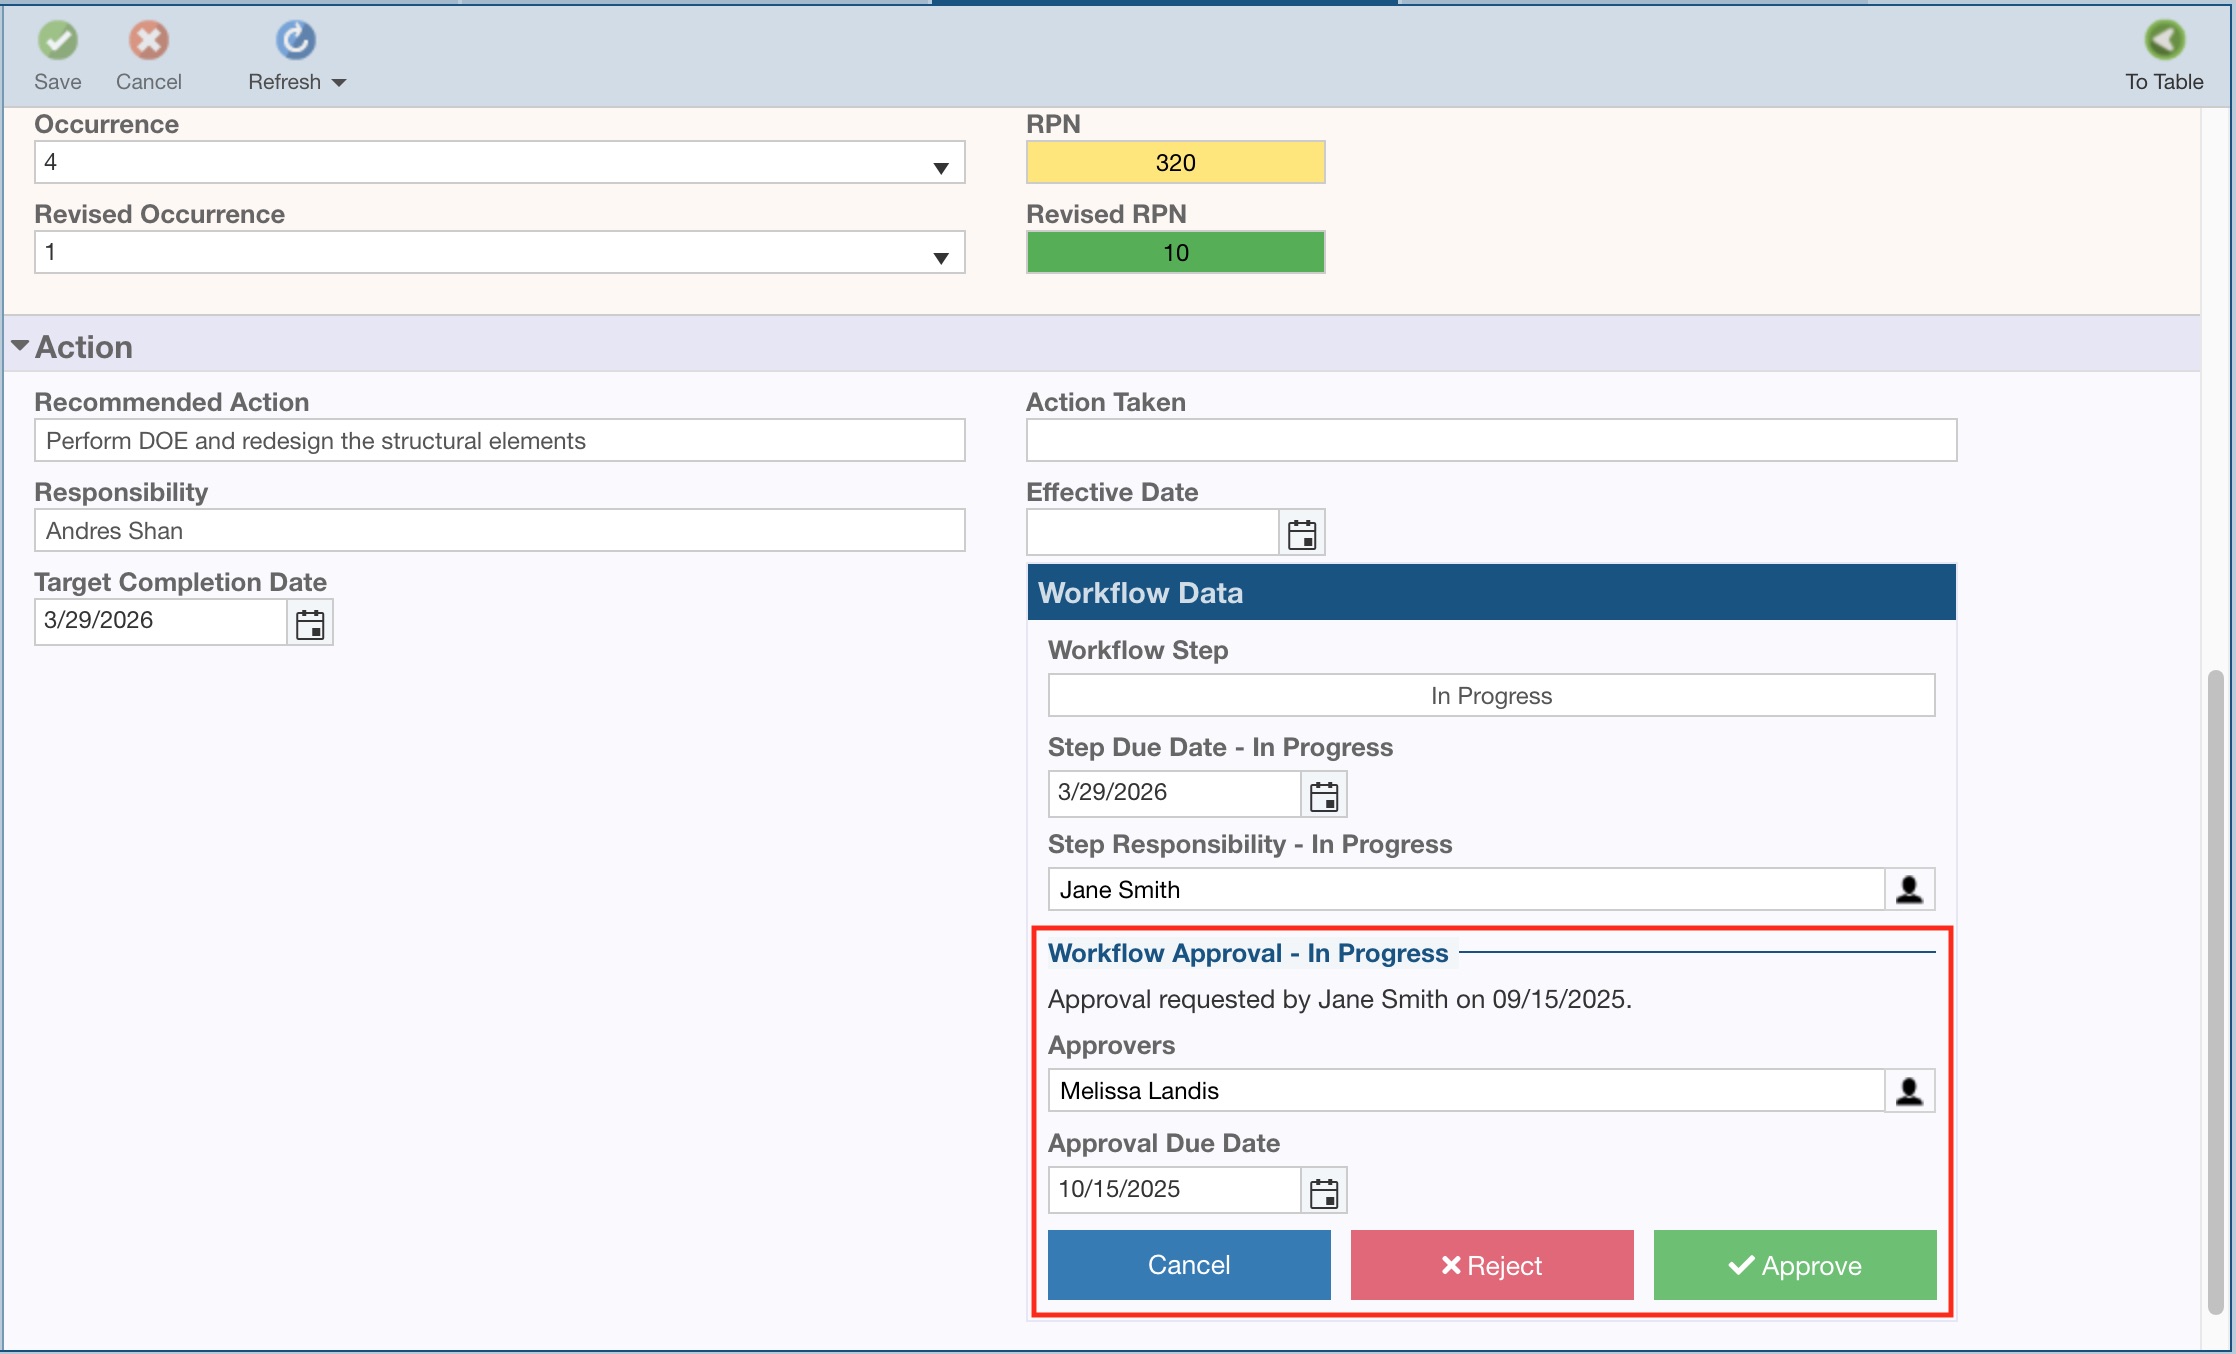
The approval request is noted in the Workflow Step box along with the Team Member requesting approval and the date approval was requested. The names of the Default Approvers you specified in Approval setup are filled in automatically in the Approvers field. To modify or add to this list, click the Team button to the right of the Approvers field to bring up the Team Members dialog and select from the list. The Approval Due Date is filled in based on the default setting specified in Approval setup. You can modify the Approval Due Date if you desire.
Click Save in the toolbar to save your changes.
The next step of the process requires an Approver to sign in to Relyence and review the request for approval.
When a team member on the Approvers list opens the FMEA, they have three options: Approve, Reject, or Cancel.
FMEA Action Workflow Approval
If the request can be approved, click the Approve button.
Note that if the Required Approvers option for the Workflow Step is set to All Approvers, the Workflow will not advance to the next step until all required Approvers have marked the Workflow as approved. The Workflow Data details will show who requested approval and when, as well as which Approvers have already approved, for reference.
The Workflow Step is automatically advanced to the next step in the FMEA Action Workflow.
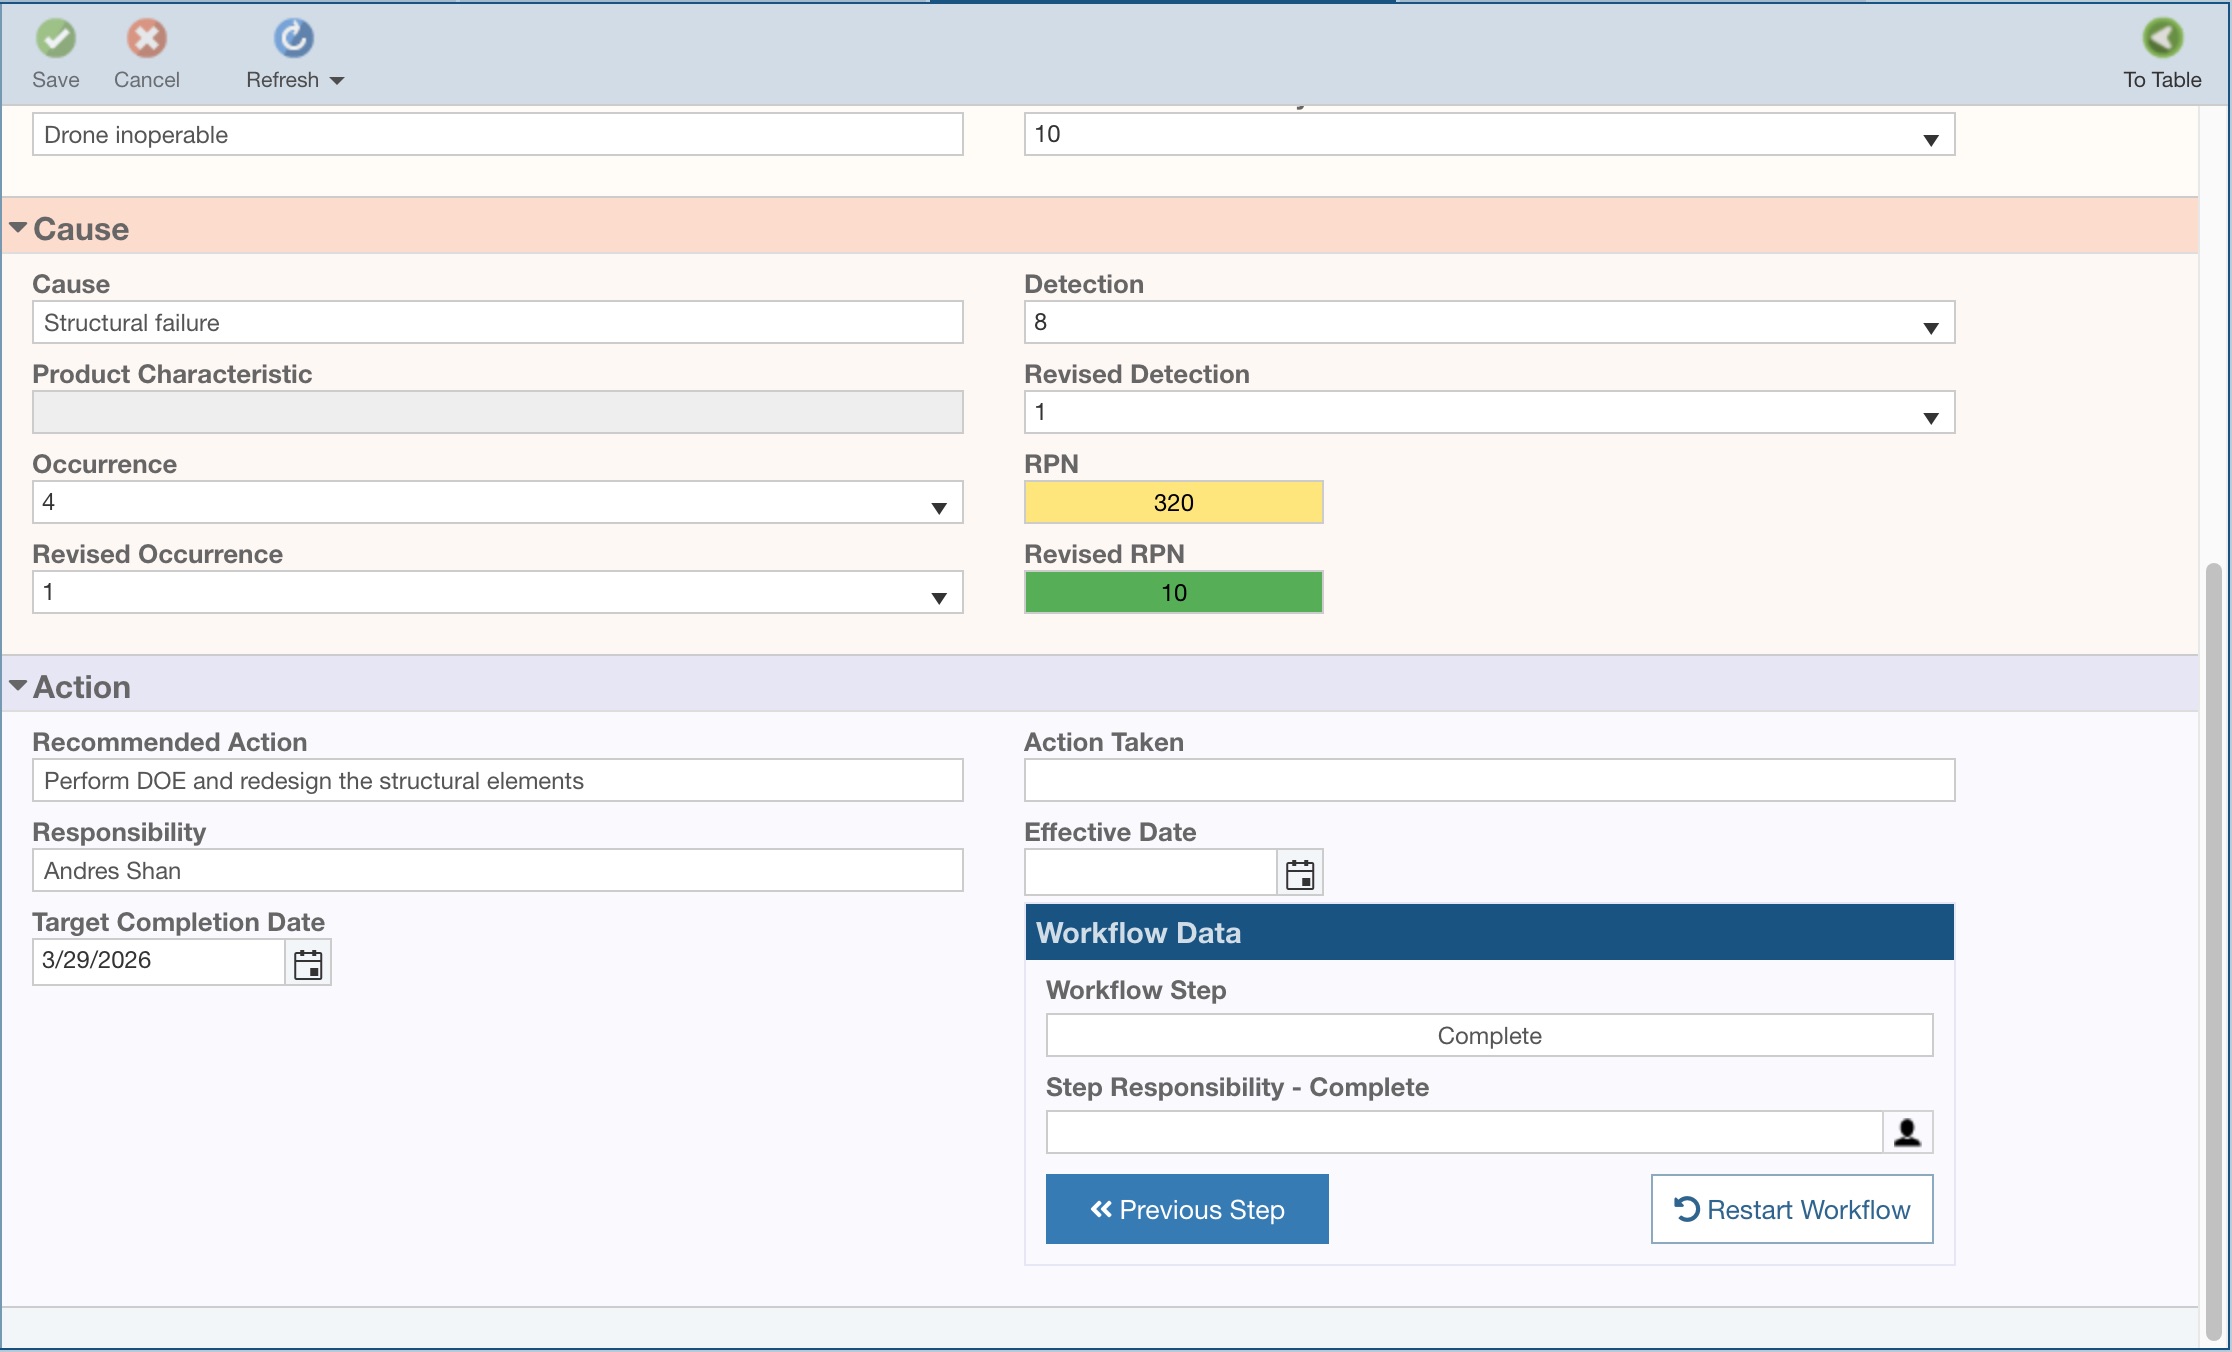
Note that when the Workflow has reached the final step, if at any time you need to restart the Workflow and return to the first step to proceed through the Workflow again, click Restart Workflow.
Click the Close button to close the Workflow dialog.
The new Workflow status appears in the FMEA Worksheet and FMEA Form.
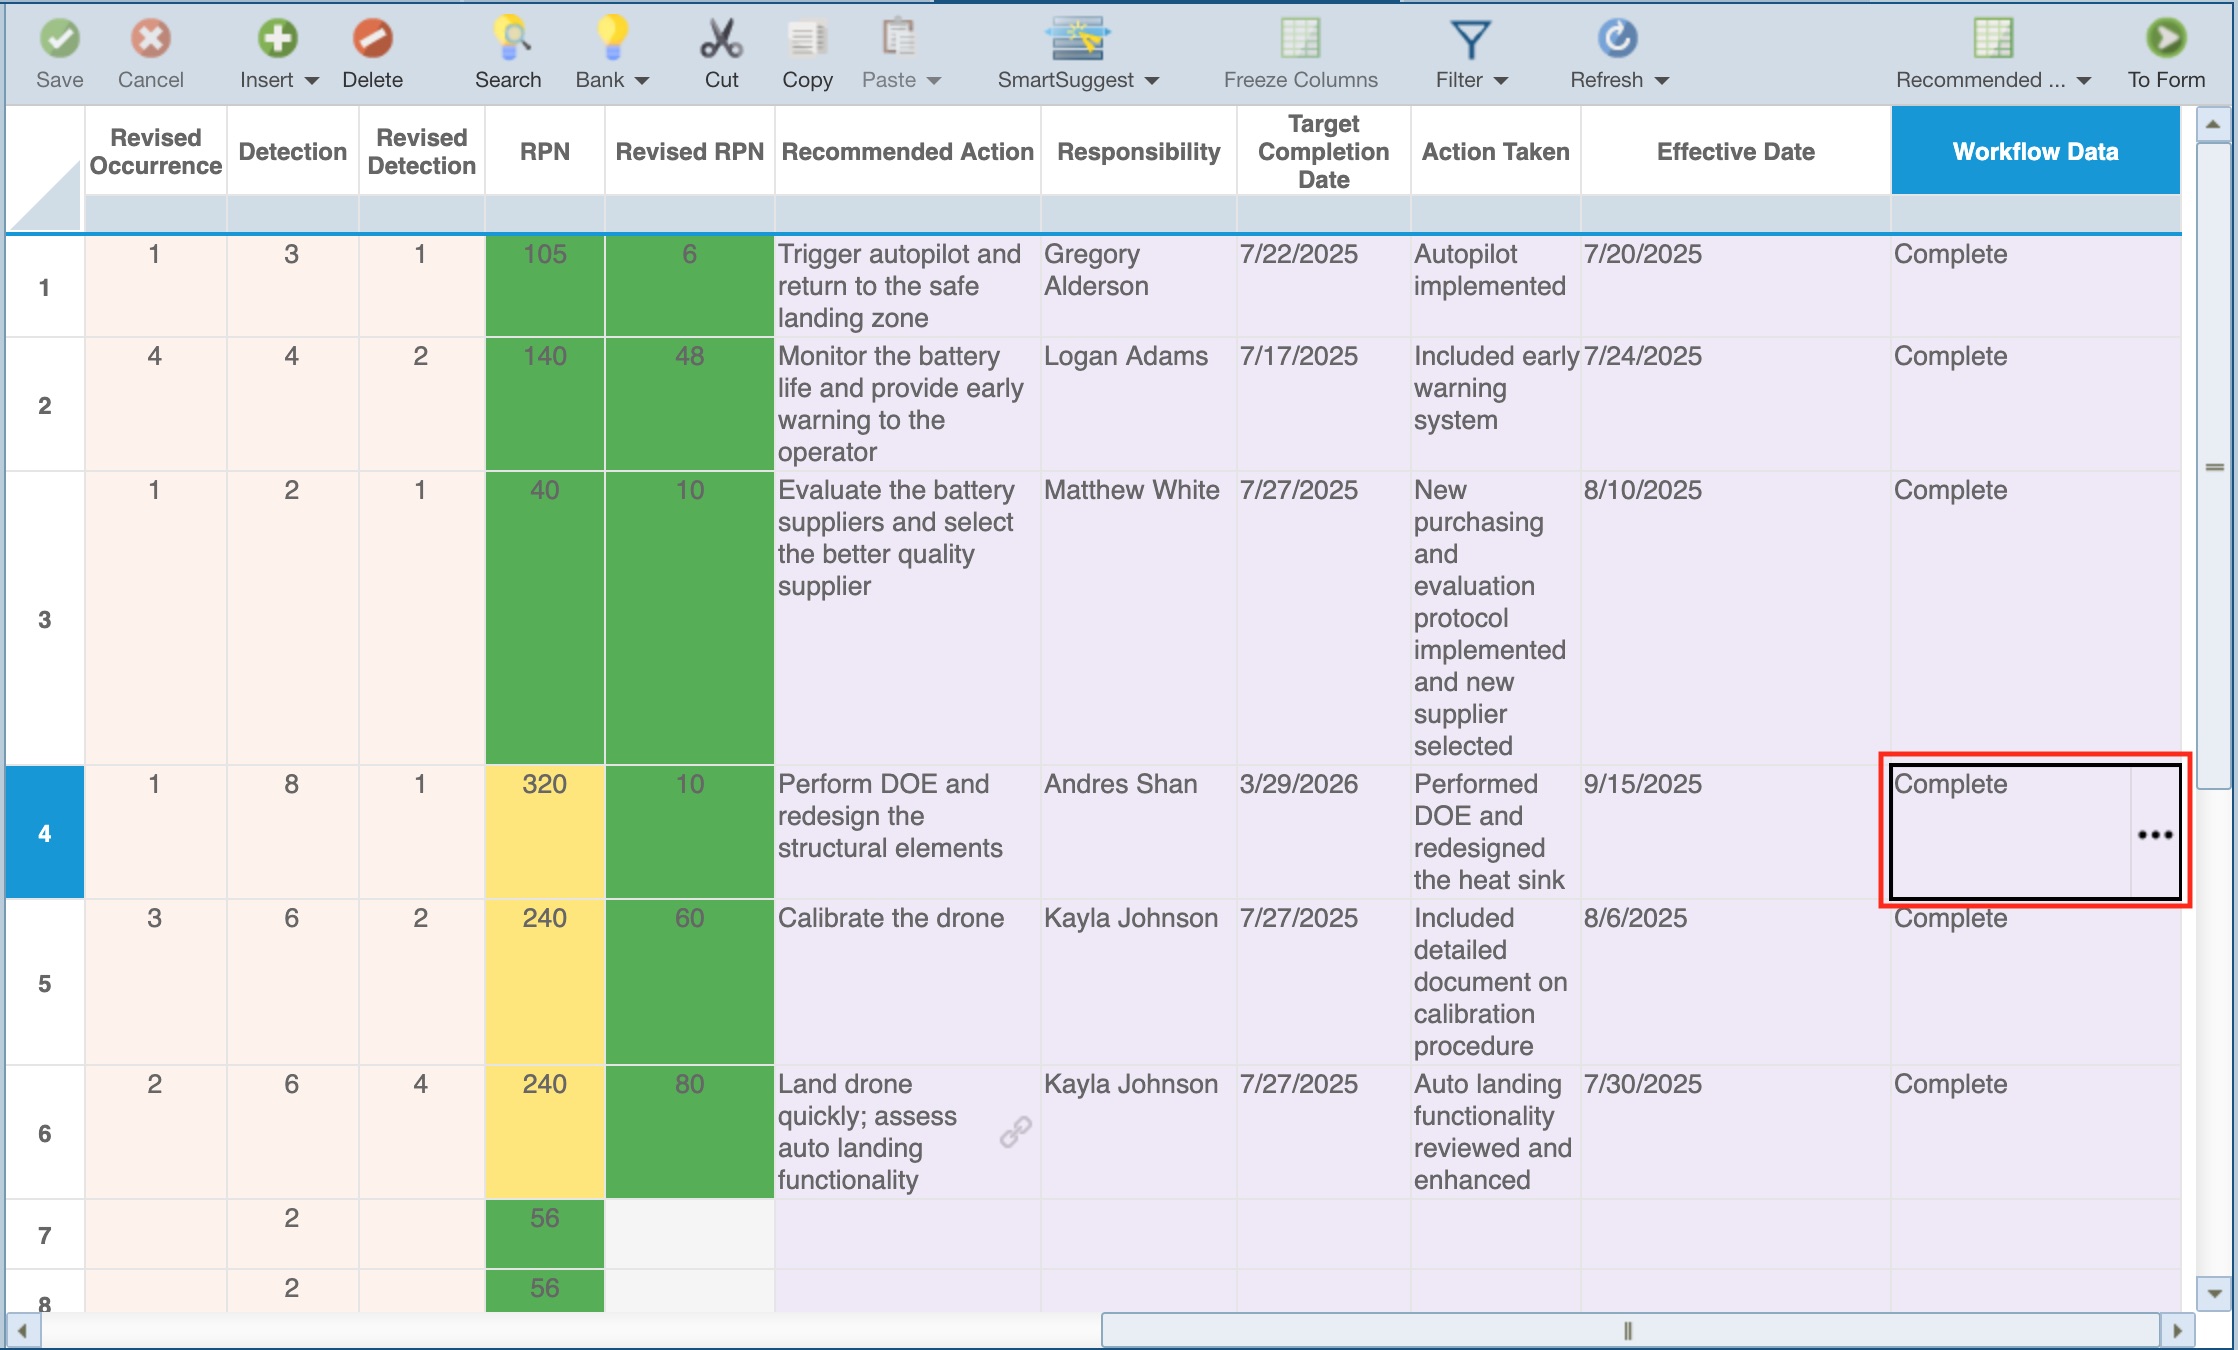
Click Save in the toolbar to save the Workflow update.
FMEA Workflow Rejection
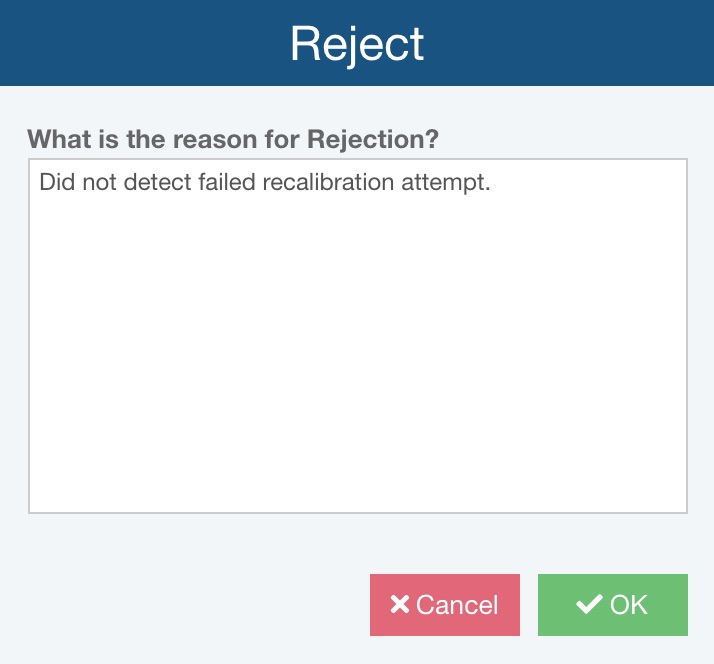
If the approval request must be rejected, click the Reject button. The Reject dialog appears to allow you to enter an explanation for rejection.
The Workflow Step is not advanced and the Approval process must be reinitiated.
Click Save in the toolbar to save the Workflow update.
FMEA Action Workflow Approval Cancel
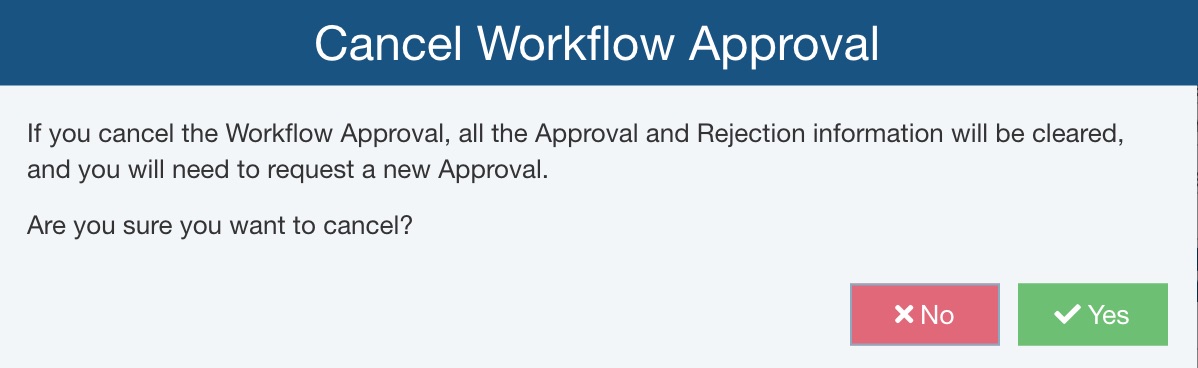
The Cancel button on the Approval request allows the Approver to reinitiate the Approval process.
If canceled, the Cancel Workflow Approval dialog appears asking if you are sure you want to cancel. Click Yes to cancel the approval and automatically reinitiate the Approval process.
Click Save in the toolbar to save the Workflow update.
Closed Workflow Status
The Closed data field is not required to be used on your FMEA Worksheets. Closed is a special field intended to indicate if a Recommended Action has been completed, and the item is closed for further review or analysis. The Closed status is useful as an overall indication of the status of Recommended Actions, can be easily seen in Worksheets and Reports, and is used in some Relyence FMEA Dashboard widgets.
The Closed checkbox can be set in one of two ways:
1. You can select the Closed checkbox field on your FMEA Worksheet.
2. The Closed checkbox on the FMEA Worksheet will automatically be selected if the final step of your Workflow requires approval and approval has been granted.
If the Closed checkbox is set, the Workflow Data field will also be set to Closed, no matter what the name of your last Workflow step is.