FRACAS Notifications
You can set up a variety of Notification emails to be sent to team members to notify them of important events in your FRACAS process. Notifications are an important element in keeping team members informed about events that occurred, upcoming due dates, overdue actions, etc. You can customize Notifications completely to your requirements.
Setting up FRACAS Notifications
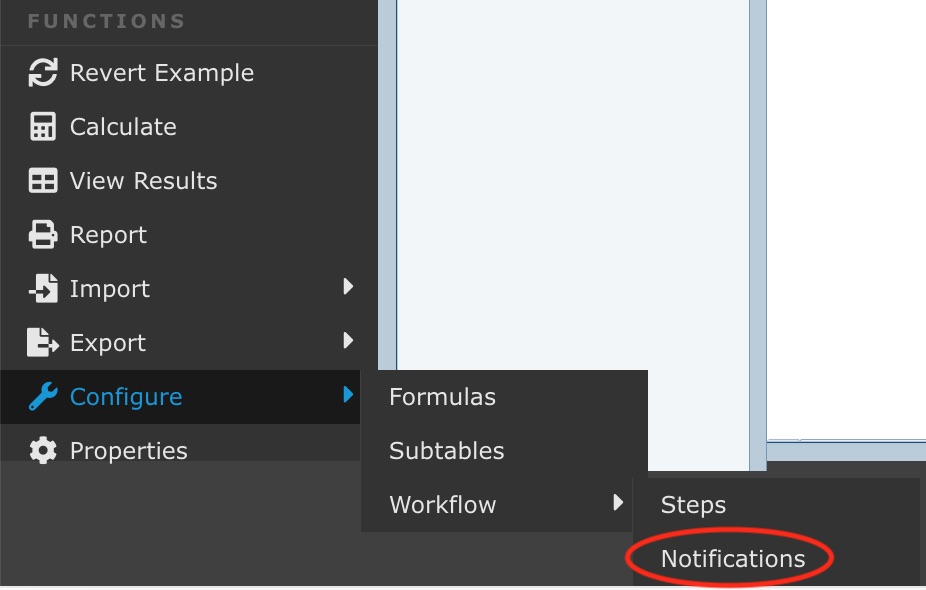
To define Notifications, from the Sidebar menu, click Configure and then Workflow and then click Notifications when Relyence FRACAS is active.
The Incident and Incident Subtable Notifications or Problem and Problem Subtable Notifications tables appear. Click the appropriate tab to add Notifications as you desire. In this example, a Problem Notification will be added. Adding Incident Notifications, Incident Subtable Notifications, or Problem Subtable Notifications operates in the same manner.
Click the Problem Notifications tab to activate the Problem Notifications table. Click on the Workflow Step tab on the left that corresponds to the step in the process you want to add a Notification for, and then click the Insert button in the toolbar to add a new Notification. In the example below, a new Notification will be added for Problems in the Workflow Step "Step D8: Closure".
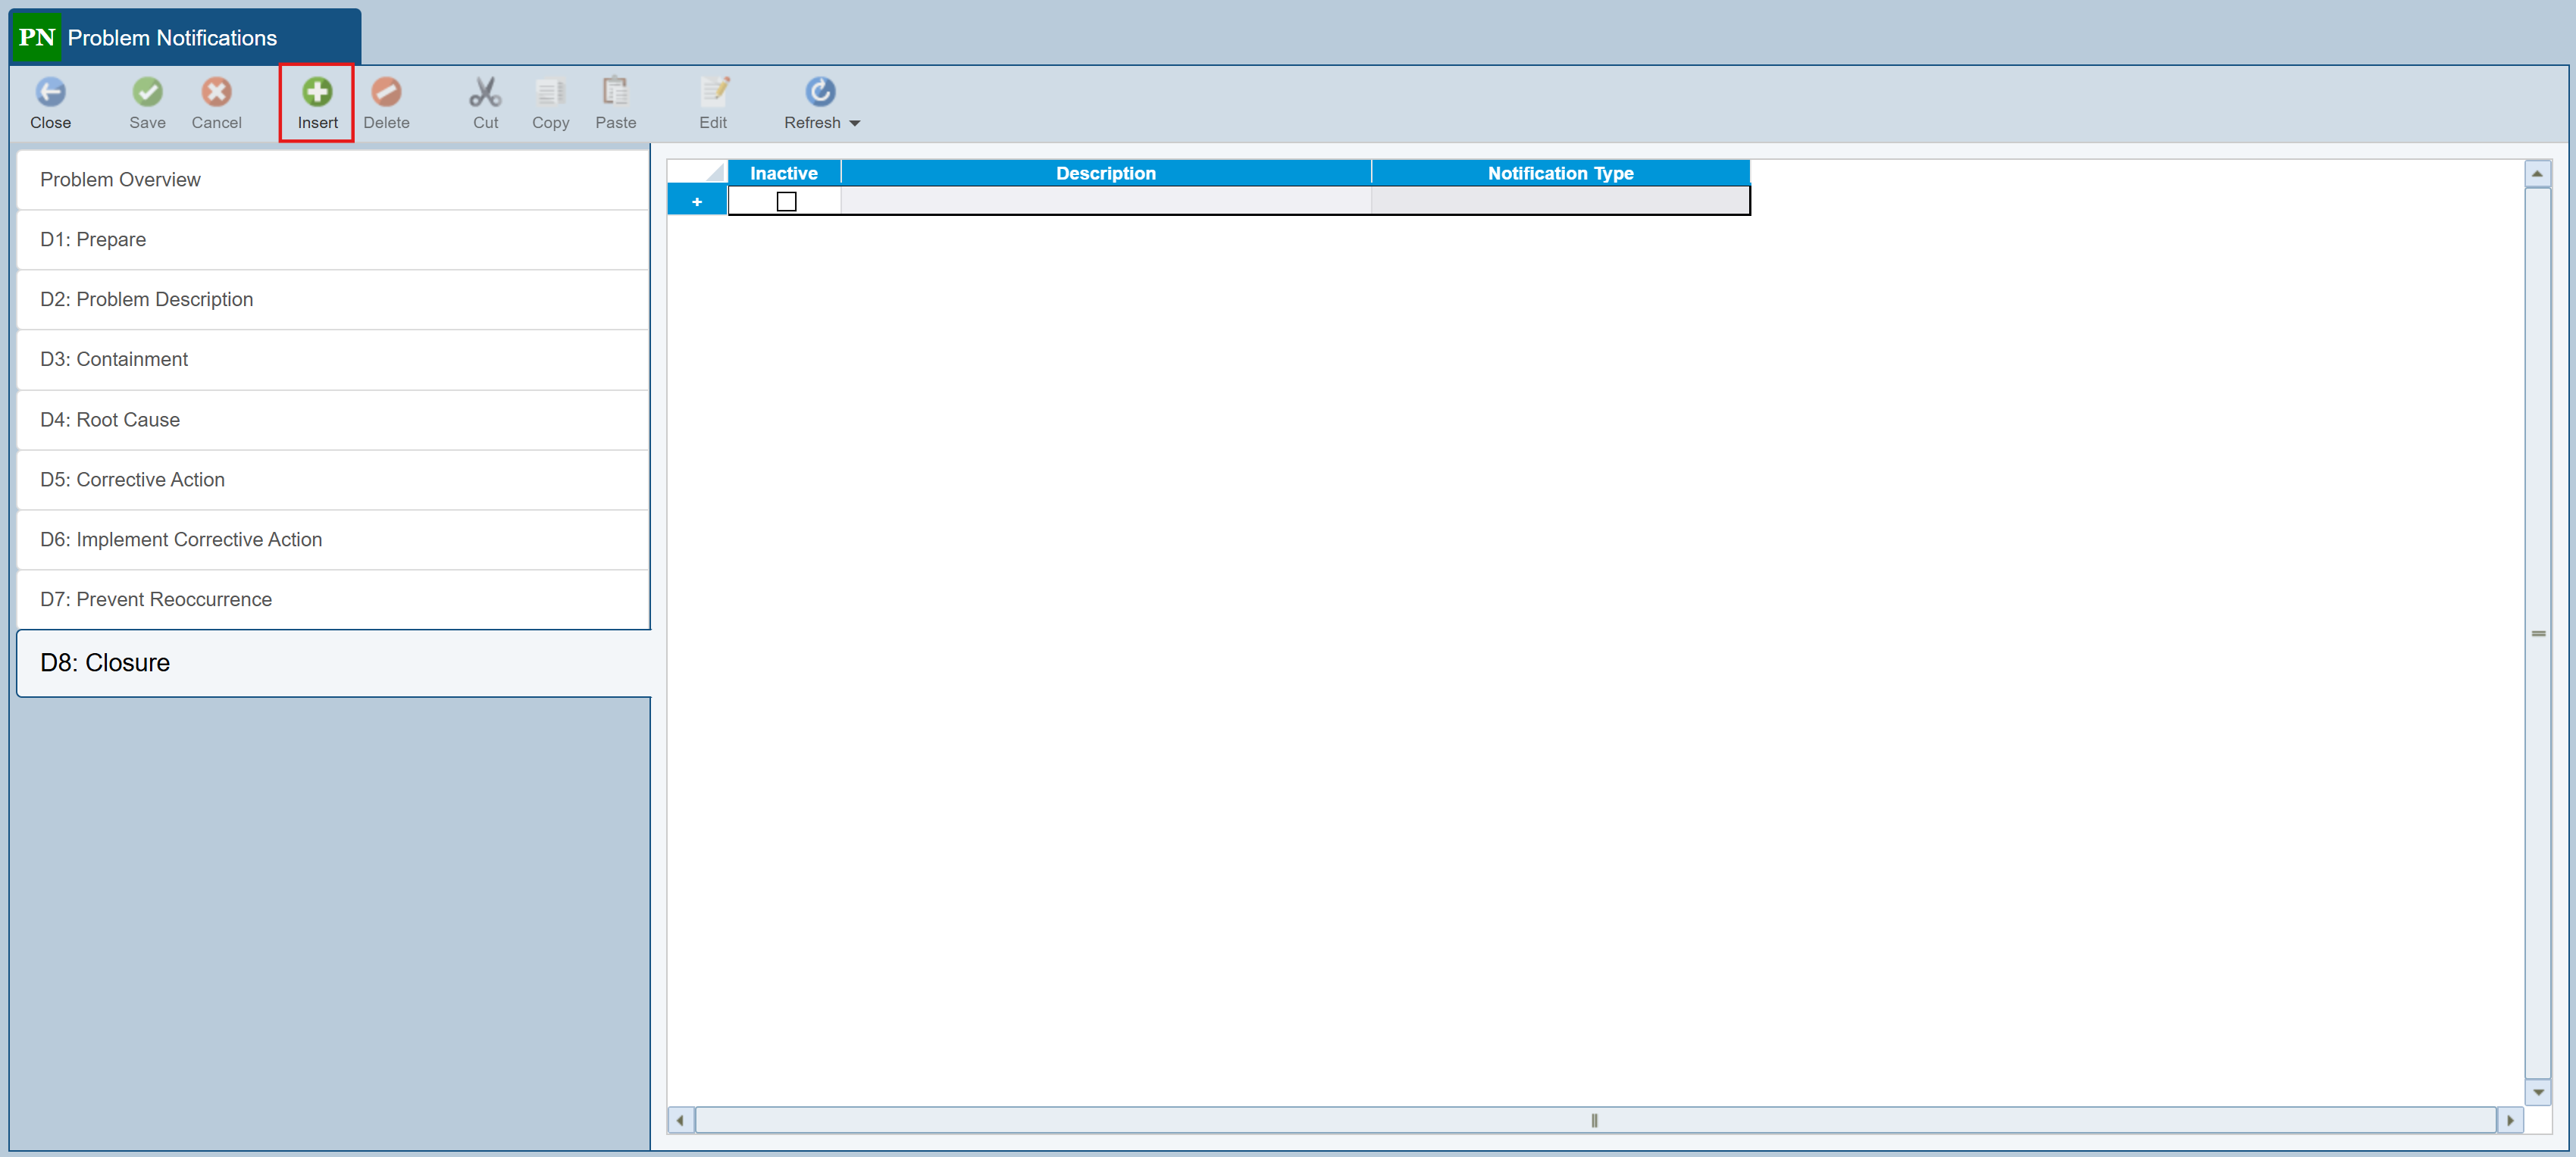
A new Notification is added, and the Edit Notification dialog appears. Add the information as required to define the Notification:
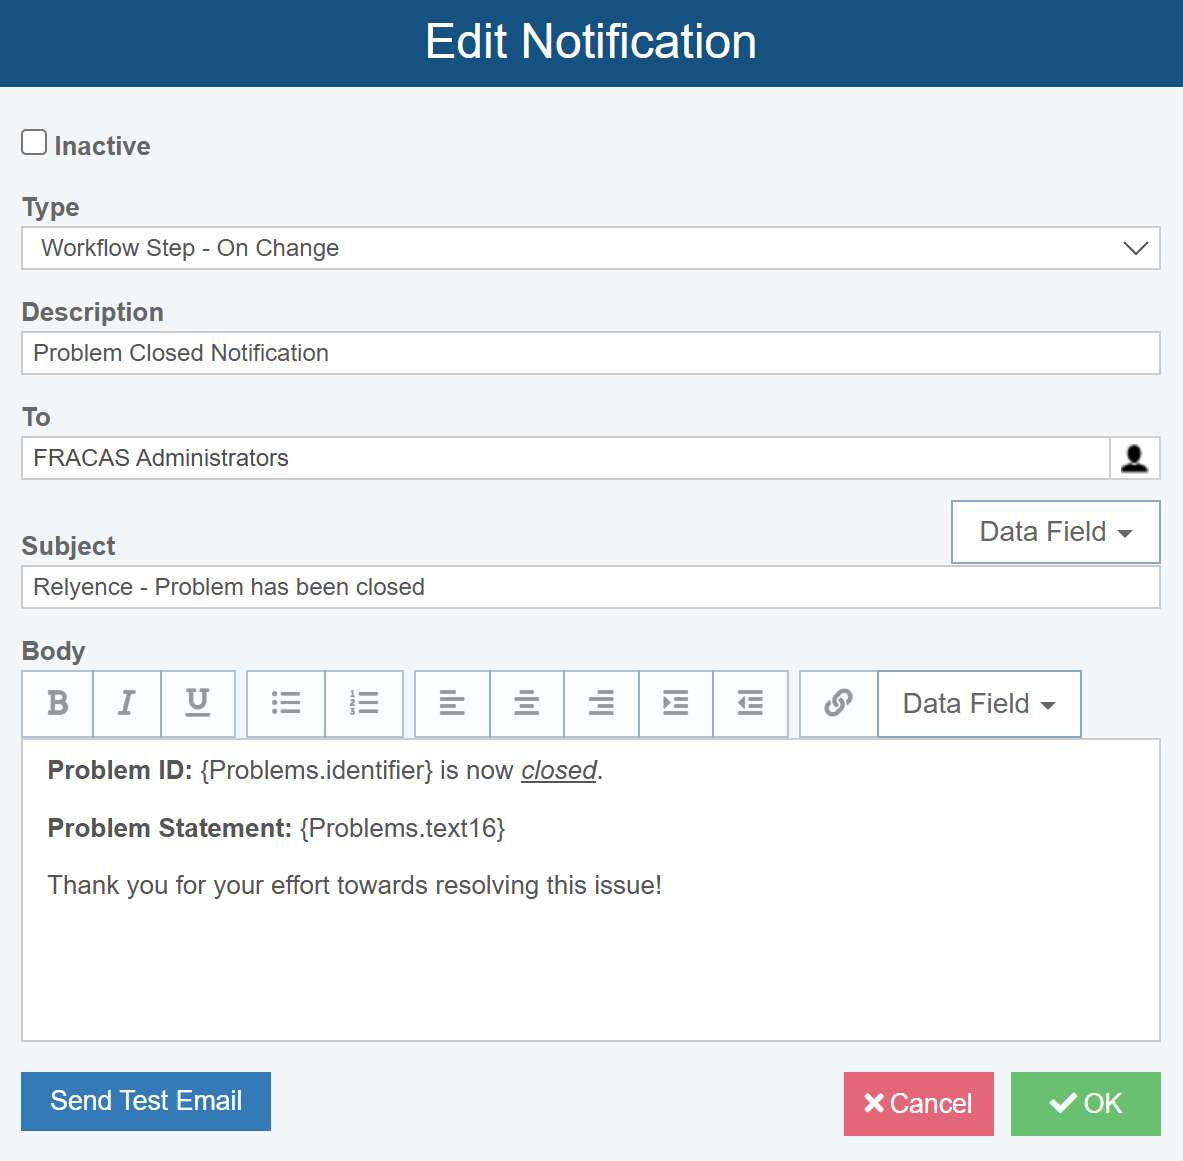
Inactive: If selected, the Notification is disabled, and no emails will be sent. If cleared, the Notification will be processed, and emails will be sent.
Type: Select the type of Notification from the list of choices:
- Workflow Step - On Change: Send a Notification when the Workflow Step either advances or regresses to another Workflow Step.
- Workflow Step - Recurring: Send Notifications on a recurring basis depending upon scheduling selections.
- Approval - On Approval: Send a Notification when an Incident or Problem is approved.
- Approval - On Rejection: Send a Notification when an Incident or Problem is rejected.
- Approval - On Request: Send a Notification when approval is requested.
- Approval - Recurring: Send Notifications on a recurring basis depending upon scheduling selections.
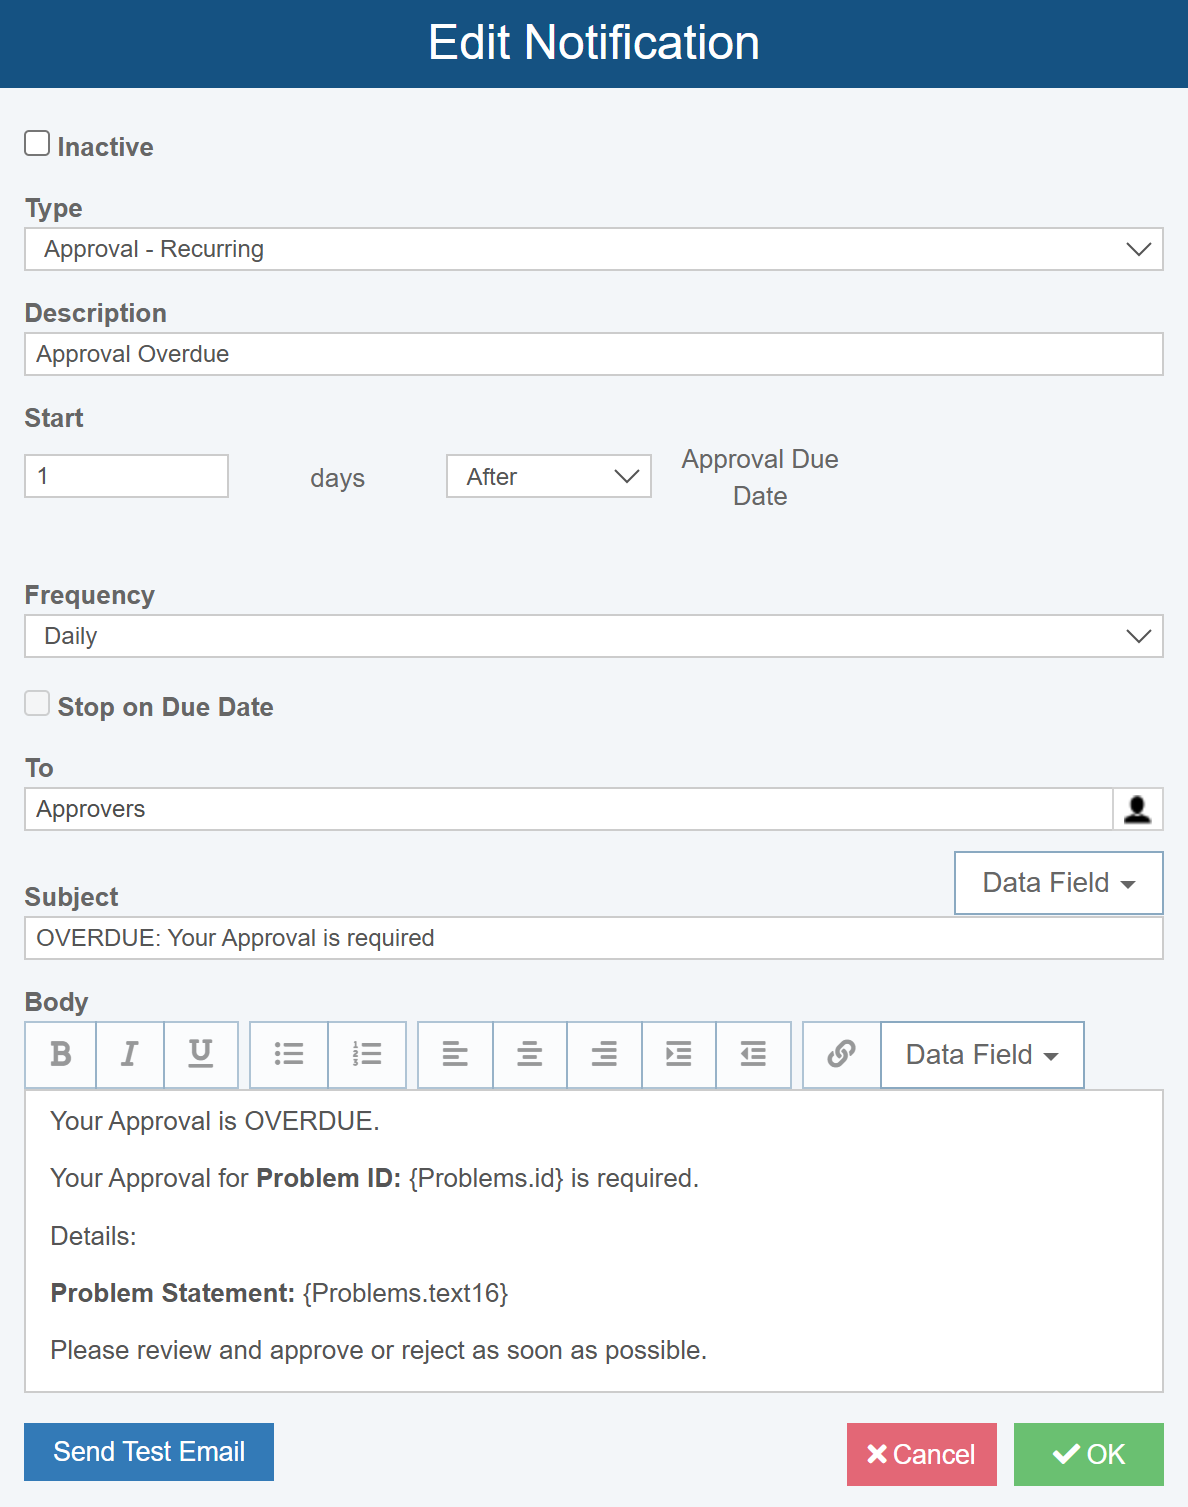
The following fields appear for recurring Notifications only:
Start: Enter the number of days and either before or after the due date you want the Notifications to occur.
Frequency: Select the frequency you want the Notifications to occur: once, daily, every 2 days, weekly, every 2 weeks, or monthly.
Stop on Due Date: Select this checkbox if you want Notifications to end once the due date is reached.
Description: Enter a description of this Notification. This is optional and is for informational purposes only.
To: Click in the To field and select from the list of choices to designate Notification recipients. The recipients can be Users, Groups of Users, groups of Users via Team Member fields, Workflow Fields, or any Contact.
Subject: Enter the text you want to appear in the subject line of the Notification email. Use the Data Field dropdown to add a FRACAS data field to the subject line.
Body: Enter the text to appear in the body of the email Notification. The toolbar formatting buttons allow you to format the email body text however you would like. You can use the Link button to add a web link to the body of the email. The team member receiving the email can click this link to be taken directly to the Incident or Problem in Relyence FRACAS. Use the Data Field dropdown to add a FRACAS data field to your Notification.
Example FRACAS Notifications
Example of non-recurring Notification:
Example of recurring Notification:
You can click the Send Test Email button to test out your Notification if you desire.
Once you have completed defining the Notification, click OK to return to the Notifications table. To go back and edit any Notification, select the appropriate Notification in the table by clicking on the row, and then click Edit from the toolbar to bring up the Edit Notification dialog.
Once you have completed entering all your Notifications, click Save in the toolbar to save all your data.
If you have Notification logging enabled, you can review a log of the Notifications by clicking the Notifications Log button in the toolbar. The Notification Log will display the Notifications processed for the selected Notification in the table.
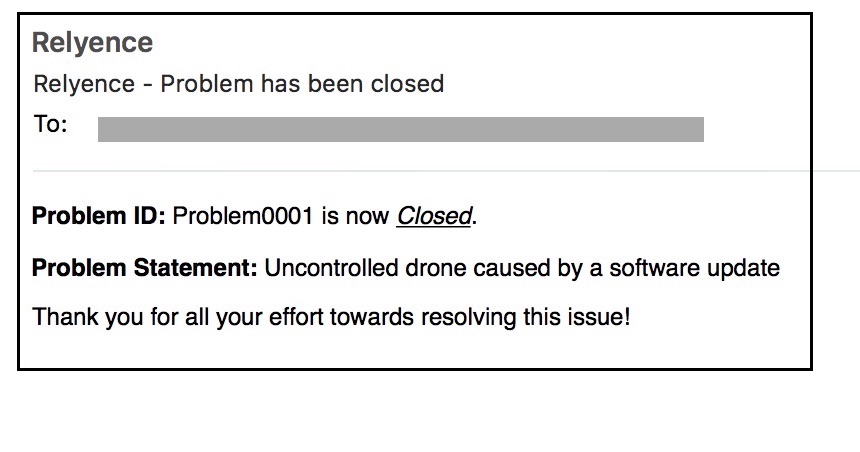
An example of a Relyence Notification:
Viewing the Notifications Logged for your Analysis
You can view the Notifications logged for your Analyses. Open the Analysis whose Notifications you want to review and make sure FRACAS is active. You can generate a report of all Notifications sent or review the Notifications of a specific Incident or Problem.
Exporting the Notifications Log
You can export an Excel-based report that includes a log of all the Notifications sent.
With your Analysis open, click Export>Notifications Log from the Sidebar menu.
Enter the Export File Name in the Export dialog and click the Export button. The Exporting progress indicator will appear, and once complete, the file will be automatically downloaded to your default downloads folder.
Viewing the Notifications for a FRACAS Incident or Problem
You can review the Notifications sent for specific FRACAS Incident or Problem in an Analysis. Select the FRACAS Incident or Problem, and then click the Notification Logs button in the toolbar. The Notification Log dialog appears.
You can click Report on the Notification Log dialog to generate a report. Click Close when you have completed viewing the Notification Log.