Using Single Sign On
Single Sign On allows you to use a single user name and password for access to Relyence and other systems you are using. Relyence Single Sign On is based on the SAML protocol and must be set up by your Relyence Administrator prior to use.
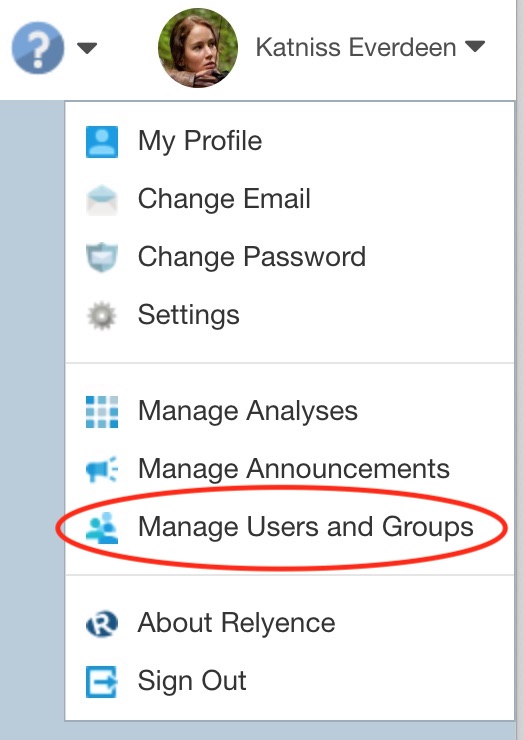
To access and set up Single Sign On, select Manage Users and Groups from the Account Management dropdown in the upper right corner of the Relyence header.
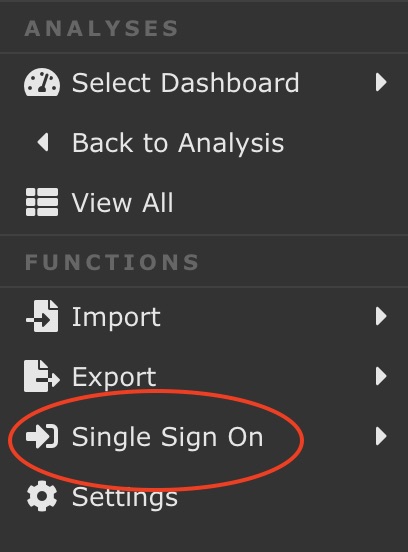
Single Sign On appears in the Sidebar menu.
Settings
First, you must configure your Single Sign on. Click Settings from Single Sign On in the Sidebar menu.
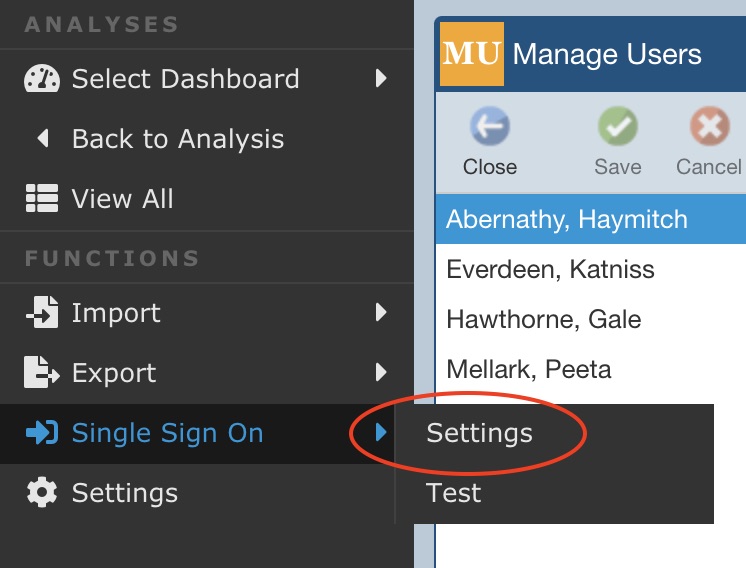
The Single Sign On Settings dialog appears.
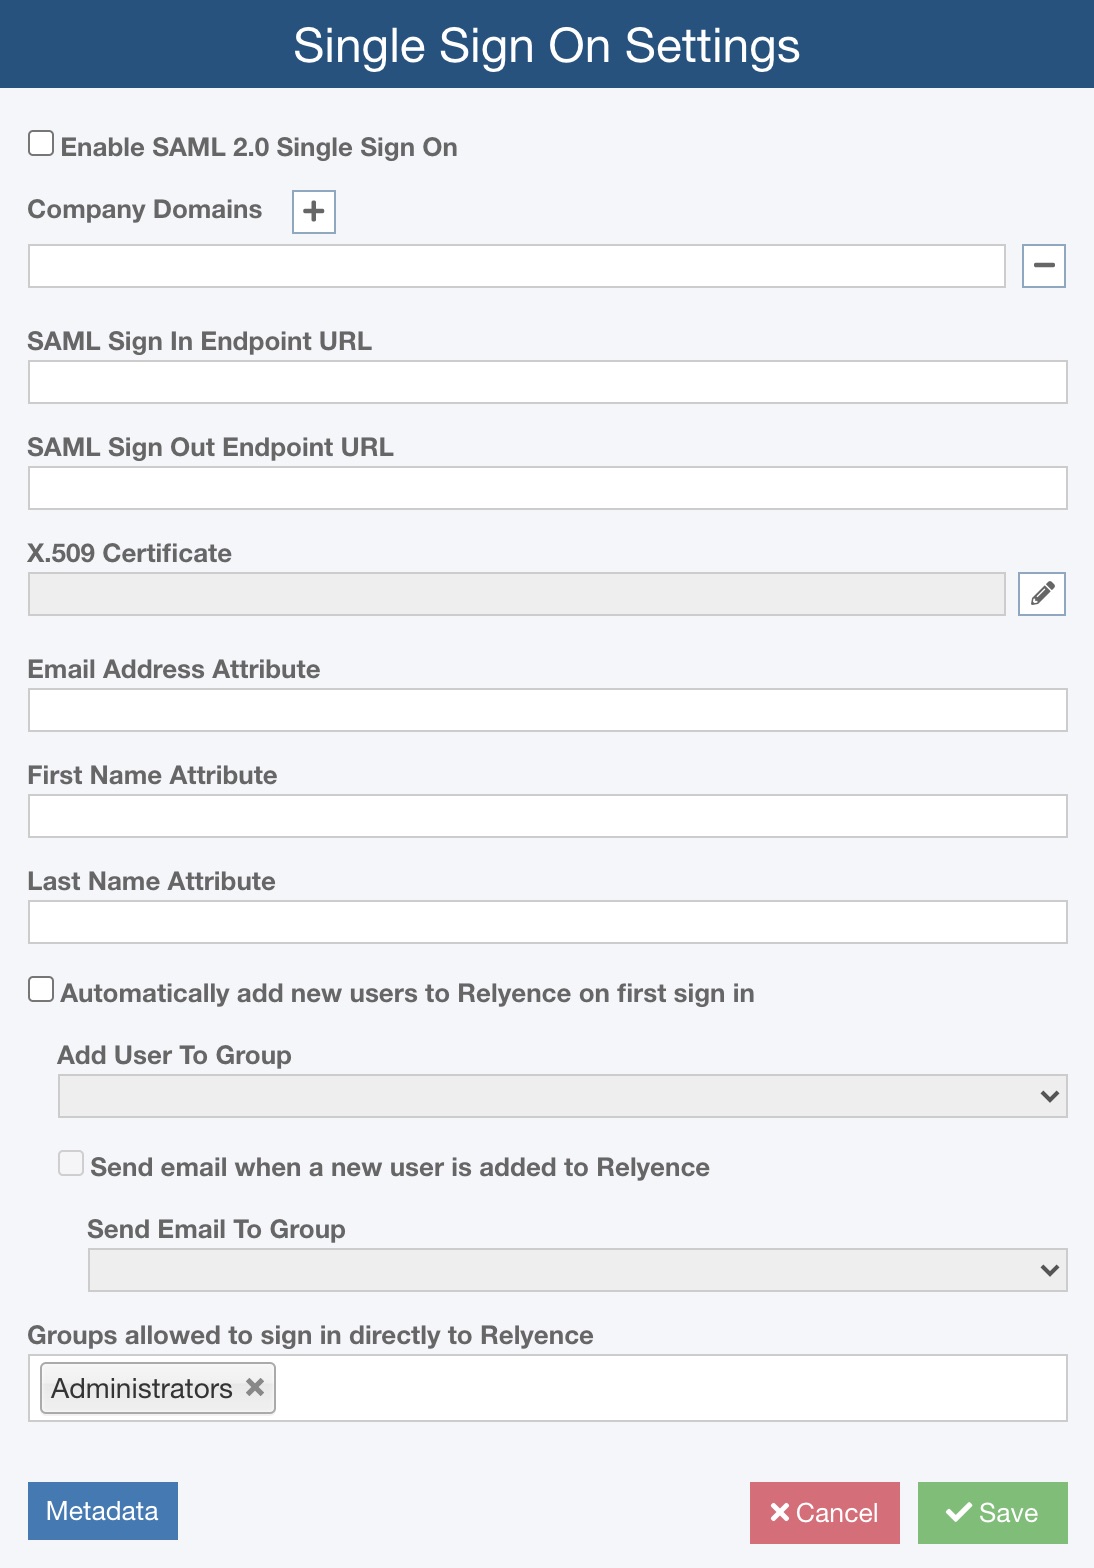
Enable SAML 2.0 Single Sign On or Enable Single Sign On
To enable Single Sign On (SSO) for use with the Relyence Cloud Solution, select Enable SAML 2.0 Single Sign On.
To enable Single Sign On (SSO) for use with the Relyence On Premise Solution, select Enable Single Sign On.
Single Sign On Type (On Premise Only)
When setting up Single Sign on for On Premise installations, you can choose between SAML 2.0 and Active Directory.
Company Domains
You must enter your Company Domain so Relyence will redirect your users to login using your SAML system. Use the [+] and [-] buttons to add and delete domains.
SAML Sign In Endpoint URL (SAML 2.0 Only)
Enter the SAML Sign In Endpoint URL, the URL of your SAML service that Relyence will use when users attempt to sign in.
SAML Sign Out Endpoint URL (SAML 2.0 Only)
Enter the SAML Sign Out Endpoint URL, the URL of your SAML service that Relyence will return to when users sign out.
X.509 Certificate (SAML 2.0 Only)
Enter the X.509 Certificate provided by your SAML Identity Provider when you added Relyence in to your system. To enter the X.509 Certificate, click the Edit (pencil) icon to the right of the field to bring up the X.509 Certificate dialog to paste a copy of your certificate.
Attributes (SAML 2.0 Only)
Upon sign in, Relyence will look for the Attributes that designate email address, first name, and last name. Relyence will look for the following Attributes tags by default:
- for email address: emailadress, email, user.email
- for first name: firstname, givenname, first_name
- for last name: lastname, surname, last_name
If you use different Attribute tags, enter them in the appropriate Attribute field.
Automatically add new users to Relyence on first sign in
Users that are in your SAML system, but not in Relyence can be automatically added. To automatically add your users when they first sign in to Relyence, select Automatically add new users to Relyence on first sign in.
Add User to Group
You must specify the Relyence Group newly added users are a member of by selecting the Group name from the Add User To Group dropdown list.
Send email when new user is added to Relyence
If you would like an email to be sent for notification purposes when a new Relyence user has been added, select the Send email when new user is added to Relyence checkbox.
Send Email to Group
When you have selected email notifications to be sent, specify which Group to send the email to in the Send Email to Group dropdown list.
Groups allowed to Sign In directly to Relyence
You can identify Groups who are allowed to bypass the SAML or Active Directory SSO and sign in directly to Relyence by clicking in the Groups allowed to Sign In directly to Relyence field and selecting the appropriate Groups. This is typically only needed for Administrative Groups who are configuring and setting up the SSO system.
Metadata
Click the Metadata button to obtain the data you need to enter into your Identity Provider (or Federation Server) in order to connect to Relyence SSO.
The Metadata dialog appears.
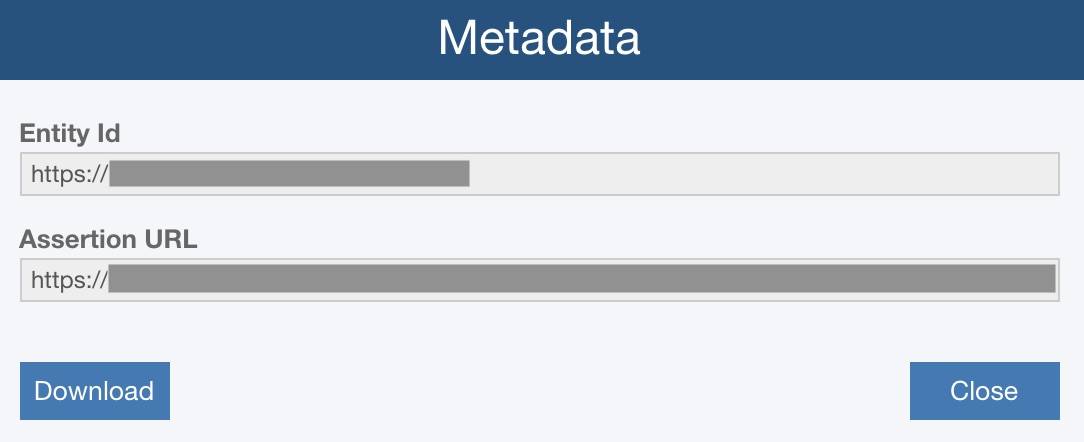
You can use the Download button to download this information to an importable XML file.
Click Close to close the Metadata dialog.
Click Save to save your SSO information.
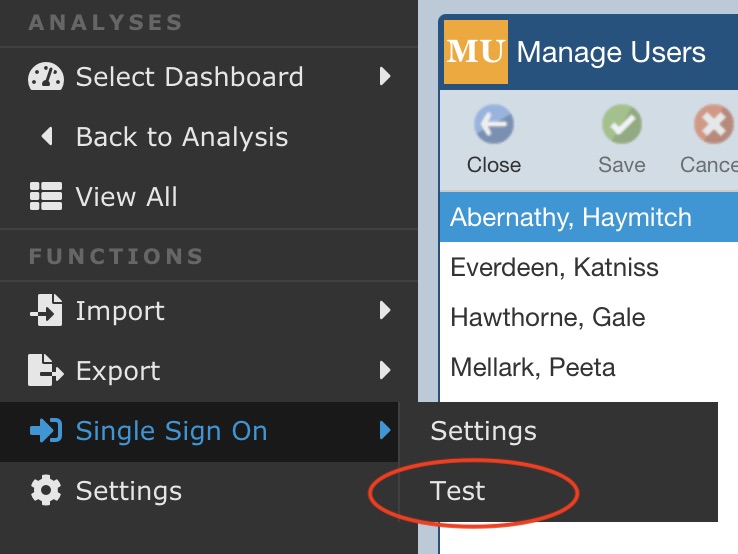
Test
Once you have completed setting up your Single Sign On, you can use the Test function to verify that it is working. Select Test from Single Sign On from the Sidebar menu.
The Sign in to Relyence domain dialog appears.
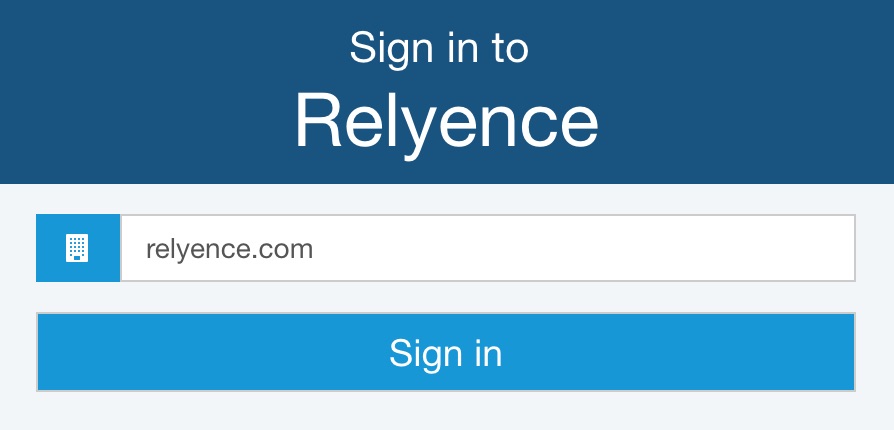
Enter your Company Domain and click Sign in. You will be taken to your Sign In page to login with your user credentials. When Sign In is completed, the Test Results dialog appears with the user information noted along with whether the user was successfully found in Relyence.
Setting a default Company Domain for your Sign in page
You can set a default name for the Company Domain for your Sign in dialog when using SSO.
You can specify a default Company Domain in your bookmarks or links you set up for signing into Relyence. To do this, modify the default link:
https://app.relyence.com/Account/SSOLogin
to include your Company Domain:
https://app.relyence.com/Account/SSOLogin?domain=<yourCompanyDomain>
Providing Relyence users a link to bypass the Relyence Sign In dialog
If you prefer to have Relyence Users bypass the Relyence Sign In dialog, you can provide them with this link to access Relyence using Single Sign On:
https://app.relyence.com/Account/SSOLoginDirect?domain=<yourCompanyDomain>, where the following details are specified:
- app.relyence.com is replaced with your server name if you have an On-Premise installation
- <yourCompanyDomain> is replaced with the domain you used in your SAML settings dialog