Using Analysis Tree Subtables in Relyence FRACAS
You can add Subtables to your Analysis Tree Properties Form. Subtables enable you to put a small table of data on your Analysis Tree Properties Form to capture a list of information.
Subtables can be used for any purpose, such as documenting team members who attended a meeting, a list of steps taken, a list of parts replaced, revision listing details, or any other type of data you want to enter for an Analysis Tree item (system or subsystem).
You can create as many Subtables as you want.
Creating Analysis Tree Subtables
To add a Subtable to the Analysis Tree Properties Form, you must first define the Subtable configuration.
To create a new Subtable, click Configure>Subtables from the Sidebar menu when Relyence FRACAS is active.
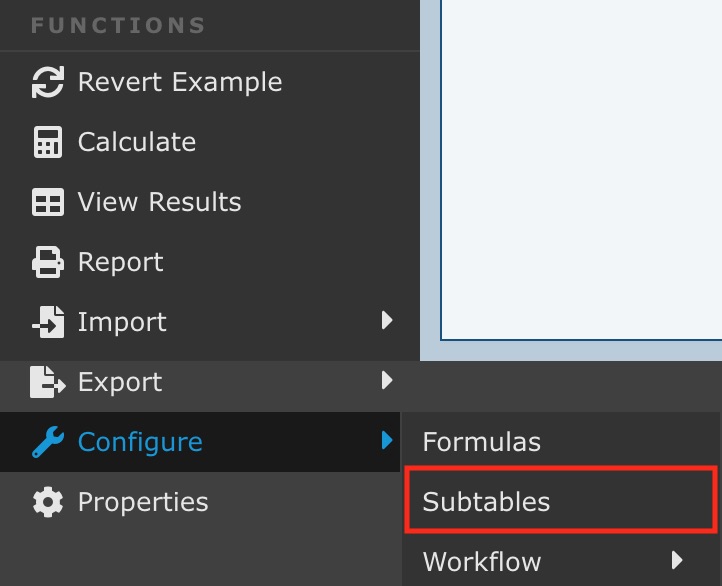
The Configure Subtables dialog appears. If the Subtables list is empty, the Click here to add a new subtable pop up message appears as a helpful indicator to the Add (+) icon . Click Got it! to dismiss the message.
.jpg)
Note: You can also add Subtables to your Incident and/or Problem Forms. Details for customizing Incident and Problem Form Subtables can be found here: Using Subtables on Incident and Problem Forms.
To customize Subtables for Analysis Tree items, click the Analysis Tree tab. If necessary, click Got it! to dismiss the message.
The small icons at the top of the Subtable list allow you to Add (+), Edit (pencil), Delete (-), and Duplicate (copy) Subtables.
To add a new Subtable, click the + (Add) icon. The Add Subtable dialog appears.
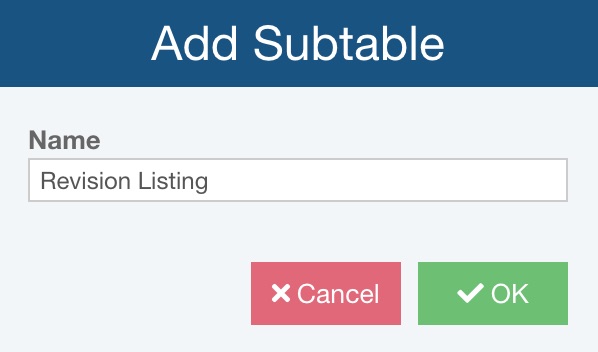
Enter the Name for your new Subtable and click OK.
Subtable Names must be unique. The Subtable Name will appear as the title of your Subtable on your Analysis Tree Properties pane.
The Configure Subtables dialog consists of two parts: the Subtables list and the Fields table. The Subtables list on the left displays the names of all your Subtables. The Fields table on the right displays the configuration of the Subtable selected in the Subtables list.
To add fields to your Subtable, click the dropdown arrow in the Field column in the Fields table. Select any existing field or click <Add New Field> to add a new field.
%20-%20RevListing%20-%20AddNewField.jpg)
The Edit Field dialog appears.
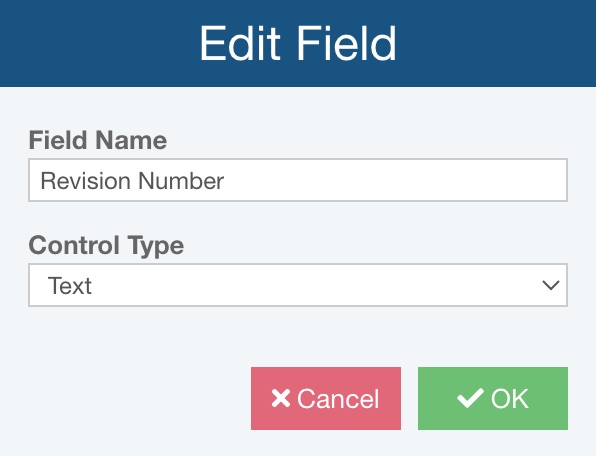
Enter the Field Name for the new field. The Field Name of the field will be used as the column header in the Subtable when displayed on the Analysis Tree Properties pane.
Select the type of data from the Control Type dropdown list:
Attachment: Allows uploading of document as attachments.
Checkbox: An on/off indicator field, designated with a check mark.
Date: A date field.
Hyperlink: A field in which to include a hyperlink.
Image: A field in which to include one or more images.
List: A dropdown choice list field. When selected, you can select an existing List Name, or enter a new List Name. For more details on creating Lists, see the Custom FMEA Lists topic.
Number: A numeric field. You can specify the precision for number fields in the Fields table.
Team Member: A dropdown list of choices of your team members.
Text: A text field to allow enter of any text-based data.
Once you have entered the field, you specify the following additional information in the Fields table:
Read-only: Select Read-only if you want this field to be non-editable.
Width: The Width of the column in the Subtable when shown on the form. You can modify the widths of the Subtable columns directly on the form to adjust as needed by dragging the column header separators to the desired widths. The updated width will be automatically updated and saved for you.
Group Title: If you want to group multiple columns under a parent heading, enter the Group Title for each the columns you want grouped together. The Group Title will appear as the parent heading and the Field names will appear as subheadings.
Precision: Enter the Precision desired for number fields.
Default Value: Enter a value if you would like this data field to have a default value automatically set.
Tooltip: If you would like a Tooltip for a column, enter the text. The tooltip appears when you hover over the column heading.
Rotate Header: If you want to rotate the header, or the title of a column, by 90 degrees, select the Rotate Header checkbox. This applies to both the on screen display as well as reports generated that include the Subtable This option is helpful when trying to condense the width of columns; by selecting Rotate Header for a column, the width of the column can be often be resized down.
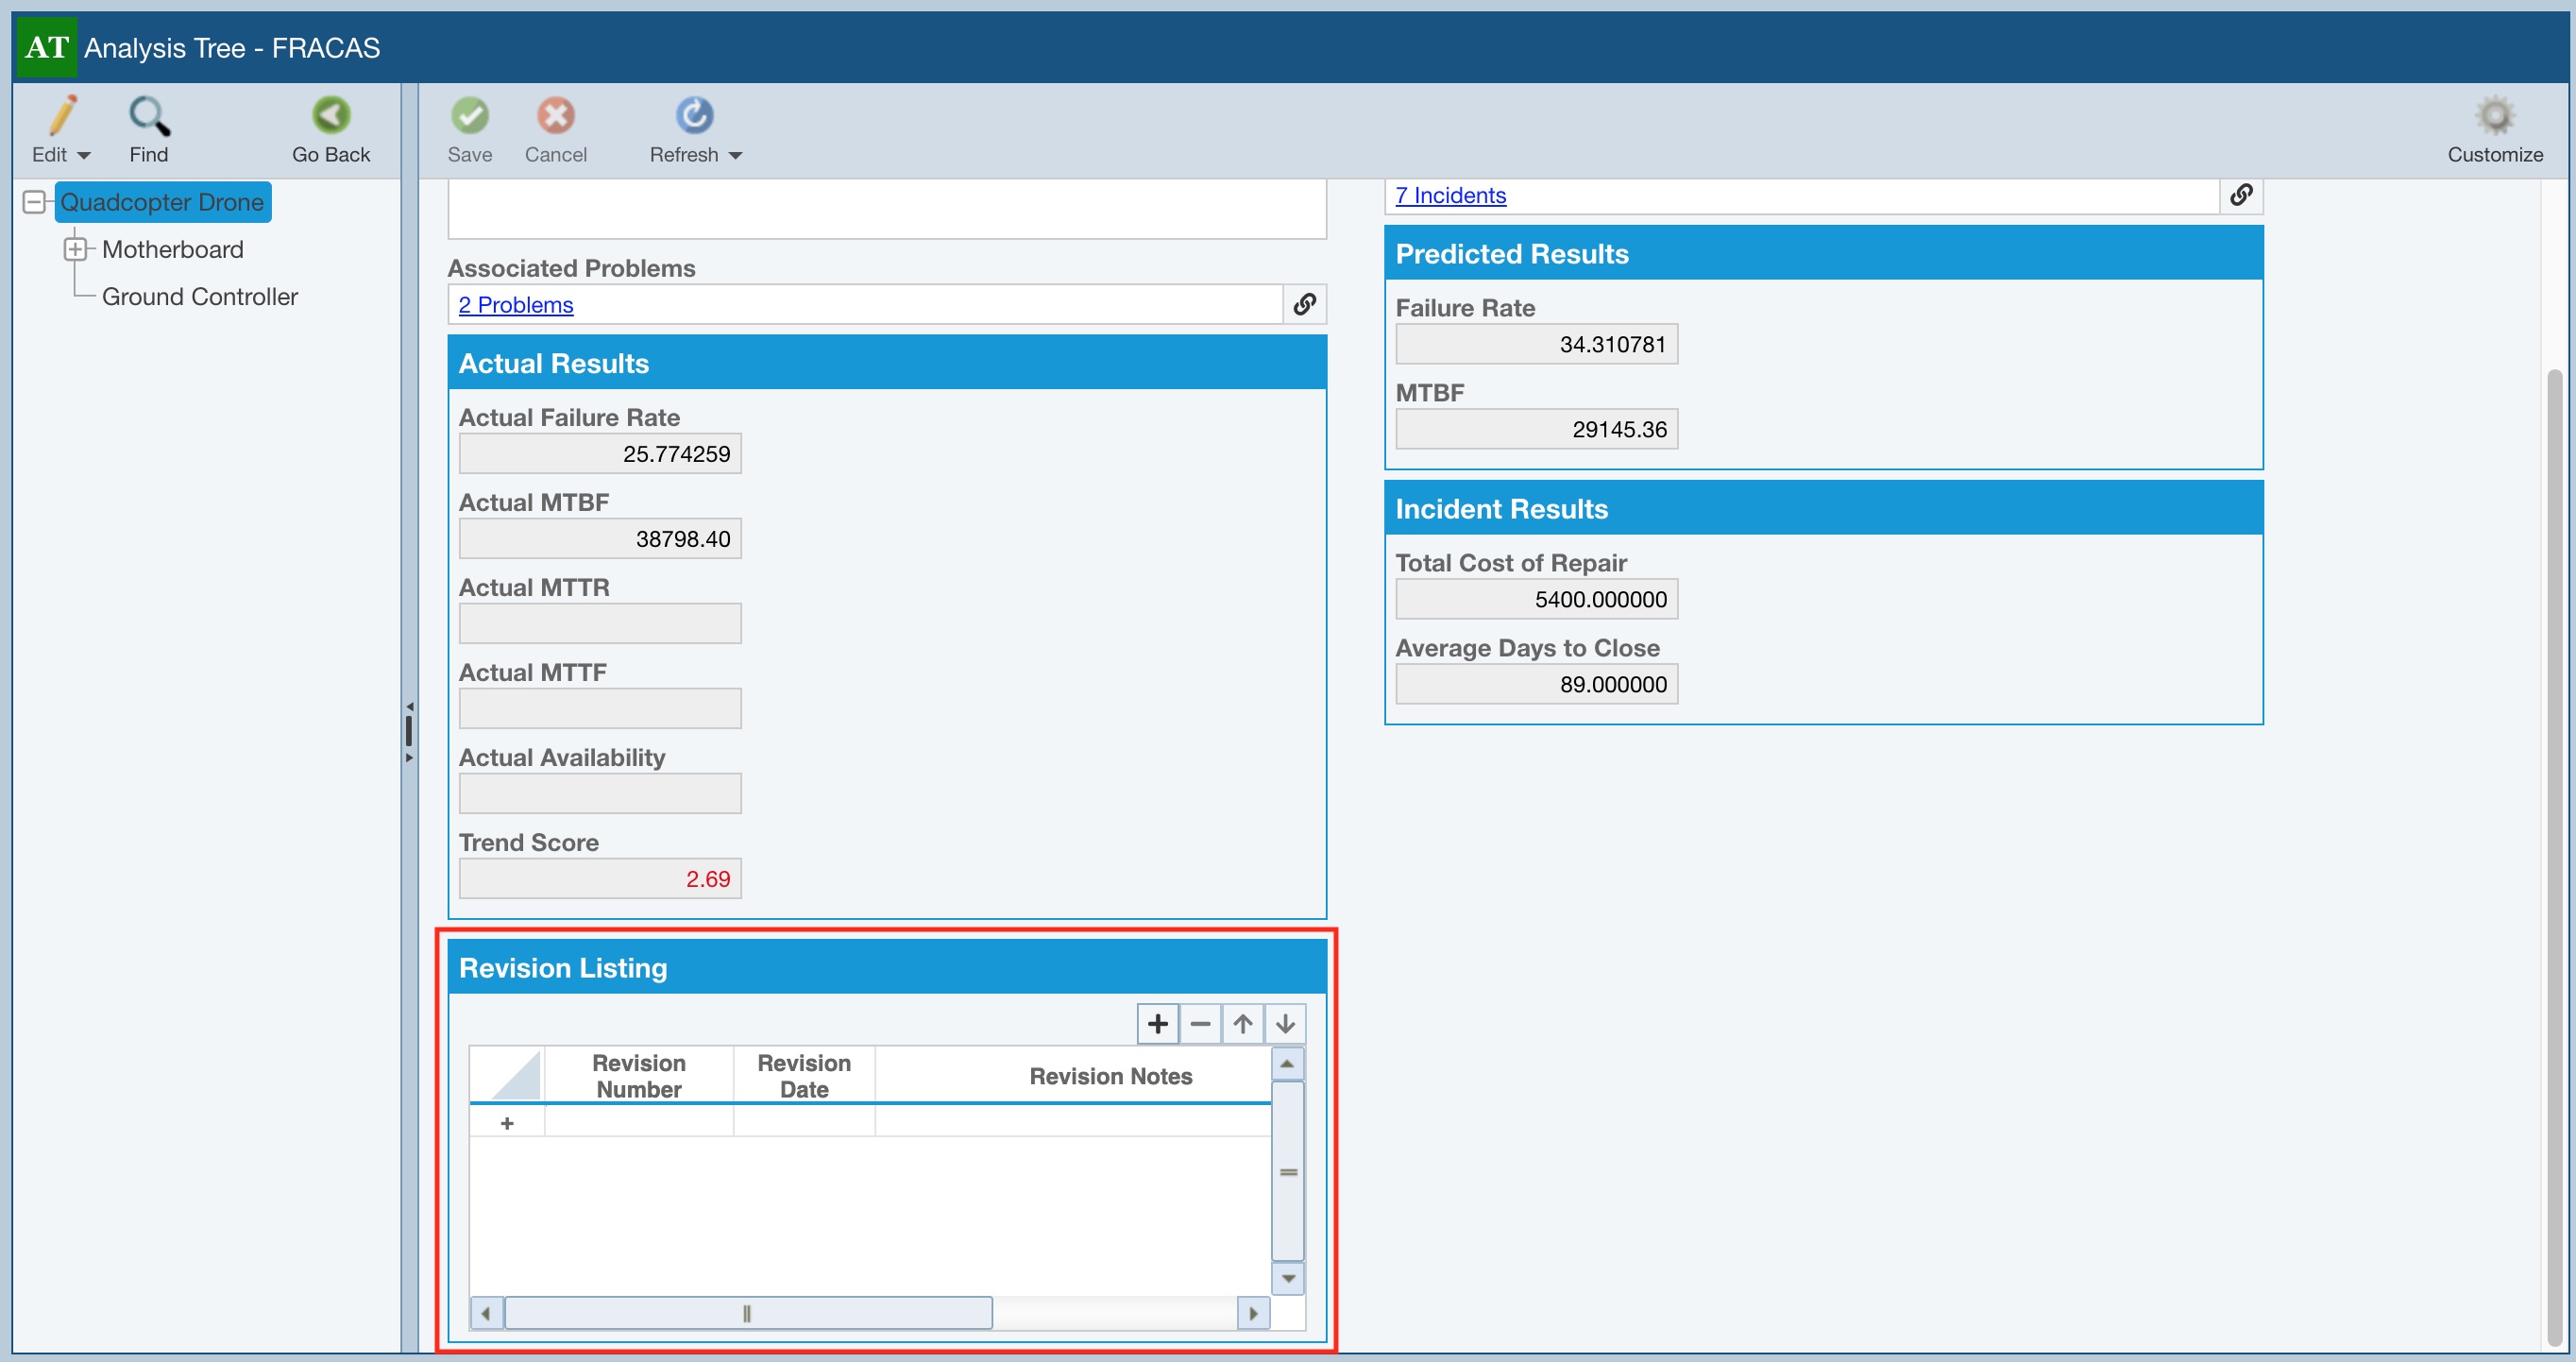
%20-%20RevListing%20-%20Sample.jpg)
Use the icons in the upper right of the Fields table allow you to Edit (pencil), Move Up or Move Down (arrows), and Delete (minus) items in the Fields table.
Note that you can also select the Subtable Identifier, which will be the identifying field for each record if updating data via import.
When you have completed defining your Subtables, click Save to save your Subtables configuration information. You can click Save at any time during the configuration process to save your work.
When you have finished defining your Subtables and have saved all your work, click Close to close the Configure Subtables dialog.
Adding Subtables to the Analysis Tree Properties Pane
Once you have defined and configured your Subtables, the next step is to place the Subtable on your Analysis Tree Properties pane. To add a Subtable on the Analysis Tree Properties pane, you use the Customize feature. Complete details about customizing the Analysis Tree Properties pane can be found in the Customizing the Reliability Prediction Analysis Tree Properties topic. For this topic, we will cover only the steps needed in order to add Subtables to the Analysis Tree Properties pane.
Make sure that Relyence Reliability Prediction is active by clicking Reliability Prediction in the Sidebar if needed.
In the Analysis Tree pane, click Properties.
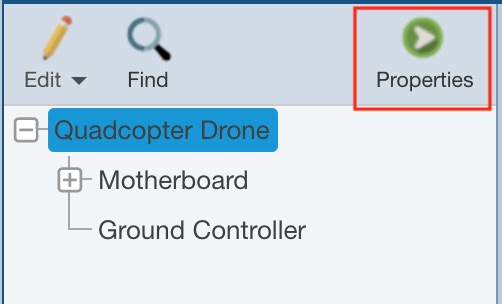
In the top-right corner of the Analysis Properties pane, click the Customize button.
.jpg)
The Customizing Analysis Tree pane appears.
Go the the empty row at the end of the Field column and click the dropdown list arrow. Any Subtables you have defined appear in the Field dropdown list. Select the Subtable you want to add.
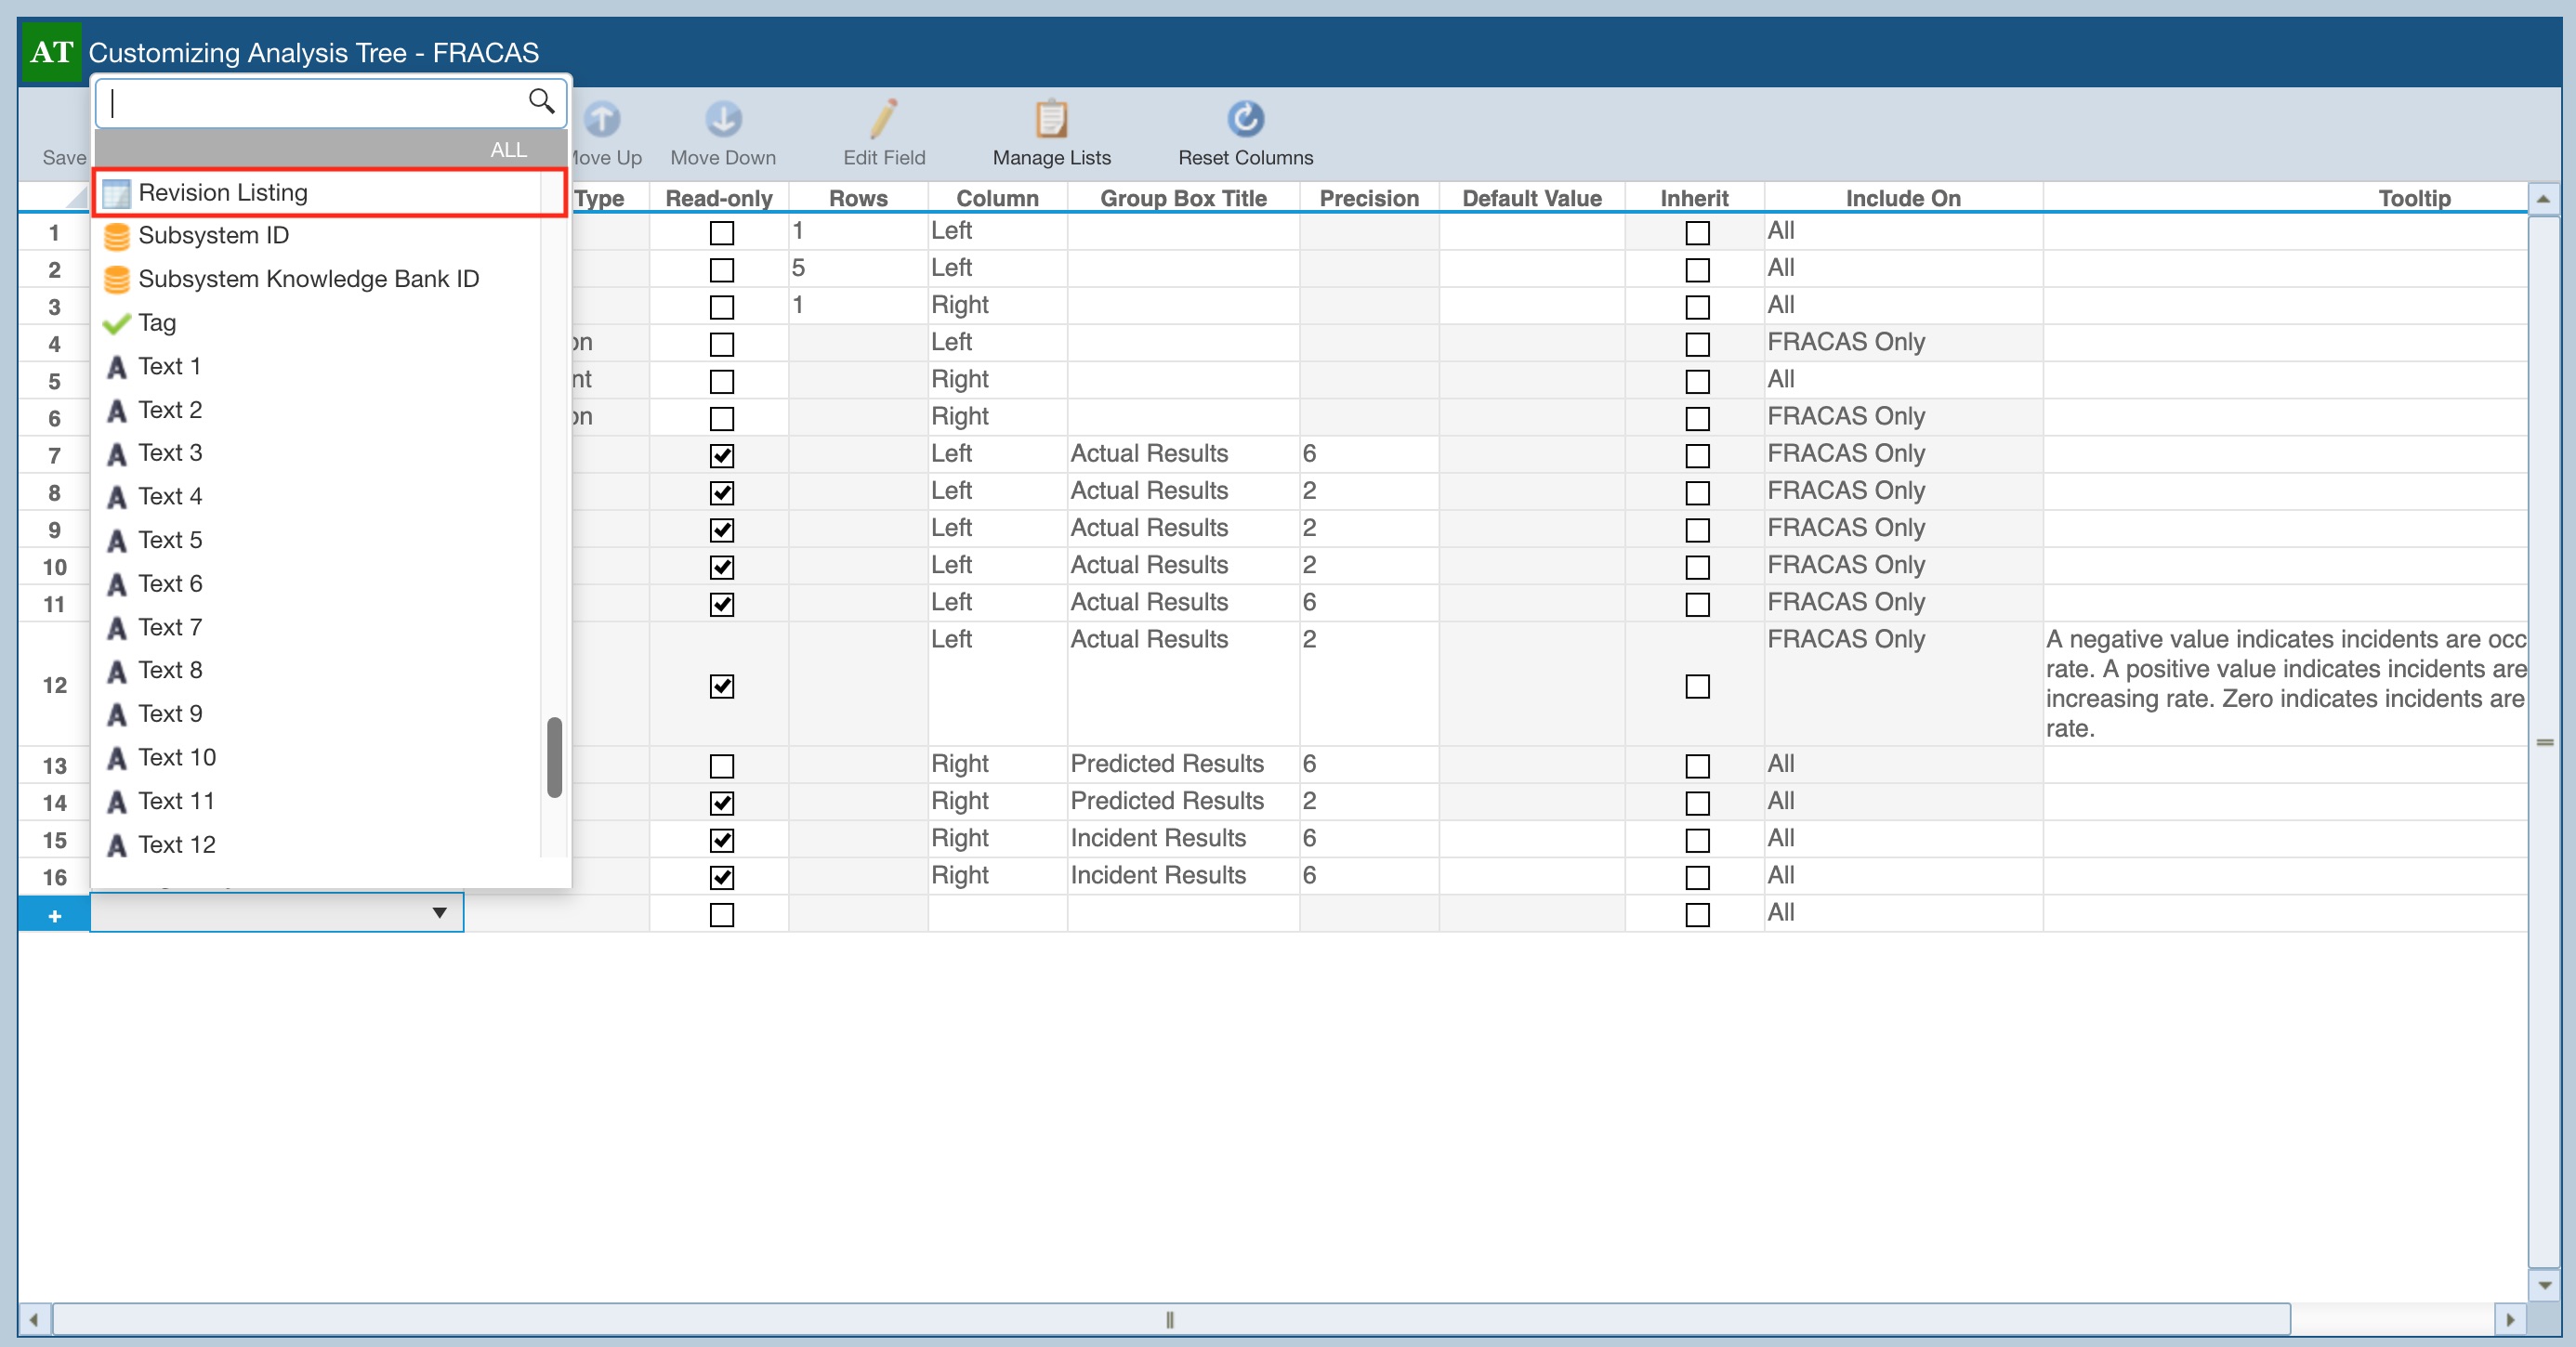
The Subtable will be added to the Field list. You can also set the following additional information:
Read-only: Select if you want the Subtable to be non-editable.
Rows: The number of rows indicates the height of the Subtable as it appears on the form. The default is 5.
Column: Select whether you want the Subtable to appear on the Right or Left side of the form.
Group Box Title: You can group fields together on the Properties Form. The data fields with the same Group Box Title will appear in a box on the form with the specified title. This is useful for keeping fields that are related grouped together.
Include On: The Include On setting enables you to select which Properties Forms you want this field to appear on. For example, you may want a particular field, such as Name, to appear on all Properties Forms. Or, you may want a particular field only in Reliability Prediction. The dropdown list varies depending on the active Product:
- DFMEA: Select from All, Design P-Diagram Only, DFMEA Worksheet Only, DVP&R Only
- PFMEA: Select from All, Process P-Diagram Only, Process Flow Only, PFMEA Worksheet Only, Control Plan Only
- FMEA-MSR: Select from All, FMEA-MSR Only
- FMECA: Select from All, FMECA Only
- FRACAS: Select from All, FRACAS Only
- Reliability Prediction: Select from All, Reliability Prediction Only
- RCM
- RCM - DFMEA: All, RCM - DFMEA Only
- RCM - PFMEA: All, RCM - PFMEA Only
- RCM - FMEA-MSR: All, RCM - FMEA-MSR Only
- RCM - FMECA: All, RCM - FMECA Only
- Maintainability Prediction: Select from All, Maintainability Prediction Only
Tooltip: The tooltip text will appear when you hover your mouse over the column header in the Table. Tooltips can be used to provide helpful hints to users about the data expected in this column.
Use the Move Up and Move Down buttons in the toolbar to place your Subtable on the Analysis Tree Properties pane where you want it.
When you have completed, click Save and Close to save your changes and return to the Analysis Tree Properties pane.
Your Subtable appears on the Analysis Tree Properties pane to be used during data entry.