Using Transfer Gates to Manage Large Fault Trees
Transfer Gates allow you to more effectively manage your trees, as well as provide the capability to reuse fault tree branch logic. Transfer Gates are Top Gates that link to one or more other fault trees. When a single fault tree diagram becomes large, the use of Transfer Gates can help in overall viewing and management.
Transfer Gates appear as green triangles in the main diagram. Transfer Gates also appear in the All Trees pane.
To insert a Transfer Gate, click the Insert Gate dropdown from the toolbar and click Transfer.
![]()
The Select Transfer from Gate dialog appears.
![]()
As needed, use the Field and Find fields to identify the transfer from gate.
In the table, select the Top Gate you wish to insert as a Transfer Gate from the list of gates.
Click OK to add the transfer.
You can also break out a branch of your diagram into a sub-diagram. Relyence Fault Tree will break the branch out into a new fault tree diagram and replace the branch in the main diagram with a Transfer Gate. To break out any branch of your diagram, click on the gate you want to make the Top Gate of the new branch and click Break into Transfer Diagram in the Properties pane.
![]()
If you want to reverse this operation, and merge a branch back into a diagram, click on the Transfer Gate to select it, and click Merge from Transfer Diagram from the Properties pane. The Transfer Gate will be replaced with the branch logic.
![]()
View options for Fault Trees with Transfer Gates
When your Fault Tree diagram utilizes Transfer Gates, you can optionally choose to display the sub-diagrams in the main tree as a single Transfer Gate or show the entire expanded sub-diagram.
To display Transfers Gates sub-diagrams as a single Transfer Gate, click the Filter button in the toolbar and under Show and select Subtrees as Transfer Gates option. This is the default option. It keeps your trees the most compact and is typically the easiest to navigate and use.
![]()
To expand the sub-diagram of the Transfer Gate in the diagram, click the Filter button in the toolbar and under Show and select Subtrees Expanded option. The subtree will be shown in full in the main diagram. In place of the Transfer Gate, the Top Gate of the subtree will appear in a gradient blue-green color to indicate it is a sub-diagram.
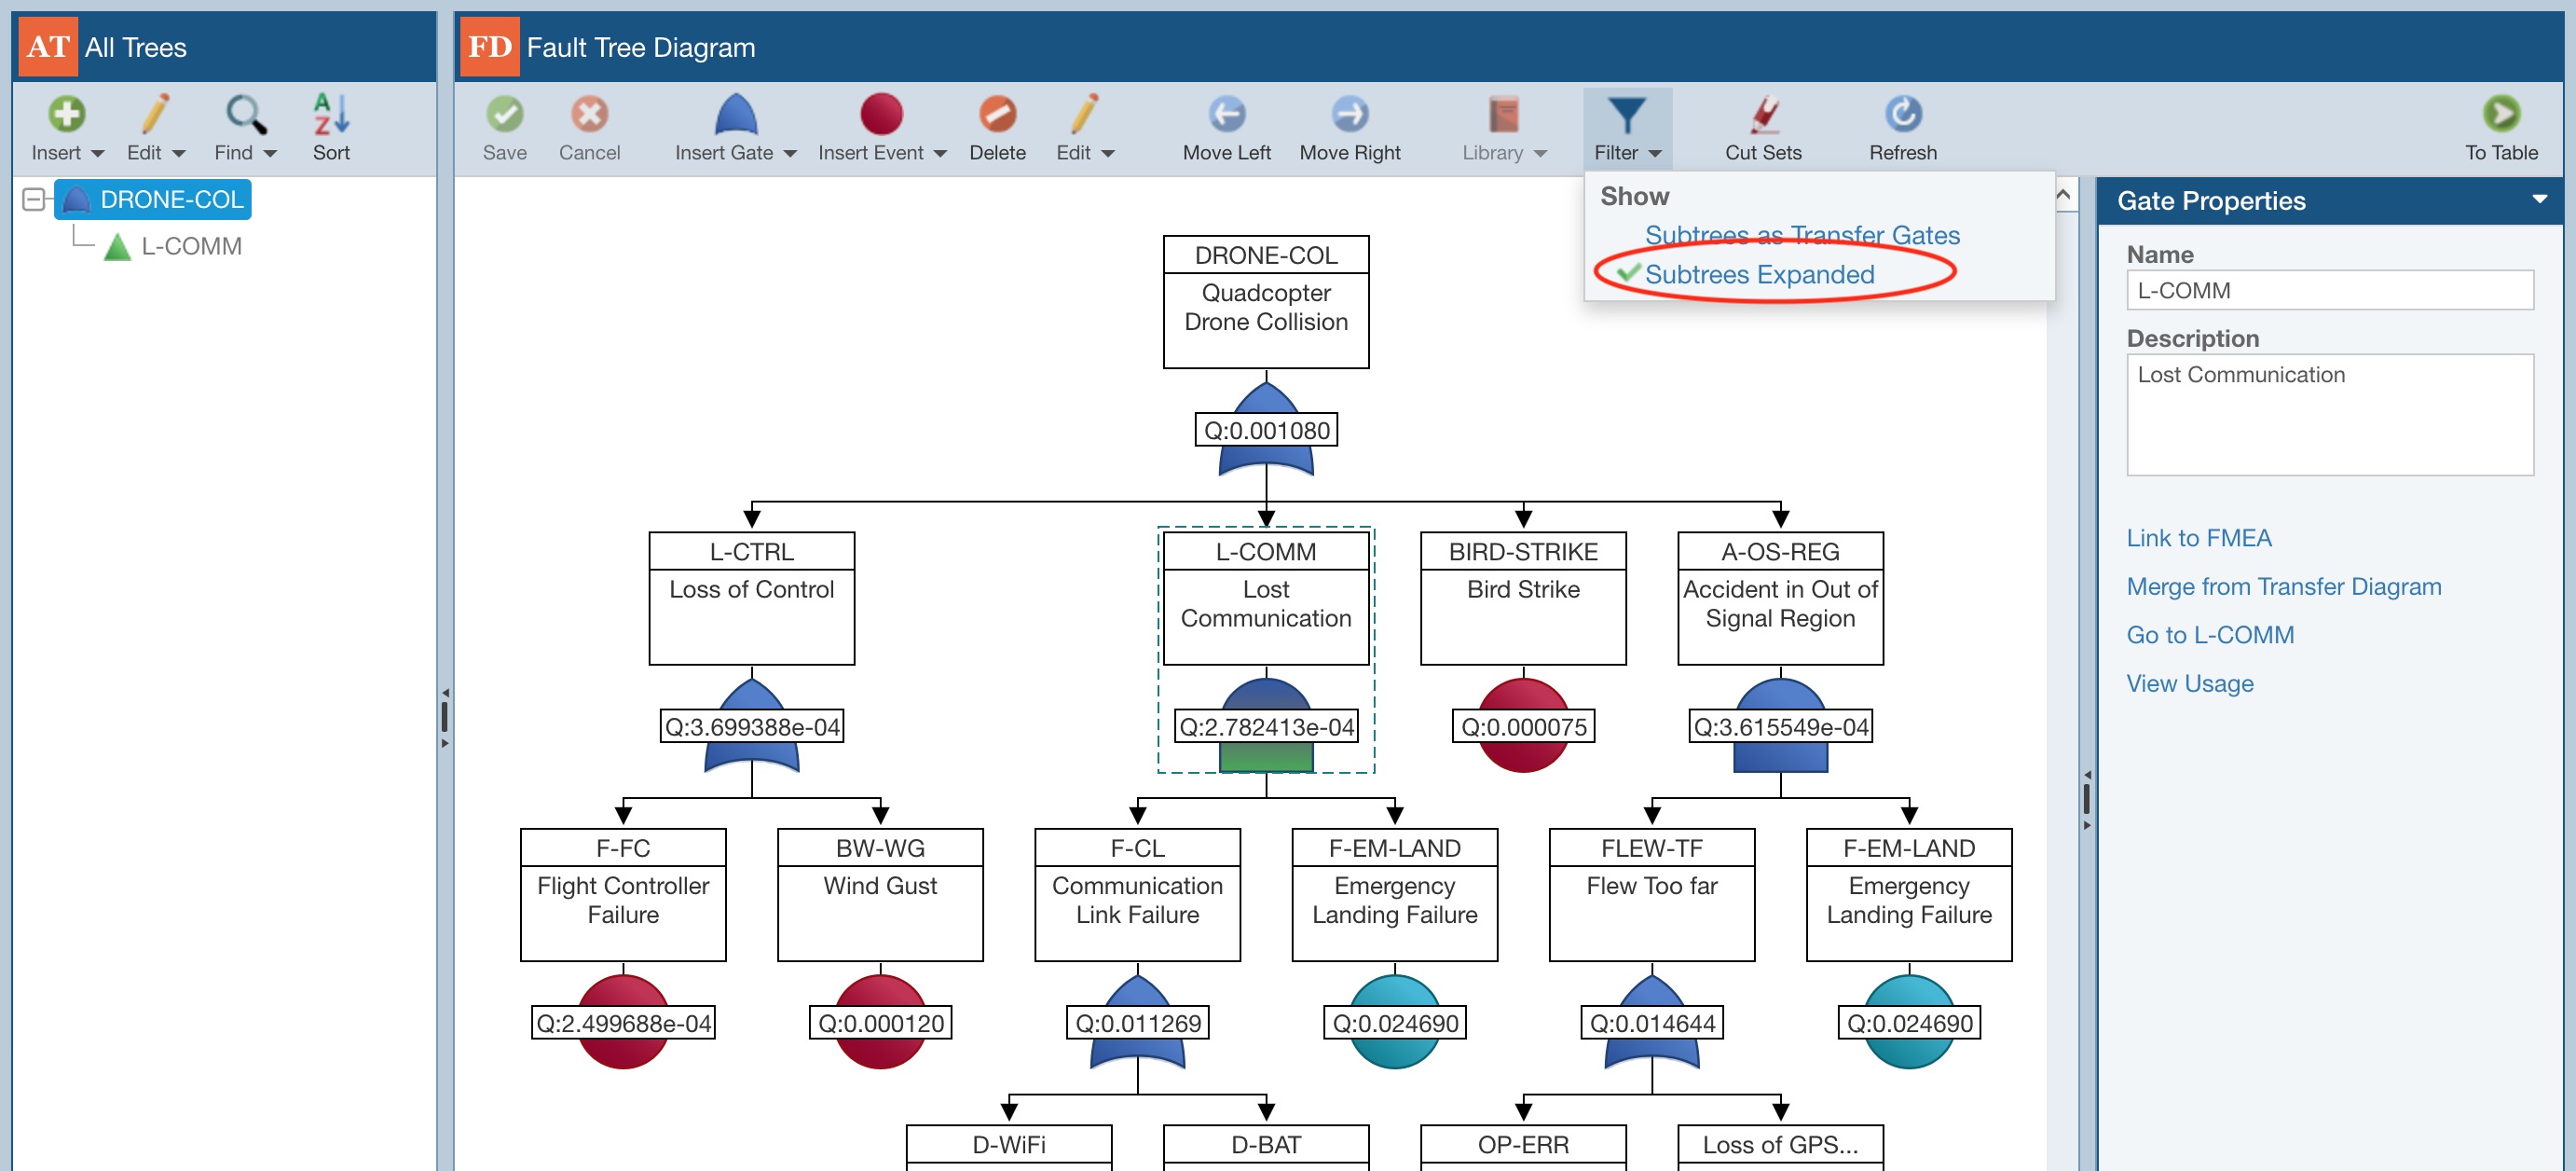
You can toggle back and forth between the Subtrees as Transfer Gates and Subtrees Expanded options.
View Usage
The View Usage link on the Properties pane for any Transfer gate allows you to view and navigate to all instances of a Transfer gate.

Click View Usage. The View Usage dialog appears.
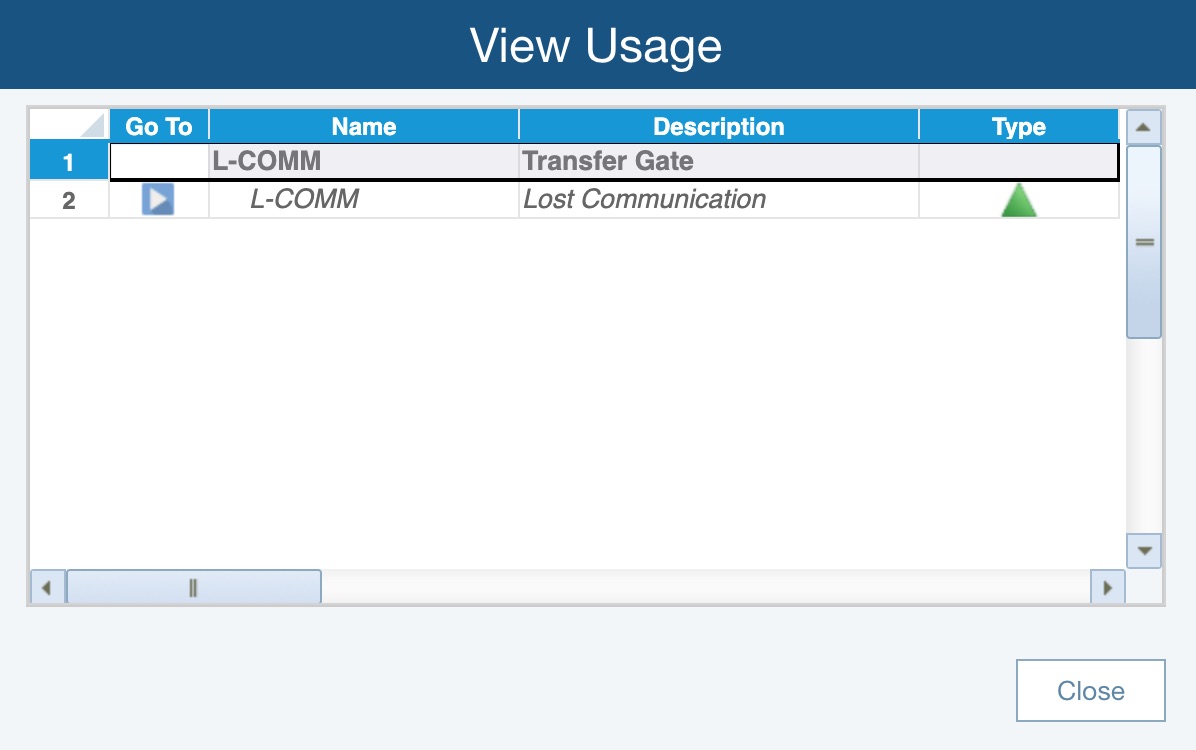
You can review all instances where the Transfer gate is in use and click the arrow in the Go To column to find the specific instance in the Fault Tree.