Creating a Fault Tree Diagram
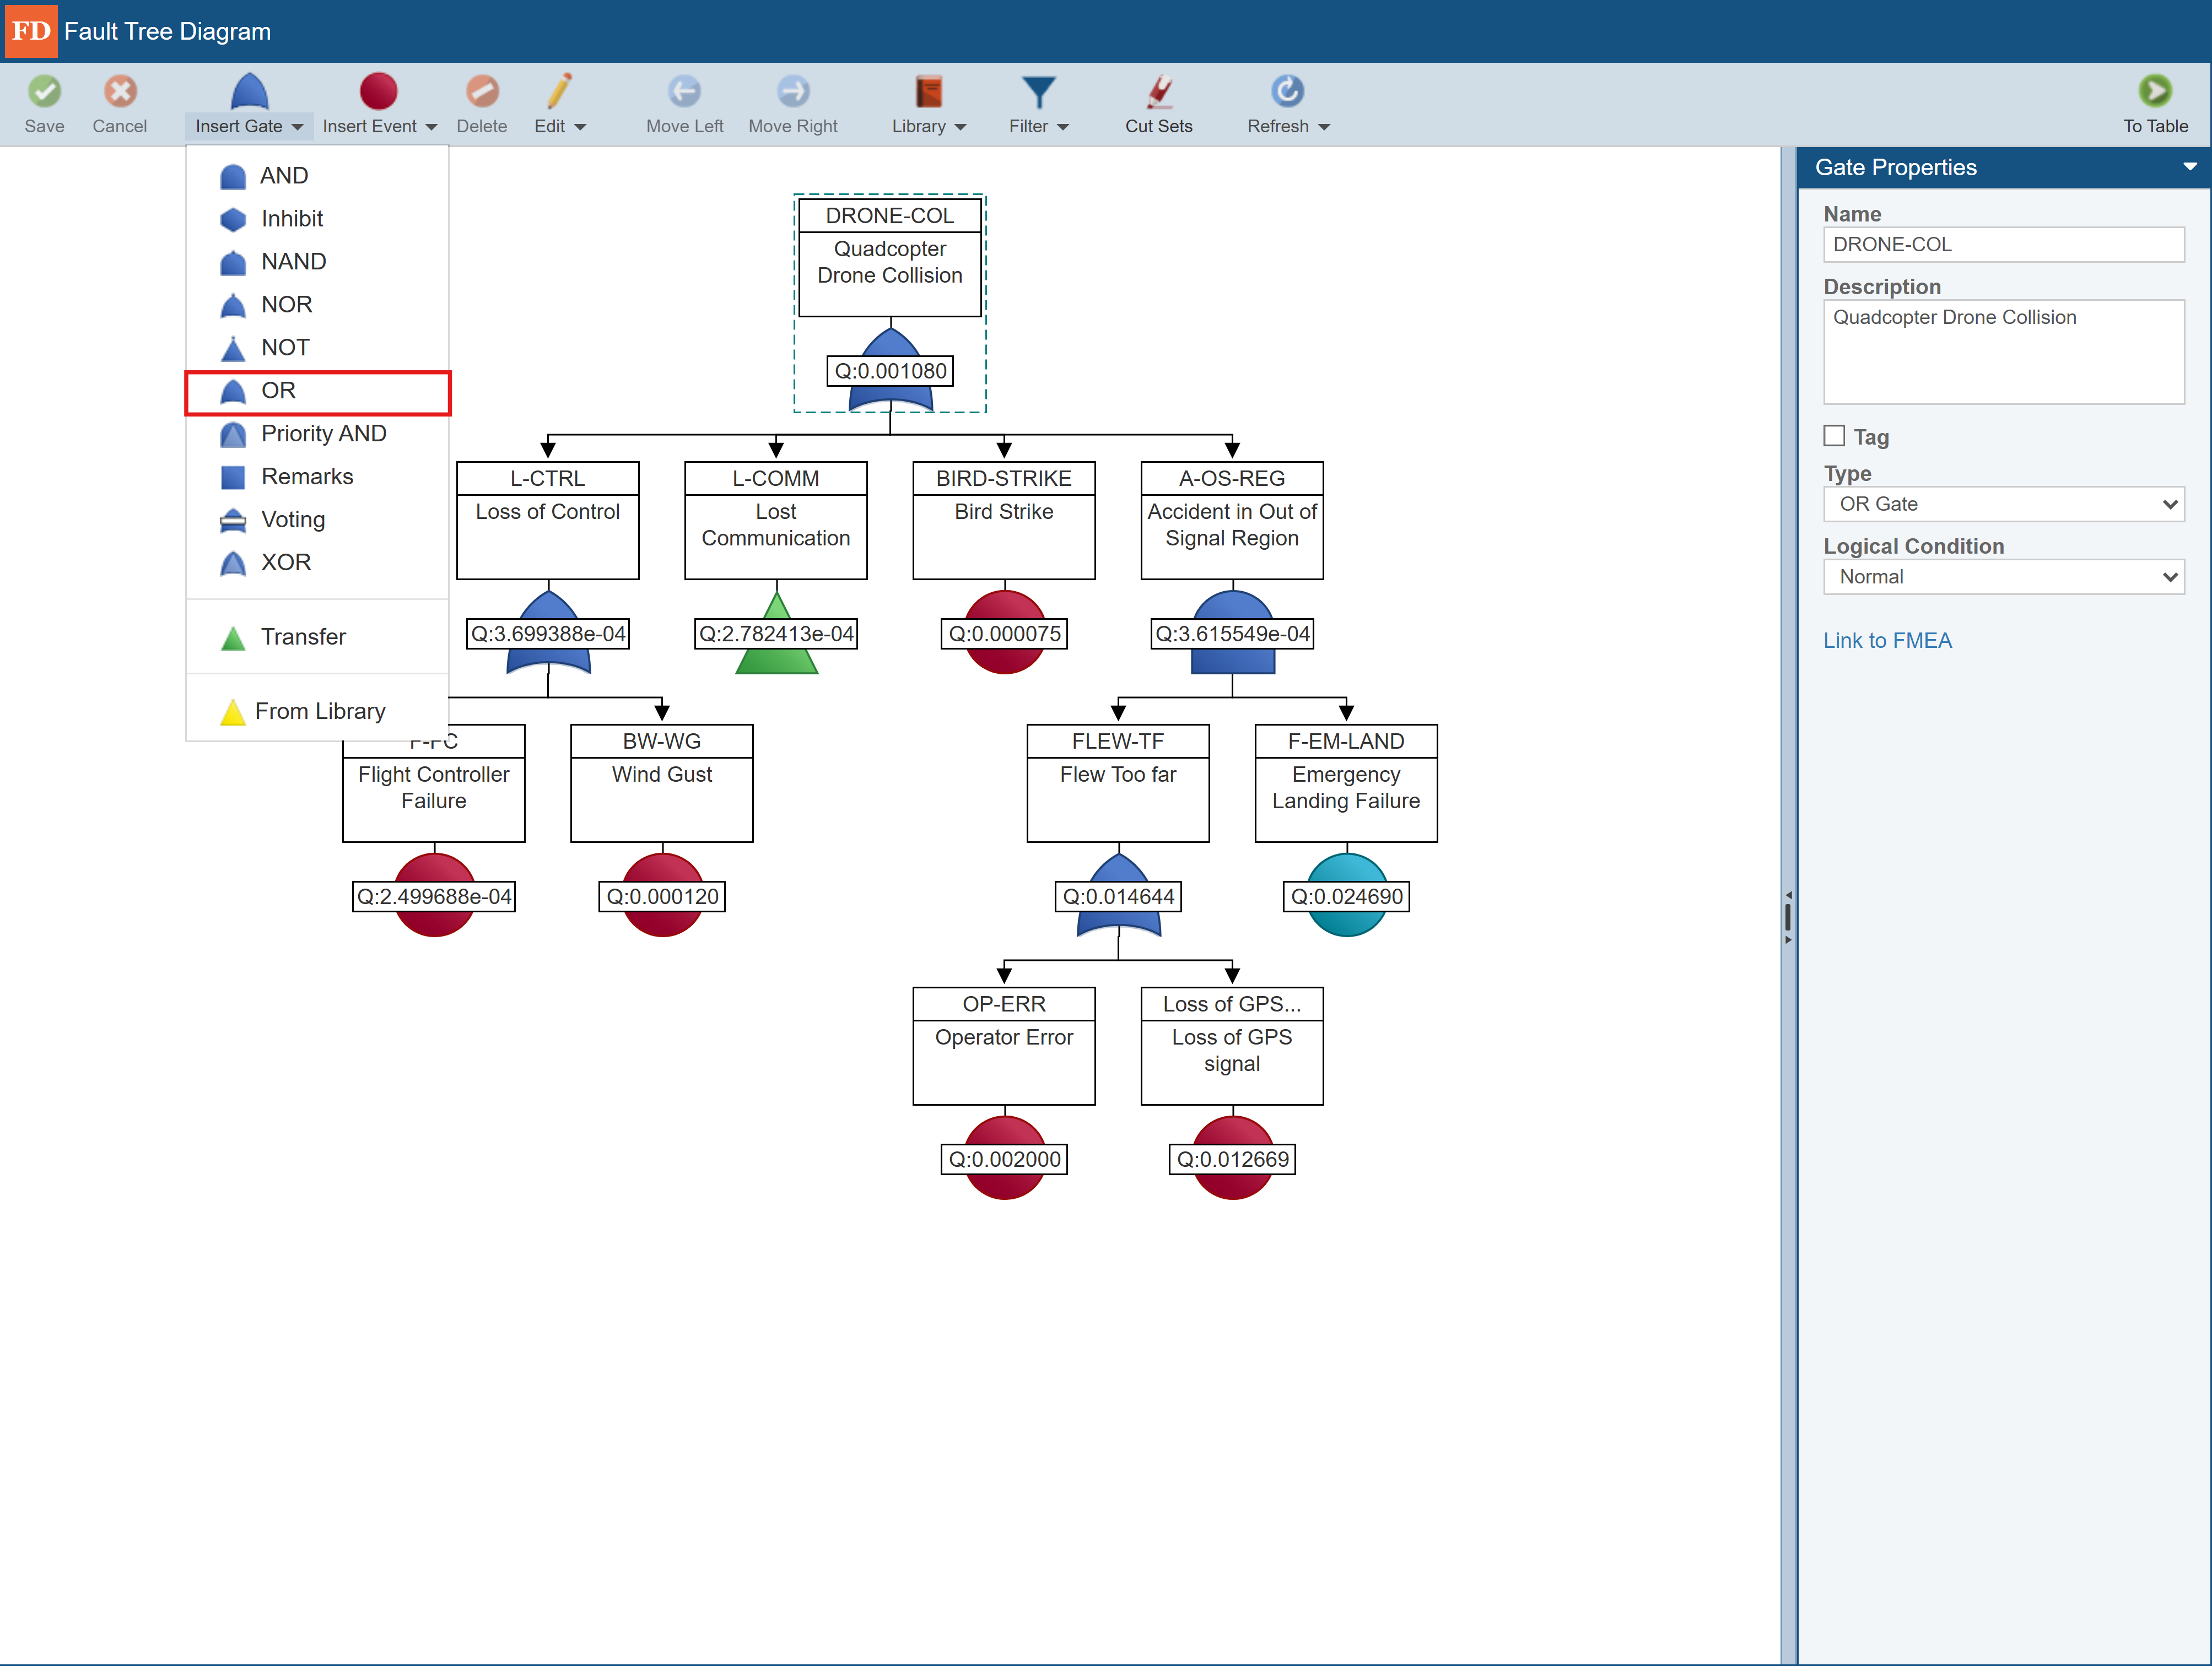
You construct your fault tree by organizing a series of logic gates with their associated inputs, which can be either other gates or events. Events are the lowest level items in your fault tree.
%20-%2011_TopGateSelected.png)
Note that this topic assumes you want to enter new gates and events; however, if you wish to add gates or events from an established Library, review the Event Libraries and Fault Tree Libraries topics of this guide.
To insert a gate, from the toolbar, click the dropdown arrow next to Insert Gate. You will see the list of all possible gate types. To insert an OR gate, for example, click OR. The new gate will be automatically inserted and aligned below the currently selected item in your fault tree diagram.
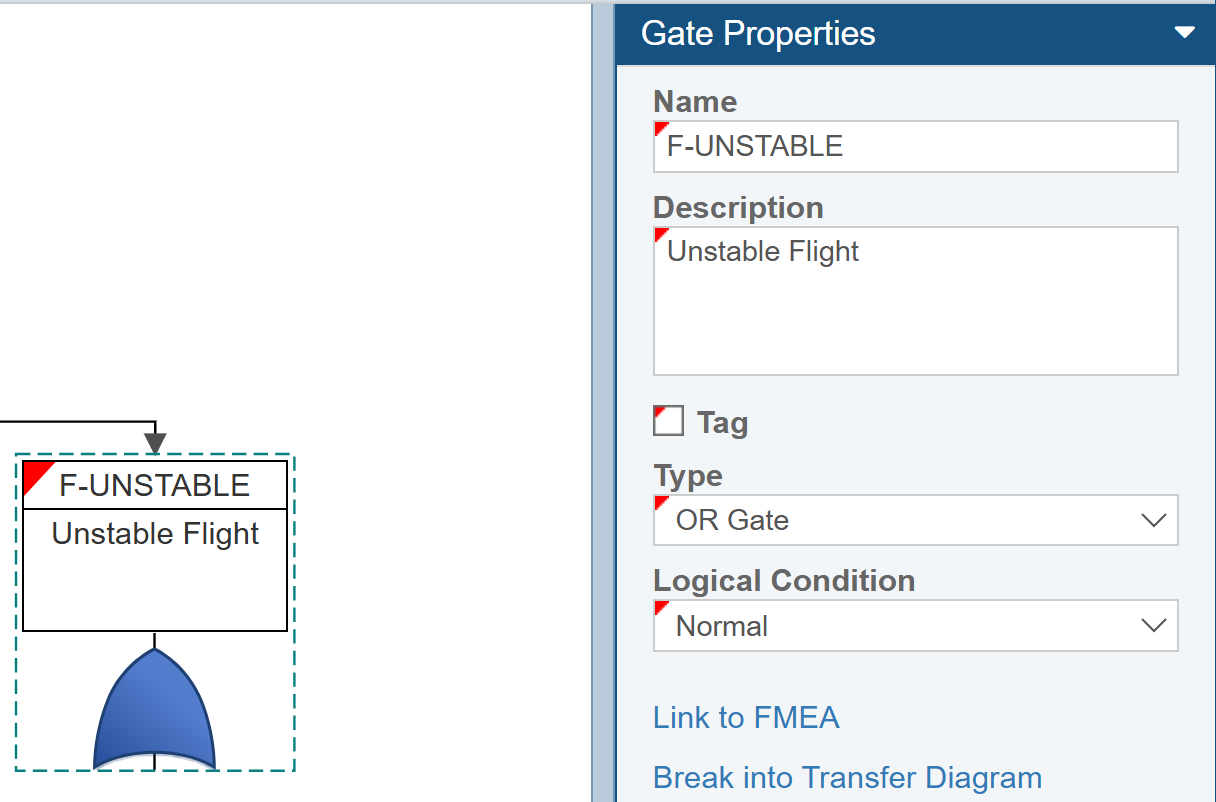
When you are entering gates, Relyence Fault Tree keeps the original gate selected to make it easier to insert multiple gates at one time.
Each item in your diagram has associated properties. To enter the properties of any item in the diagram, click the gate or event to select it, and the properties will appear in the Properties pane.
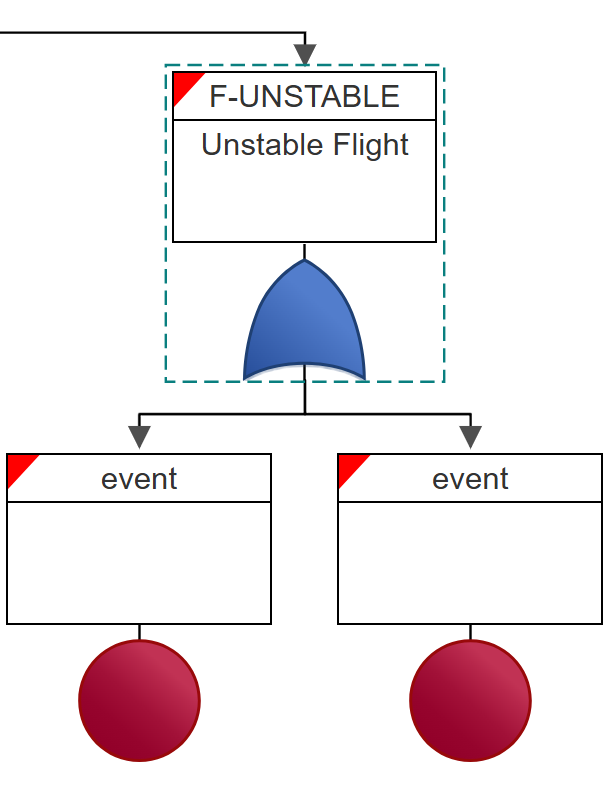
To insert events, use the Insert Event button in the toolbar.

As you use the Insert Gate or Insert Event functions, the image on the toolbar will change to whatever gate or event you last inserted. This allows you to just click the Insert Gate and Insert Event functions to make entering the same gate or event type easier.
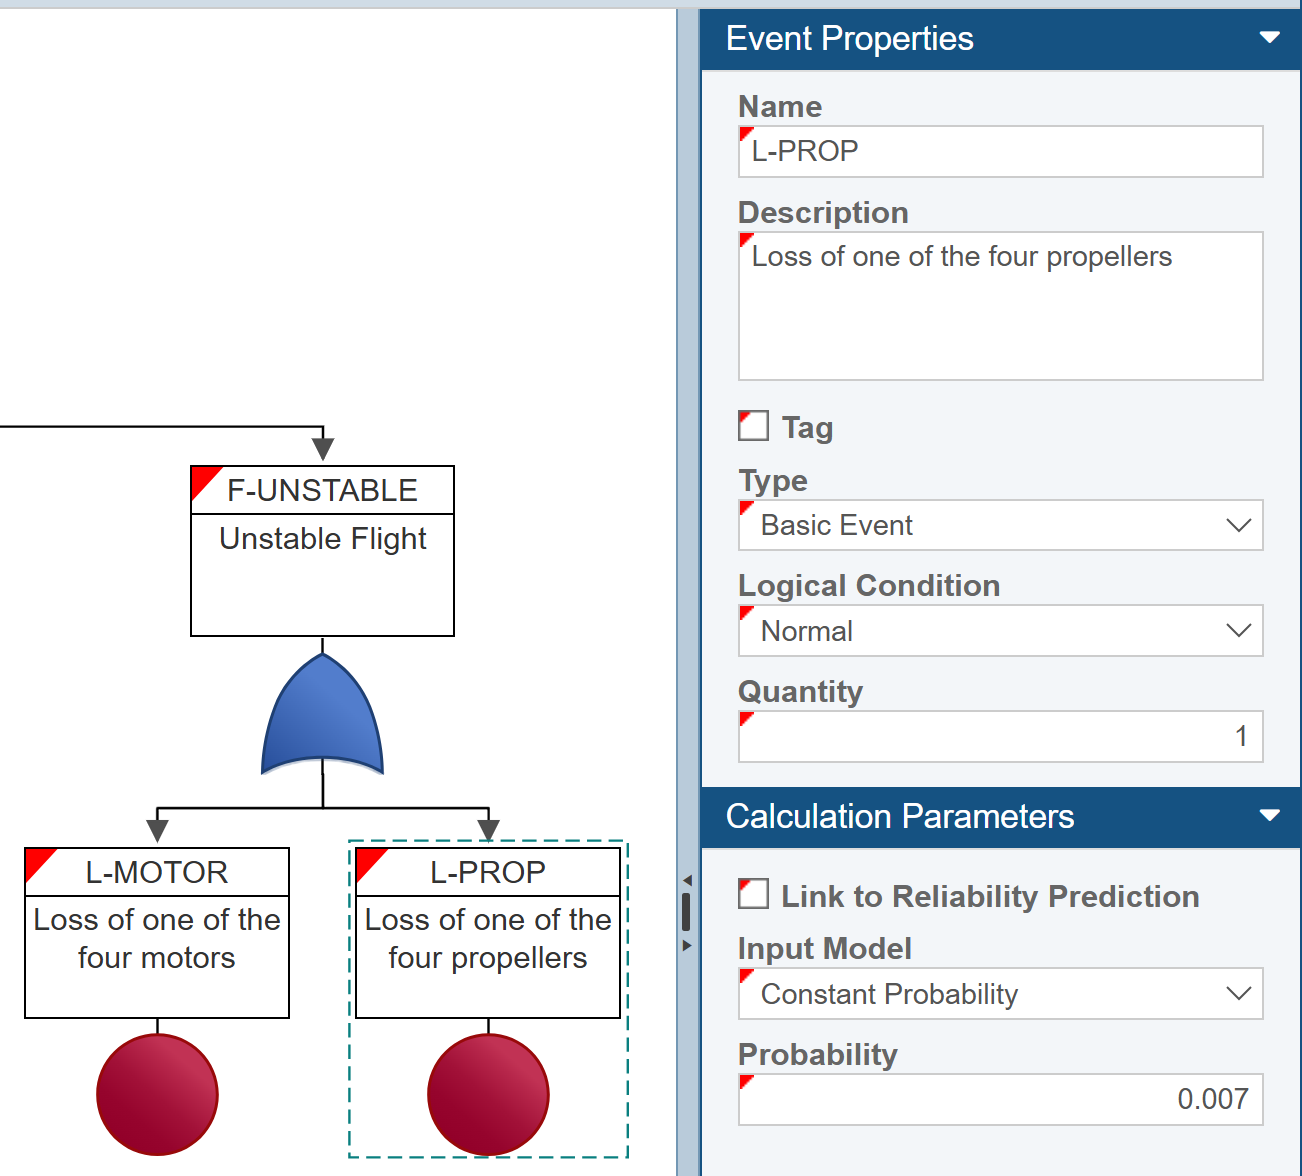
You can click on any event to see its associated properties in the Properties pane.
Using Event Quantity
Note the Quantity field in the Event Properties section. If you wish to account for more than a single event with one Event in the fault tree, increase the Quantity value to an integer greater than 1.
If the Quantity value is greater than 1, the Quantity Type field also appears. For Quantity Type, you can choose from AND, NAND, NOR, OR, and XOR. The Quantity Type selection defines the branch that the Event with Quantity > 1 represents. For example, an Event with Quantity = 3 and Quantity Type = AND represents an AND gate with three event inputs.
Note that the Quantity field is hidden when Logical Condition is not Normal and in cases where the Event belongs to a Disjoint Group (Defining Disjoint Event Groups) or CCF Group (Using CCF (Common Cause Failure) Groups).
Save Event Properties
Now you will need to save changes you made. Notice the red tag marks appear in the upper left corners of the newly entered gate and events to indicate that unsaved data is present. Click Save in the toolbar. The newly entered gate, events, and their associated Properties are saved, and you will notice the red tag marks no longer appear.