Customizing Analysis Categories
Customizable Analysis Categories can be set for Analyses as a way to categorize Analyses based on details such as Manufacturing Plant, Customer Location, Product Line, etc. Analysis Categories can assist with Analysis filtering.
By default, Relyence does not have pre-defined Analysis Categories.
You can customize the Analysis Categories to be one or more multi-select list choices you establish for your Analyses.
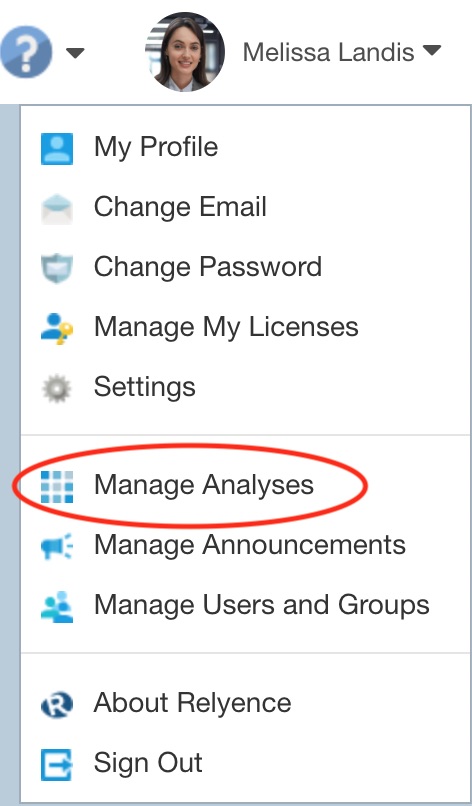
To customize the Analysis Categories, select Manage Analyses from the Account menu dropdown in the upper right of the Relyence header bar.
The Manage Analyses page appears. Click Configure>Analysis Categories from the Sidebar menu.
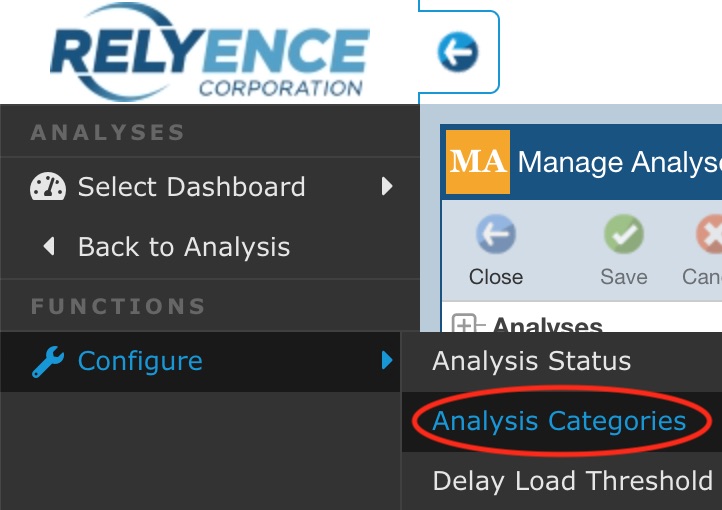
The Configure Analysis Categories pane appears.

Adding Analysis Categories
To add a custom Analysis Category, go to the last (empty) row in the table and click the dropdown arrow in the Field column. You can also click the + in the last (empty) row and the list of available Fields will be displayed.

Then fill in the data accordingly:
Field: The list of available Category fields not already in use will be displayed. Select the desired field from the list to add it.
Control Type: This data is not editable; it is there for informational purposes. By default, all Analysis Category fields are Multi-Select Lists. Lists can be established using the Edit Field button as described below.
List Name: This data is not editable; it shows any List field associated with the selected Analysis Category field.
Column: Use the Column setting to indicate if you want the field to appear in the Left or Right position on the Manage Analyses page or View All dialog. The fields will appear in the order they appear in this list, in the position indicated by the Column setting. For example, if you set every field to Left, the fields will all appear in one column on the left side. If you want fields to appear in both columns, alternate the use of Left and Right and the fields will appear in a two-column layout.
Tooltip: The tooltip text will appear when you hover your mouse over the Analysis Category field. Tooltips can be used to provide helpful hints to users about the data expected in this field.
Customizing the Analysis Category Name and Establishing Analysis Category Lists
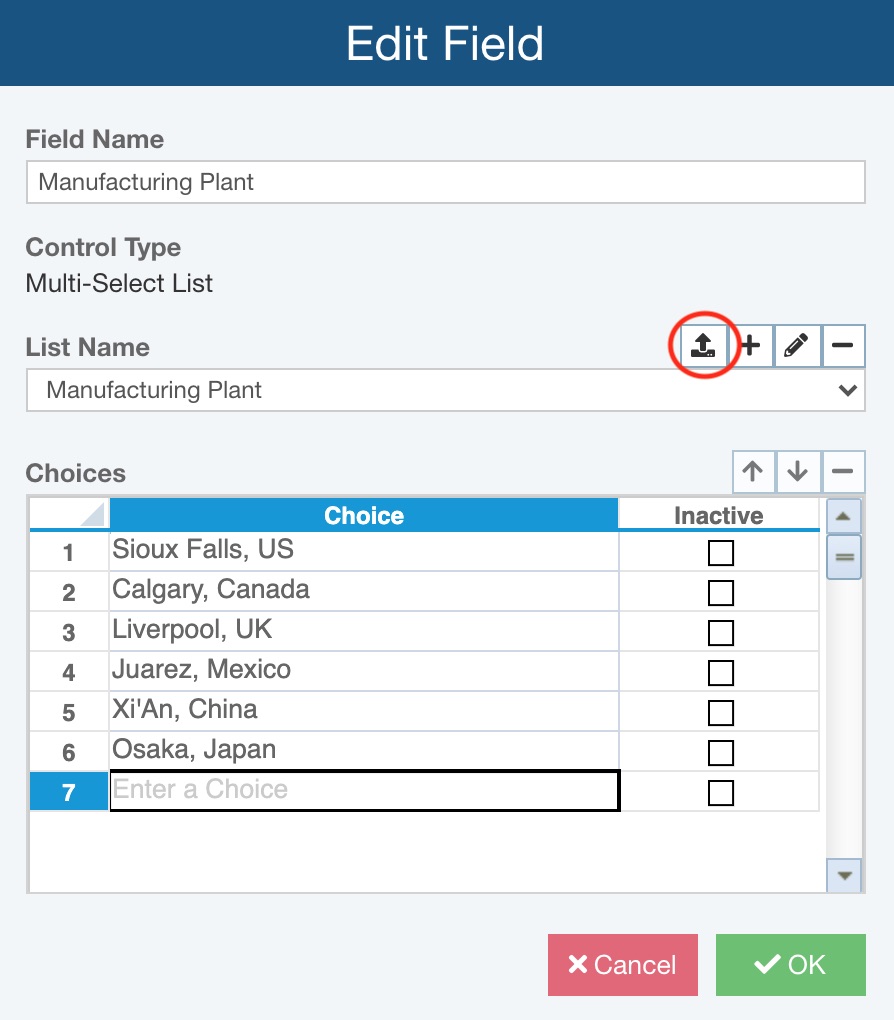
To customize any Analysis Category field, select the row in the table and in the toolbar, click the Edit Field button.

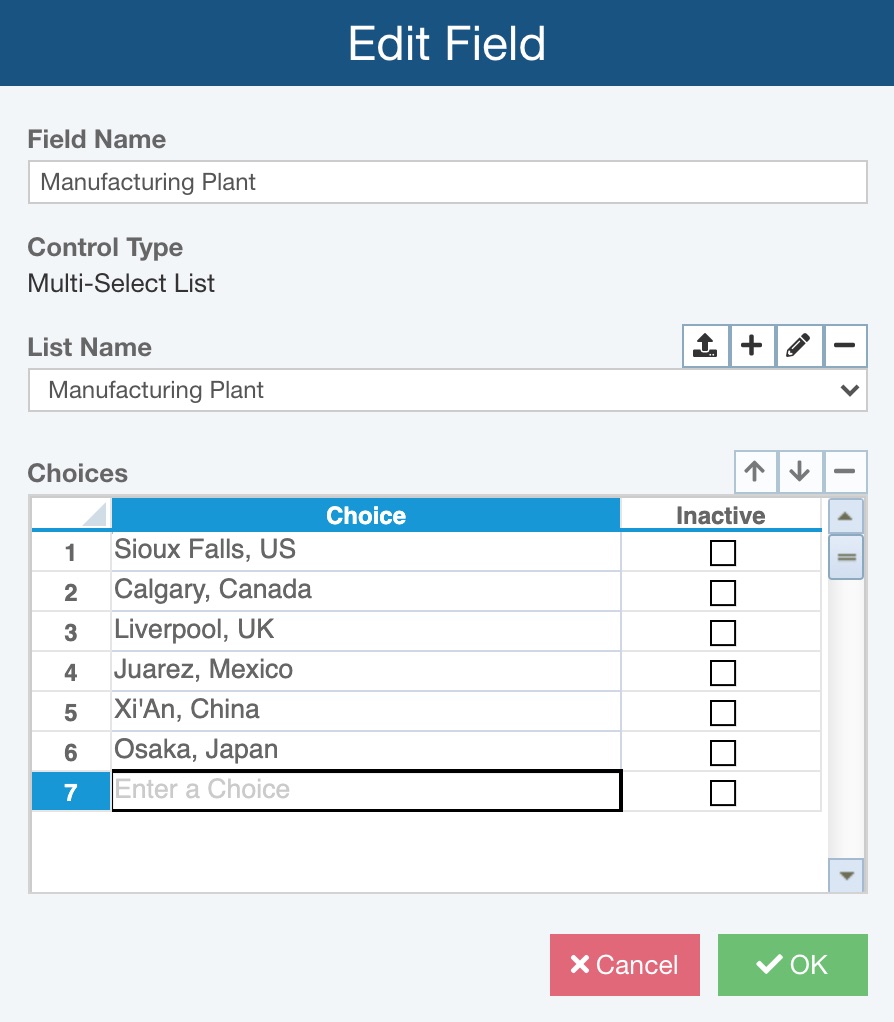
The Edit Field dialog appears.
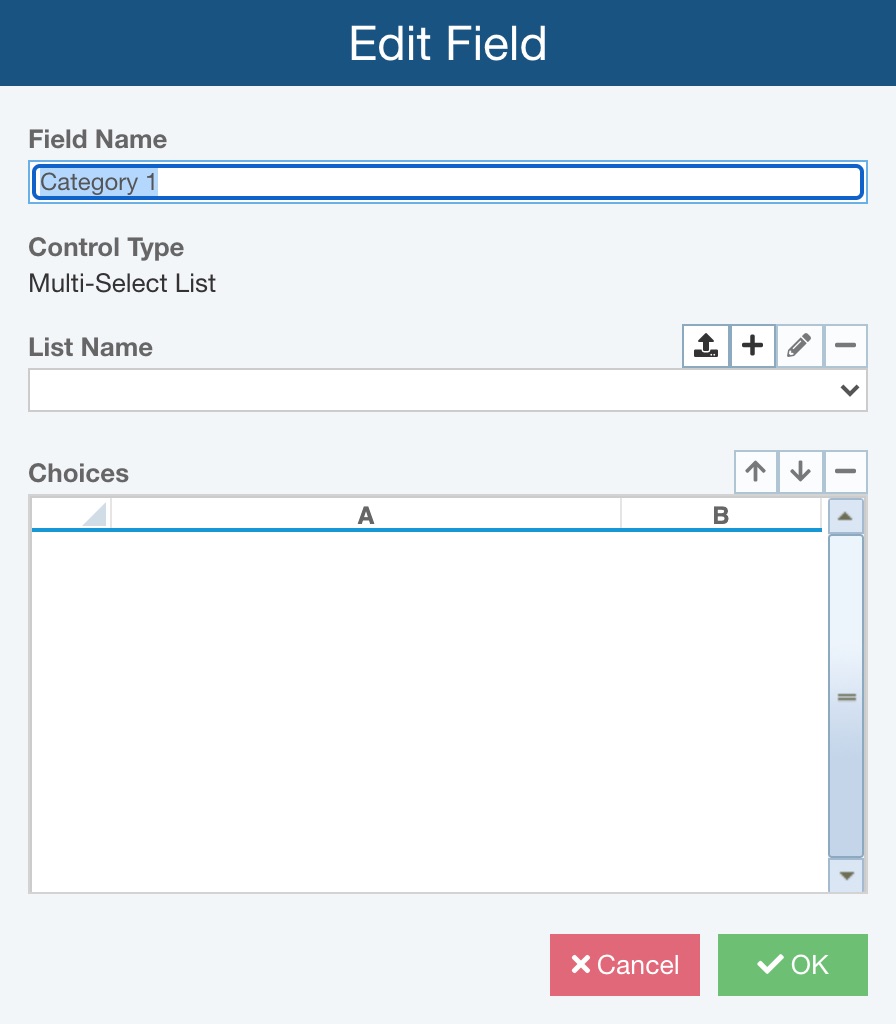
The Edit Field dialog allows you to customize the Analysis Category Field Name and enter the List items.
To customize the Analysis Category, enter your preferred text in the Field Name field.
The List Name enables you to select and manage your Lists.
You can use the Add (+), Edit (pencil), and Delete (-) buttons by List Name to manage your lists. You can also import an Excel file of list items using the Import (up arrow) button. See below for details on importing lists.
In Choices, enter the items for your new List. Use the Move Up (arrow up), Move Down (arrow down), and Delete (-) buttons by Choices to manage the items in the List.
Click OK to save your new List.
Your List will appear for the custom Analysis Category field.
Importing Lists
You also have the ability to import your own Lists using an Excel file. To import your Lists, click the Import button on the Edit Field dialog.
The Import Lists dialog appears.
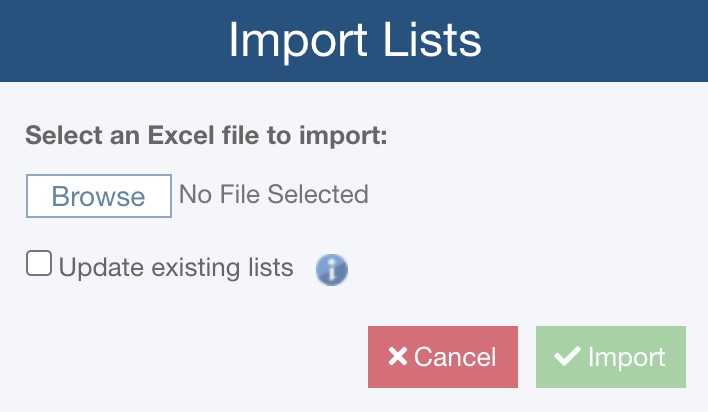
Click Browse to select the Excel file to import. If you want existing Lists to be overwritten with data from the import file, select Update existing lists. Otherwise, duplicate Lists found in the import file will be ignored and your existing Lists will remain intact.
Click Import to import your Lists. When the import is complete, the Import Complete dialog appears with status about the import. You can also review the log file if you desire. Click Close to close the dialog.
The format for the importable Excel Lists file is simply two columns of ListName and ListItem. You can include as many Lists as you want in the import file.

Once imported, all the Lists will be available in the List Name dropdown choice list. Select the List to use for this data field using the dropdown choice list.
Click the following link if you would like to download the sample Lists import file for Analysis Categories:
Analysis Categories Lists Example
Click OK when you are done to save your preferences.
Repeat the process for each custom Analysis Category required.

When you have completed designing Analysis Category fields, click Save to save your changes, or click Save and Close to save your changes, close the Manage Analysis Categories pane, and return to the Manage Analyses page.
Click to select the Categories tab in the right-most pane to review the Analysis Categories for the selected item.
Note the custom Analysis Categories in the right-most Manage Analyses Settings pane, on the Categories tab.
Setting Analysis Categories
Once you have customized the Analysis Categories you need, you can assign the category details to each Analysis within the Manage Analyses pane or via the Analysis Properties dialog.
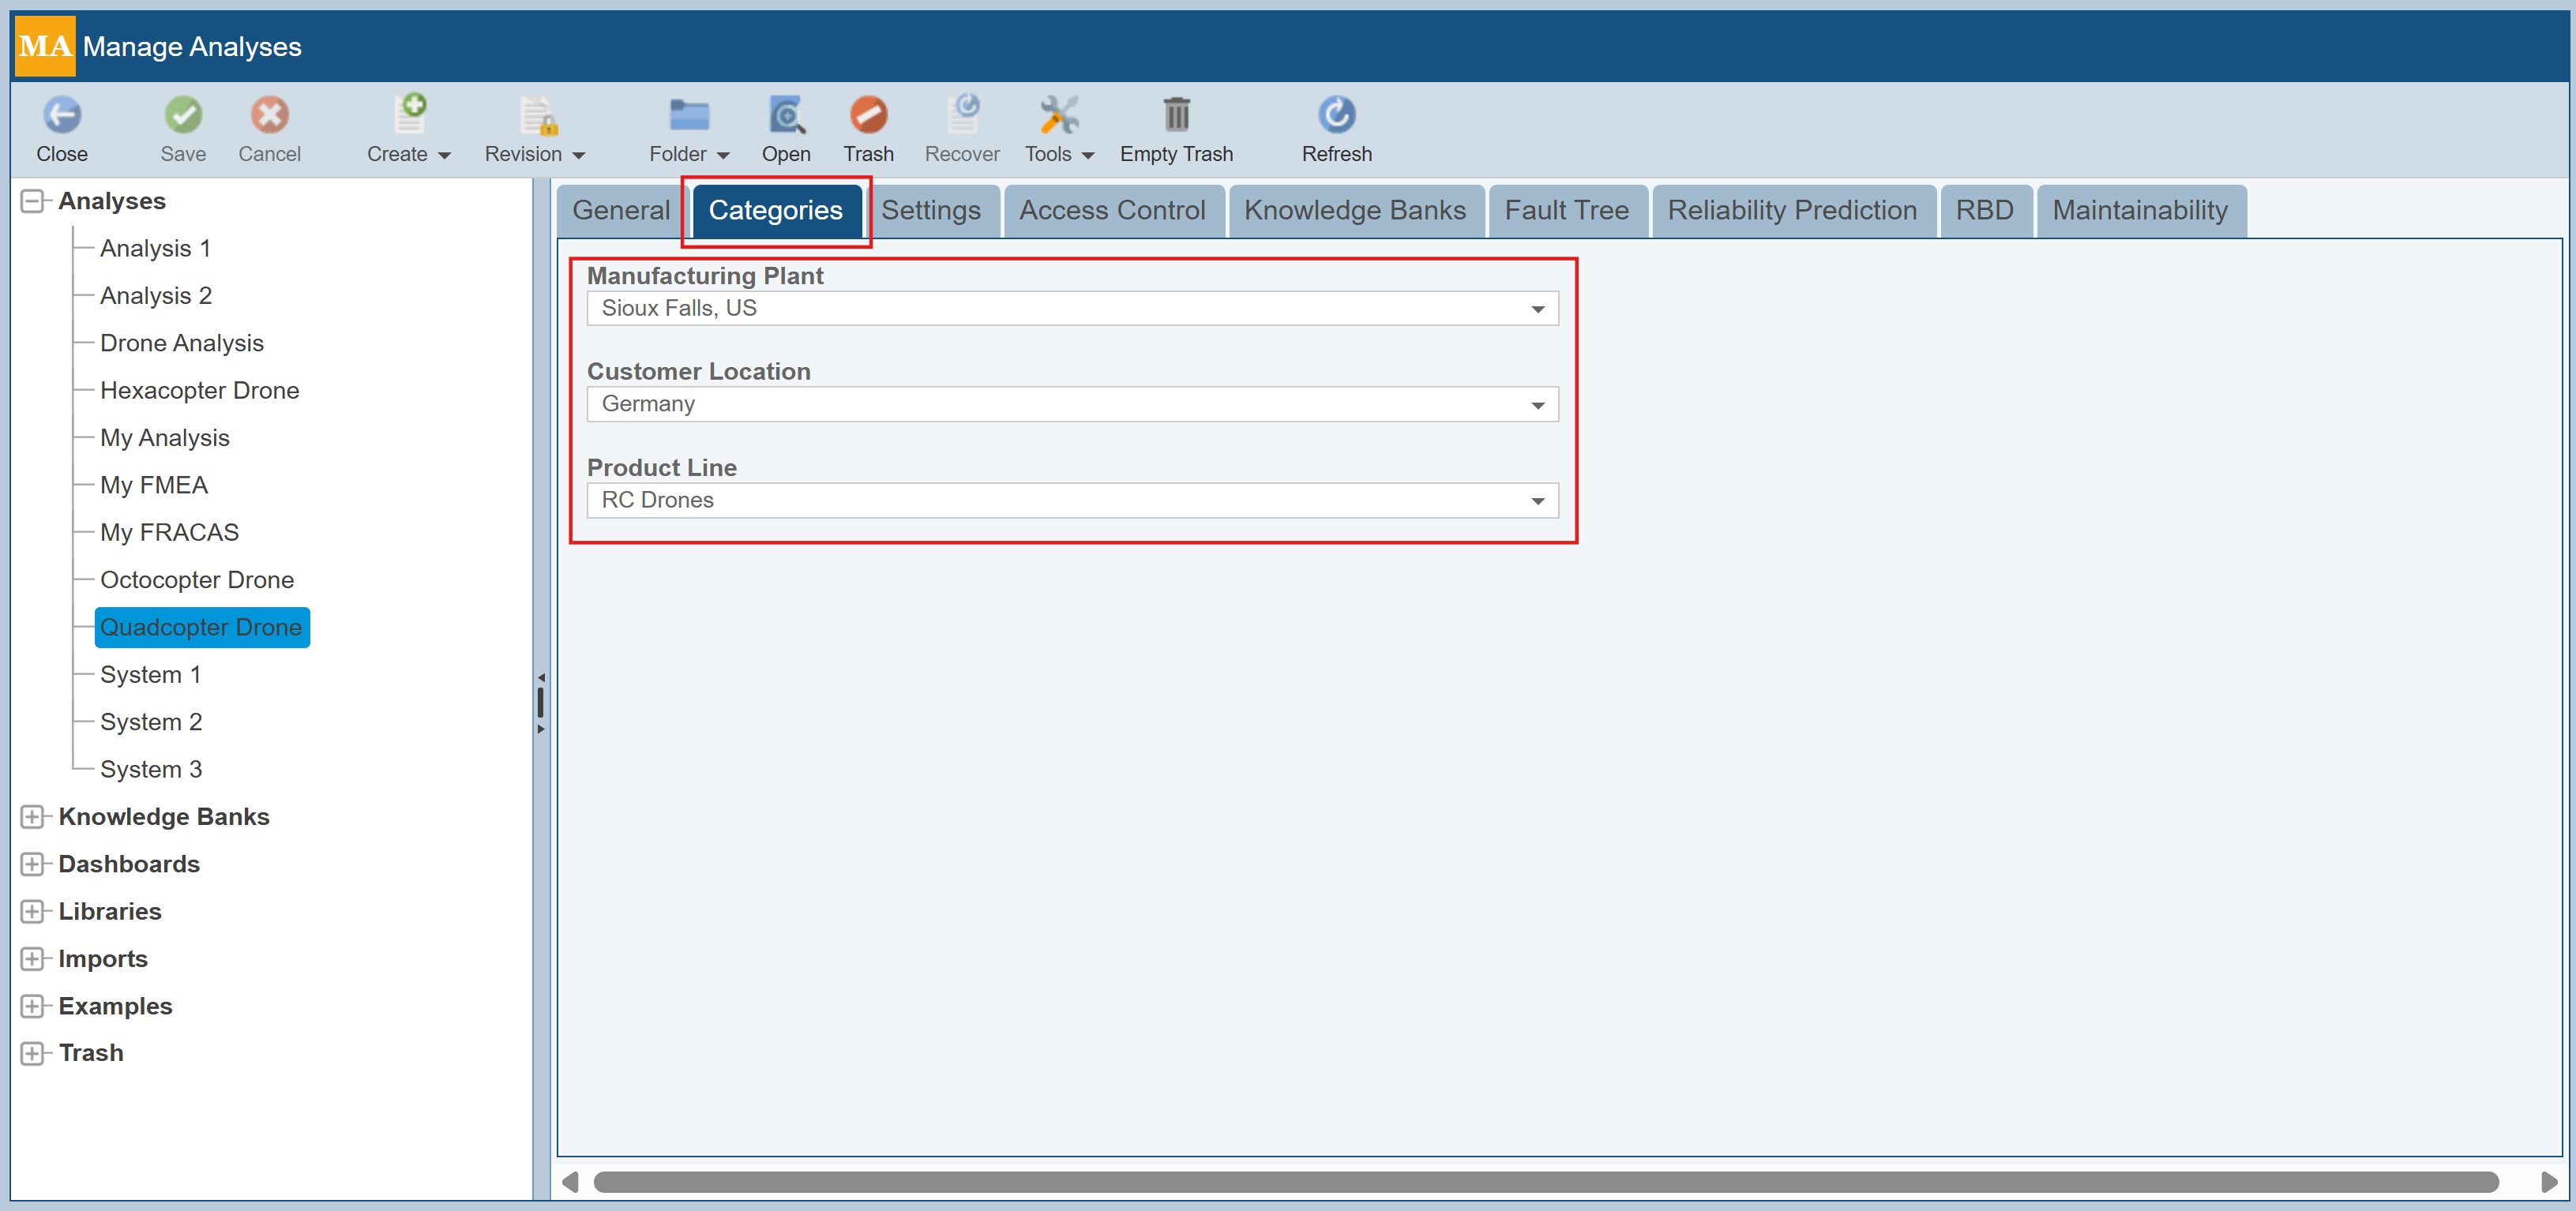
Setting Analysis Categories in the Manage Analyses Pane
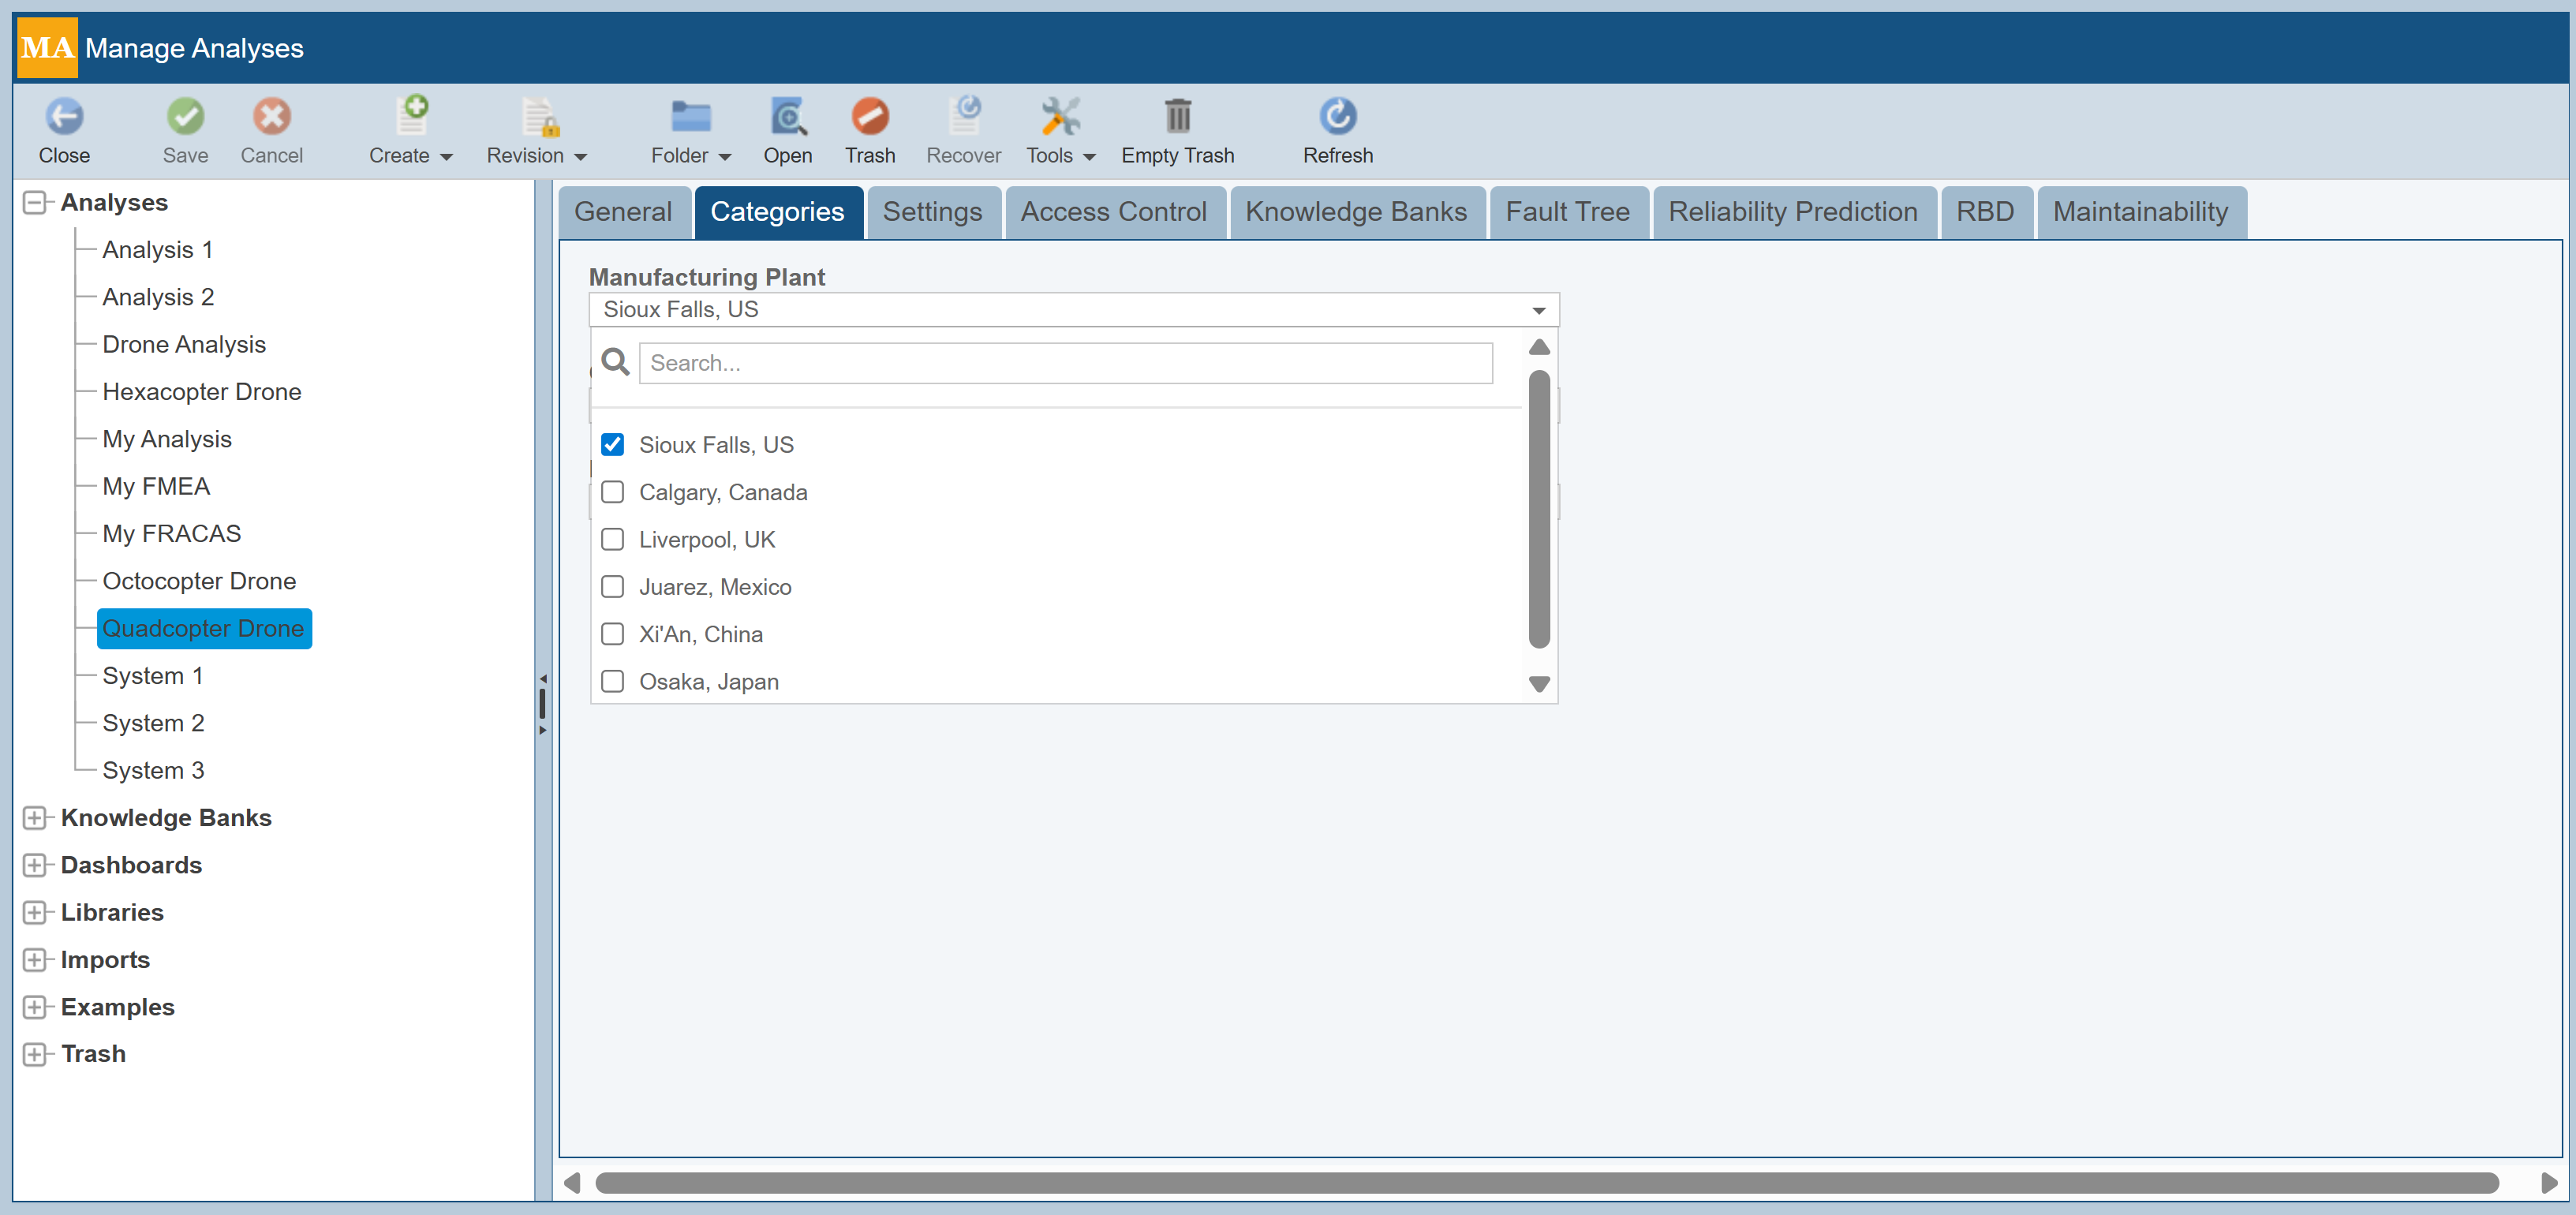
In the Manage Analyses pane, simply select the Analysis for which you want to assign Analysis Category details, select the Categories tab and then assign appropriate values for each Analysis Category.
Since the control used for each custom Category is a multi-select list, it shows as a dropdown with checkboxes so that multiple items can be selected for each field.
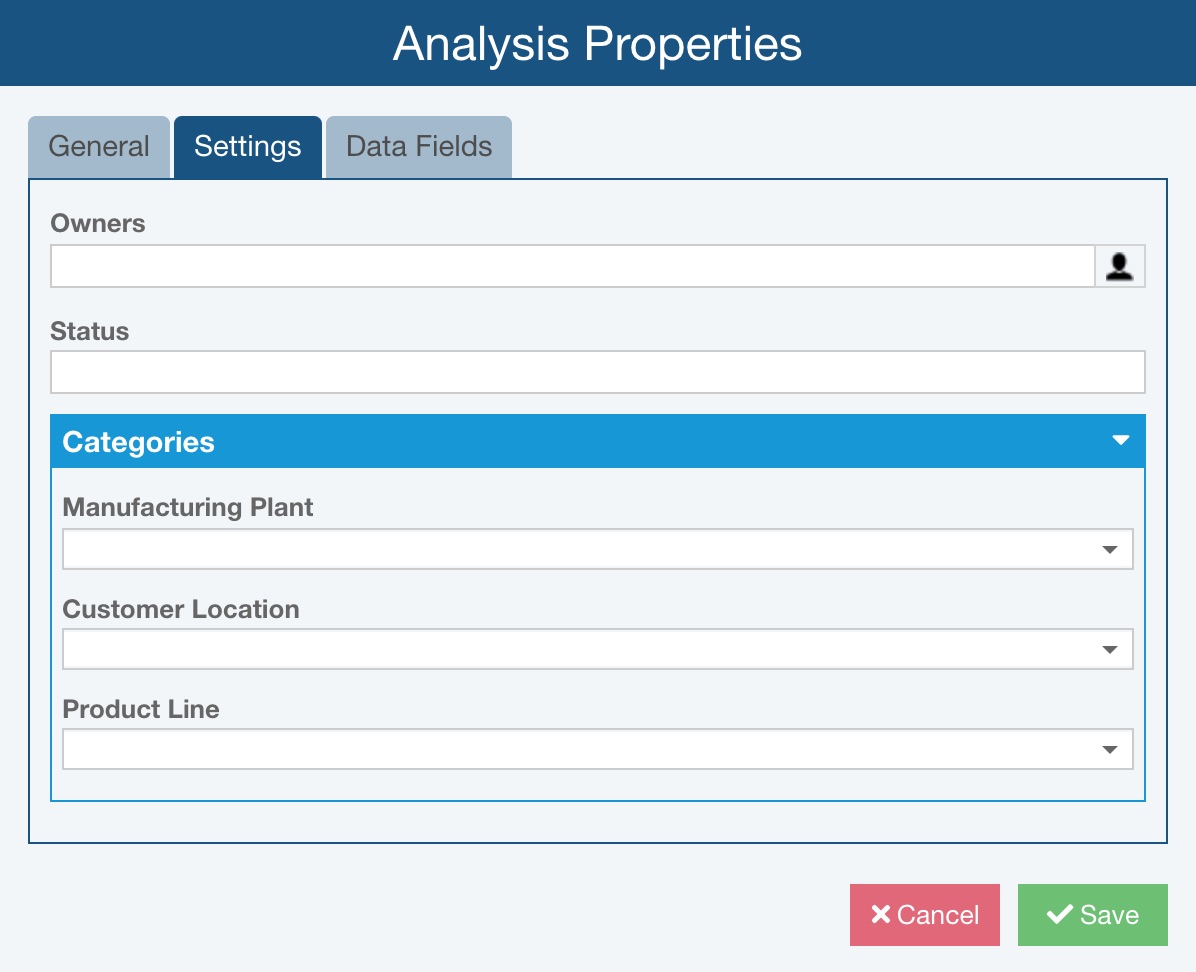
Setting Analysis Categories in the Analysis Properties
Open the Analysis for which you want to set the Analysis Category values. From the Analysis Selector in the Sidebar, choose Analysis Properties.
The Analysis Properties dialog appears. Click the Settings tab and if needed, click the arrow to expand the Categories section.
For any Category, click the arrow to pull down the available choices.
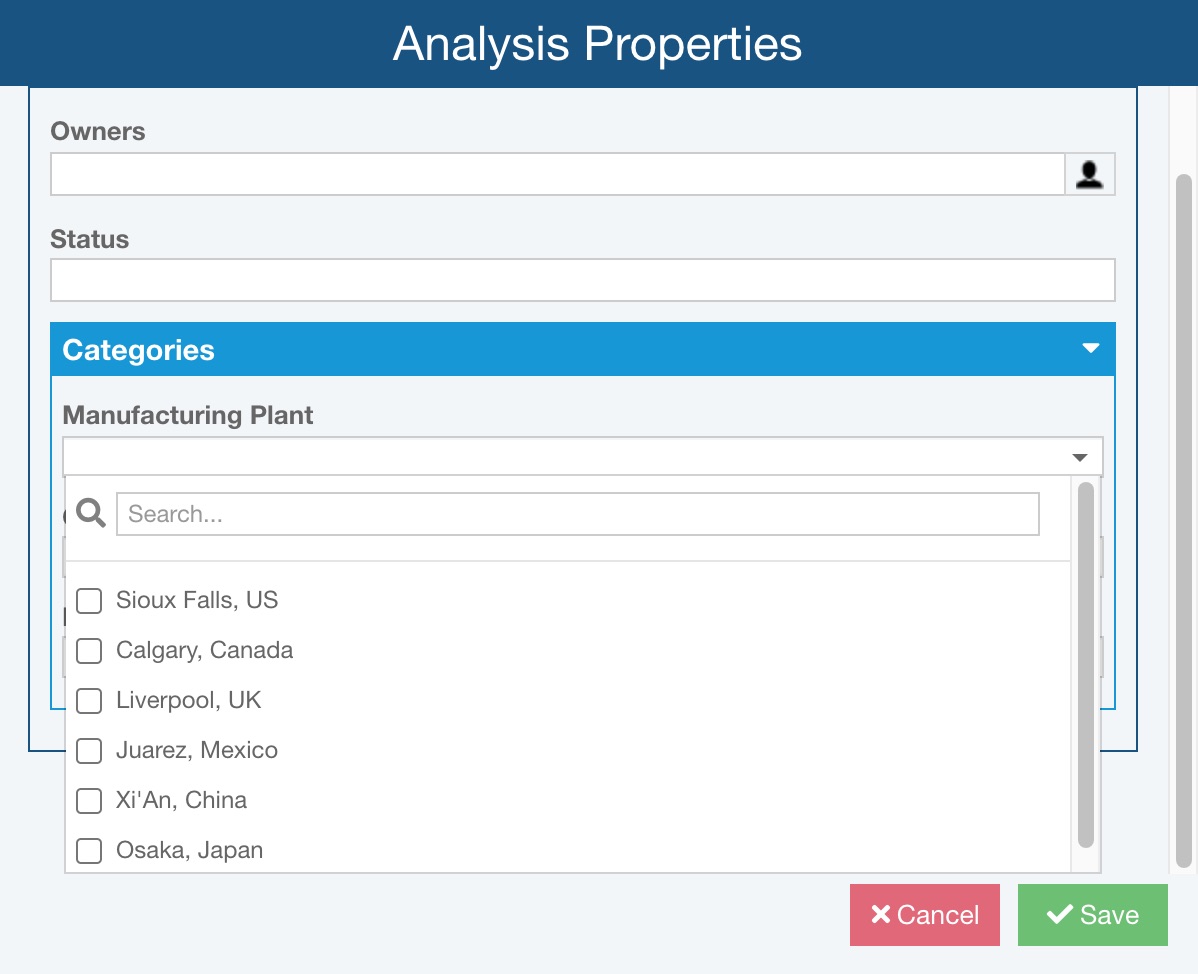
Use the Search option to find desired category selections, if needed.
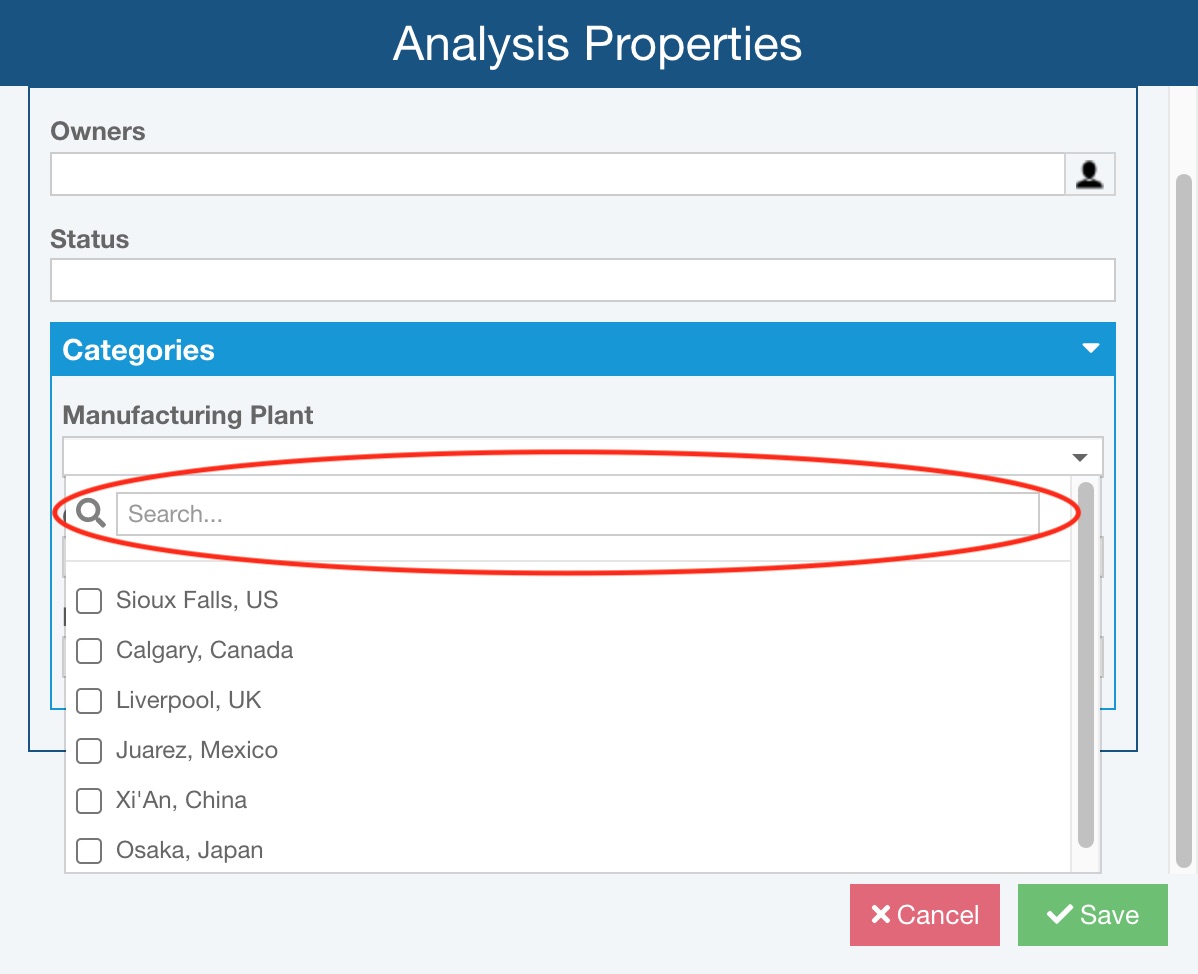
Click the checkbox for any applicable options.
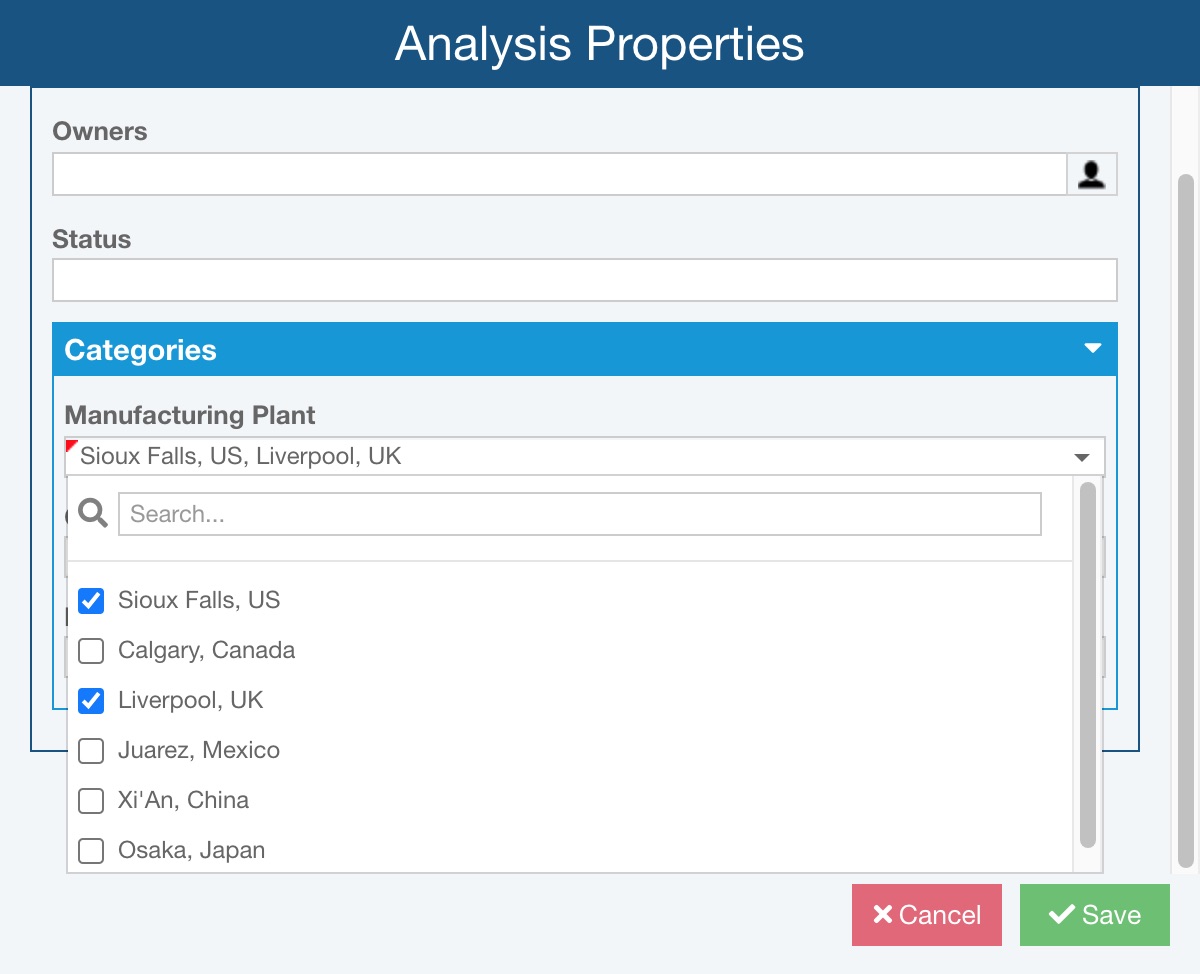
Repeat for all Analysis Categories.
Click Save to save the Analysis Properties.
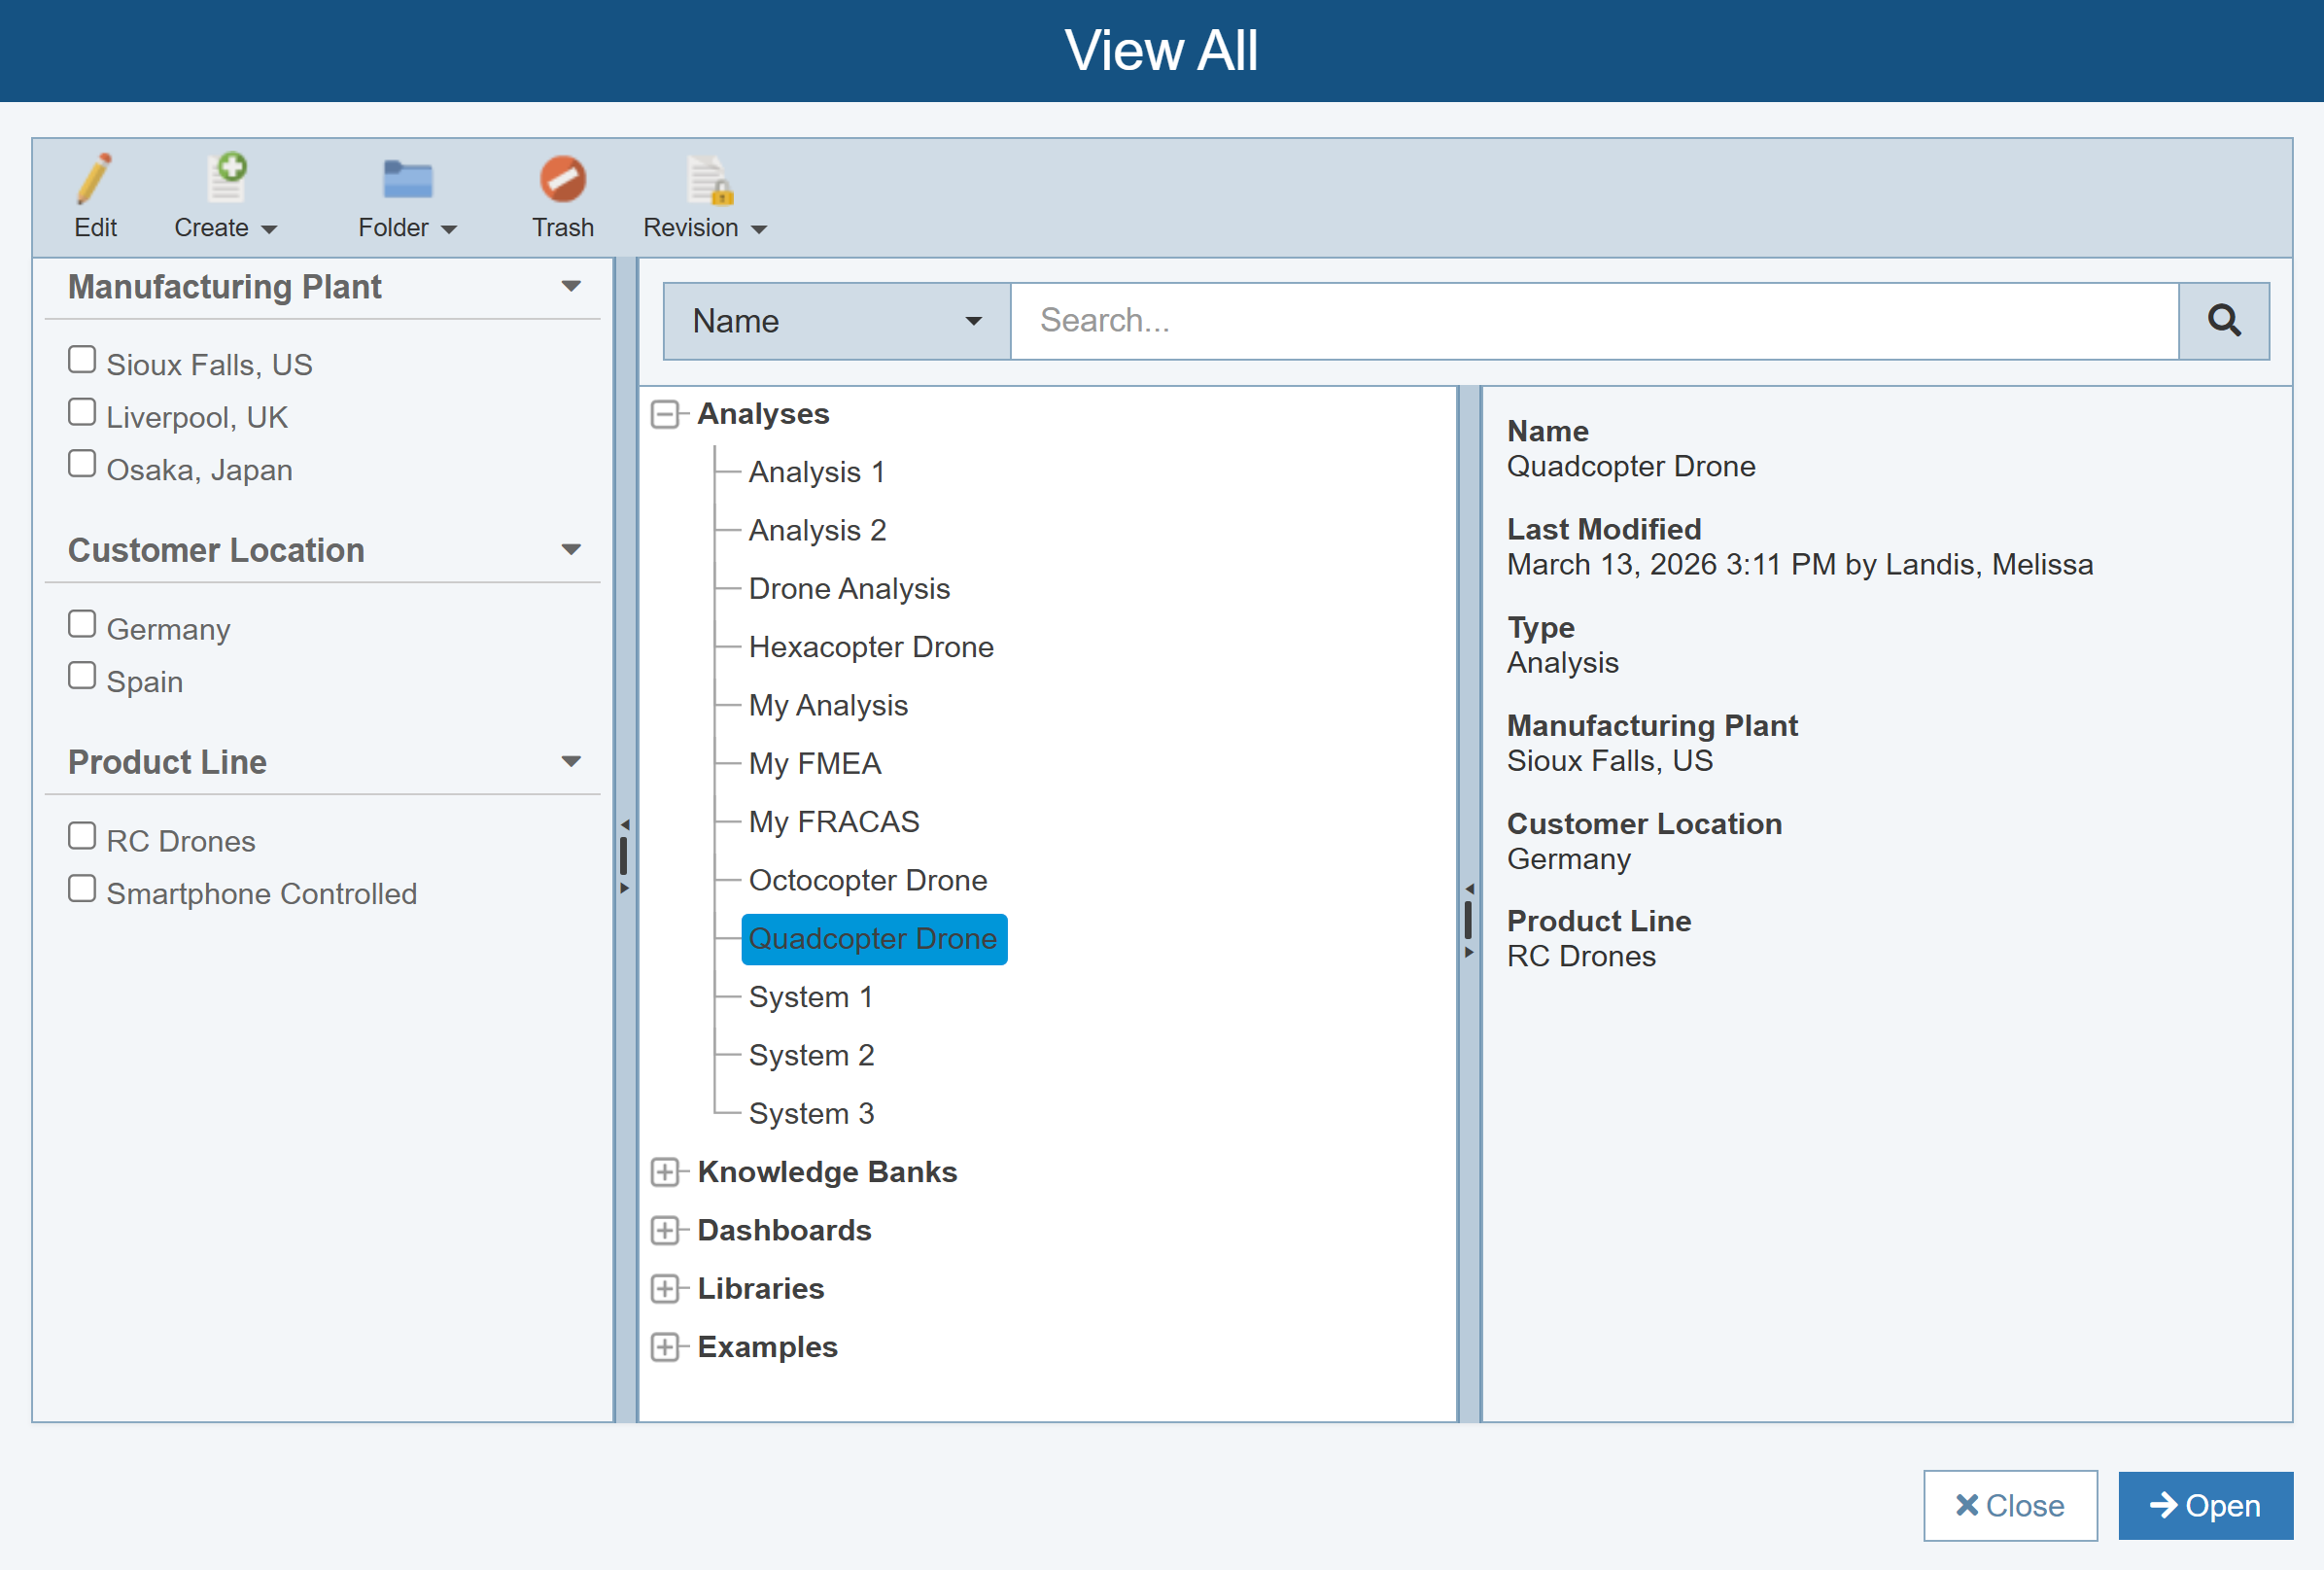
Using Analysis Categories on the View All Dialog
Once Analysis Categories are established for each Analysis, you can use them to help find Analyses that meet Category criteria on the View All dialog.
When Analysis Categories are defined, the View All dialog displays an extra pane on the left, with the available Analysis Categories. Without any Analysis Category details checked, all Analyses are displayed.
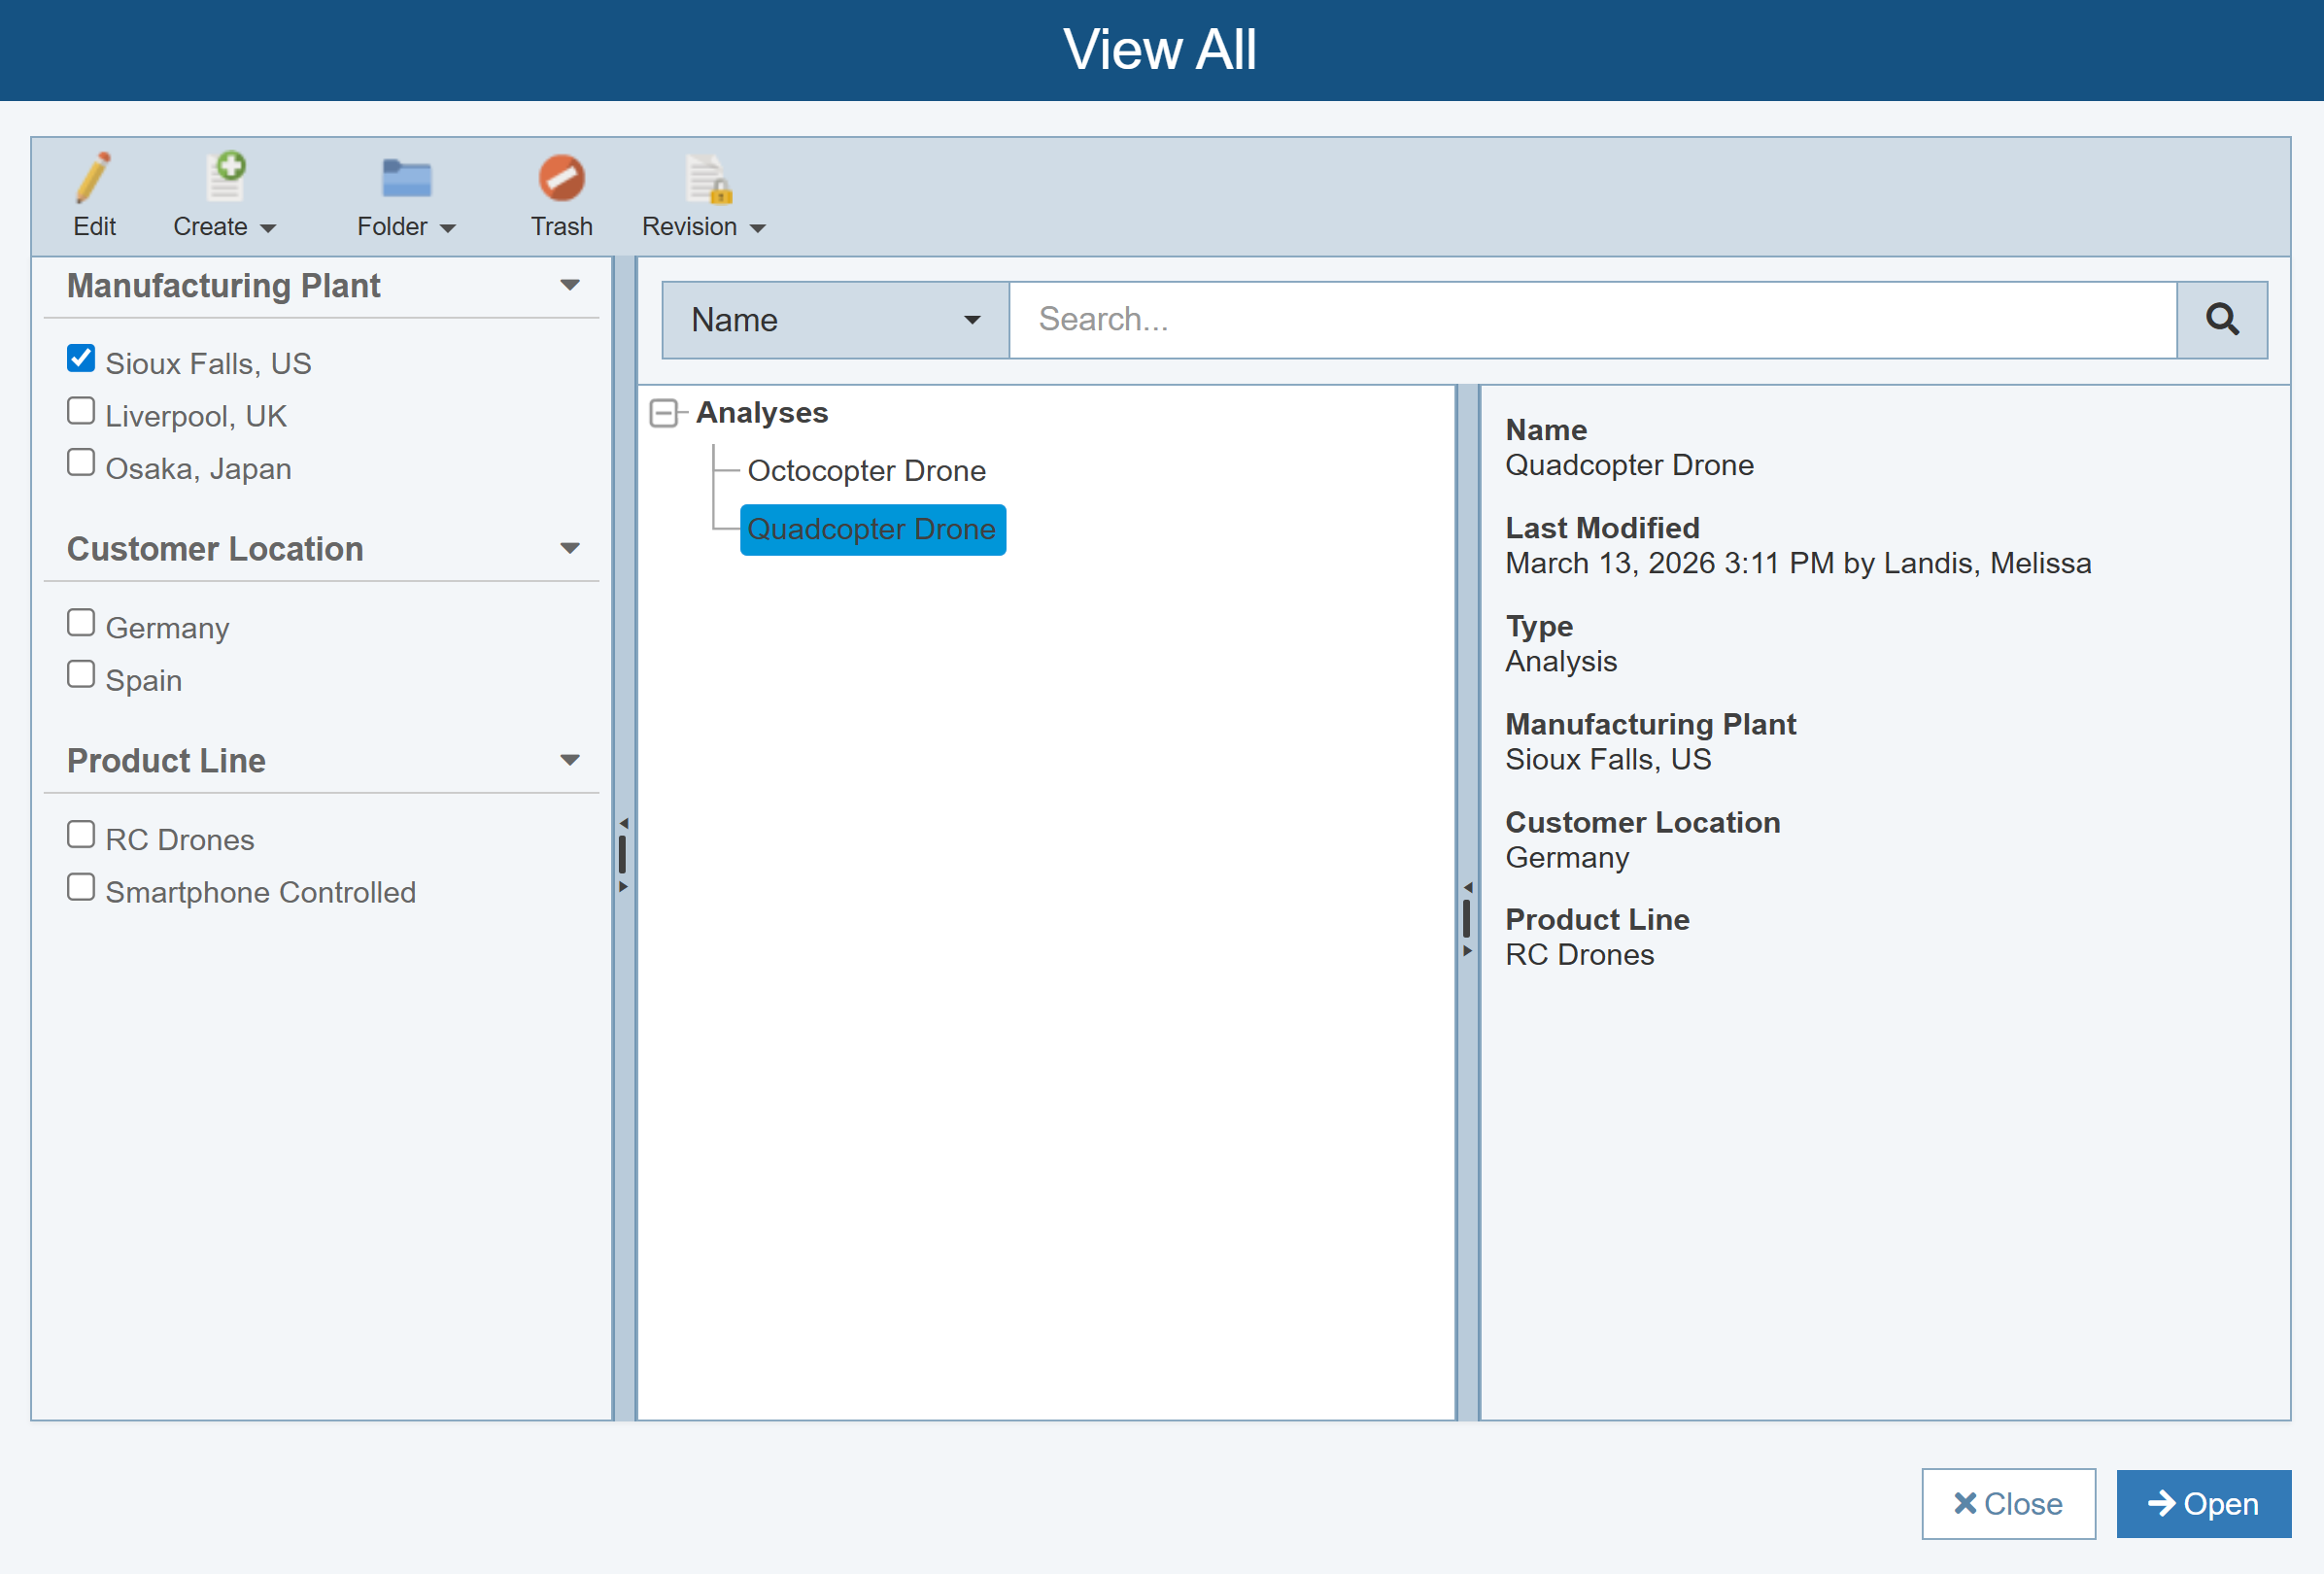
The list of Analyses displayed in the middle pane can be customized to show only those Analyses with the appropriate Analysis Category details. For example, if you're only looking for Analyses with details relevant for a certain Manufacturing Plant and Customer Location, you can simply check the relevant Analysis Category boxes and note the filtered list of Analyses in the middle pane.
For more details about using the View All dialog, see Using the View All Function.