Importing and Exporting Users
You can import a list of your Users and their associated data from an Excel file as a quick means to data entry to add or update Users. You can also export your Relyence Users and their associated information to an Excel file.
Importing Users
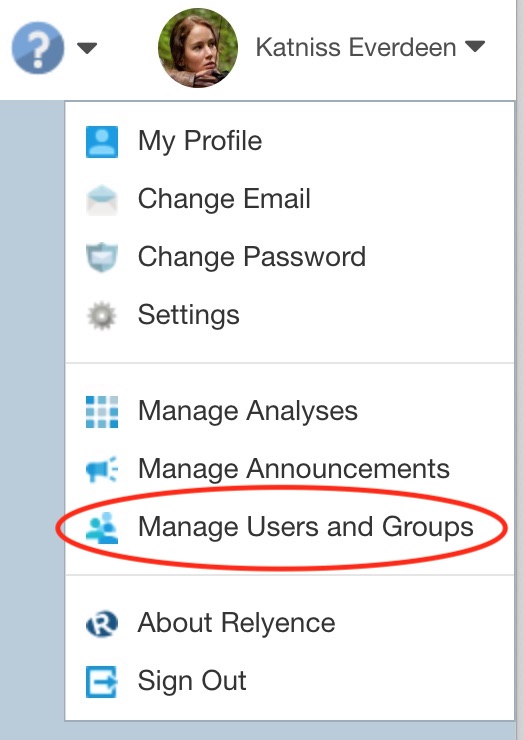
To import a list of Users into Relyence, click Manage Users and Groups from the Account Management dropdown menu in the upper right of the Header Bar.
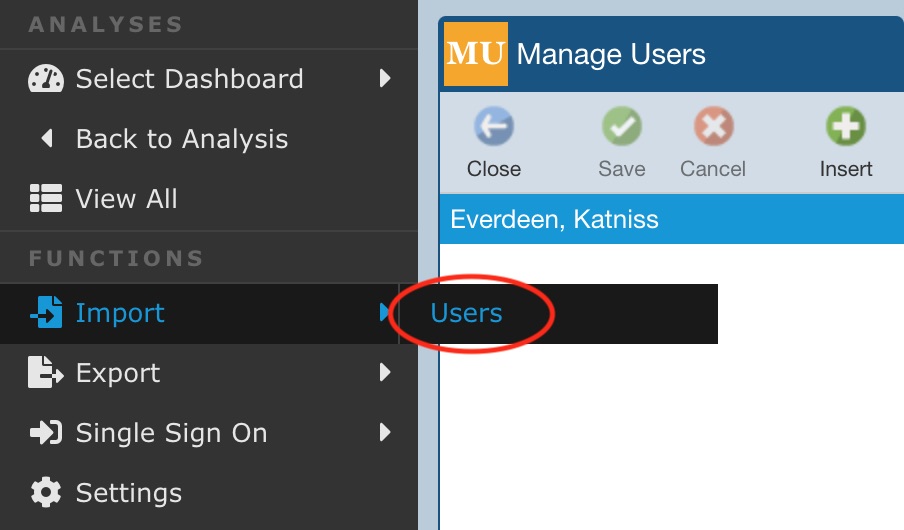
The Manage Users and Groups page appears. Click Import>Users to initiate your import.
The Import Users dialog appears. (Note: If you do not have any saved Imports, the I want to options and Import button will not appear.)
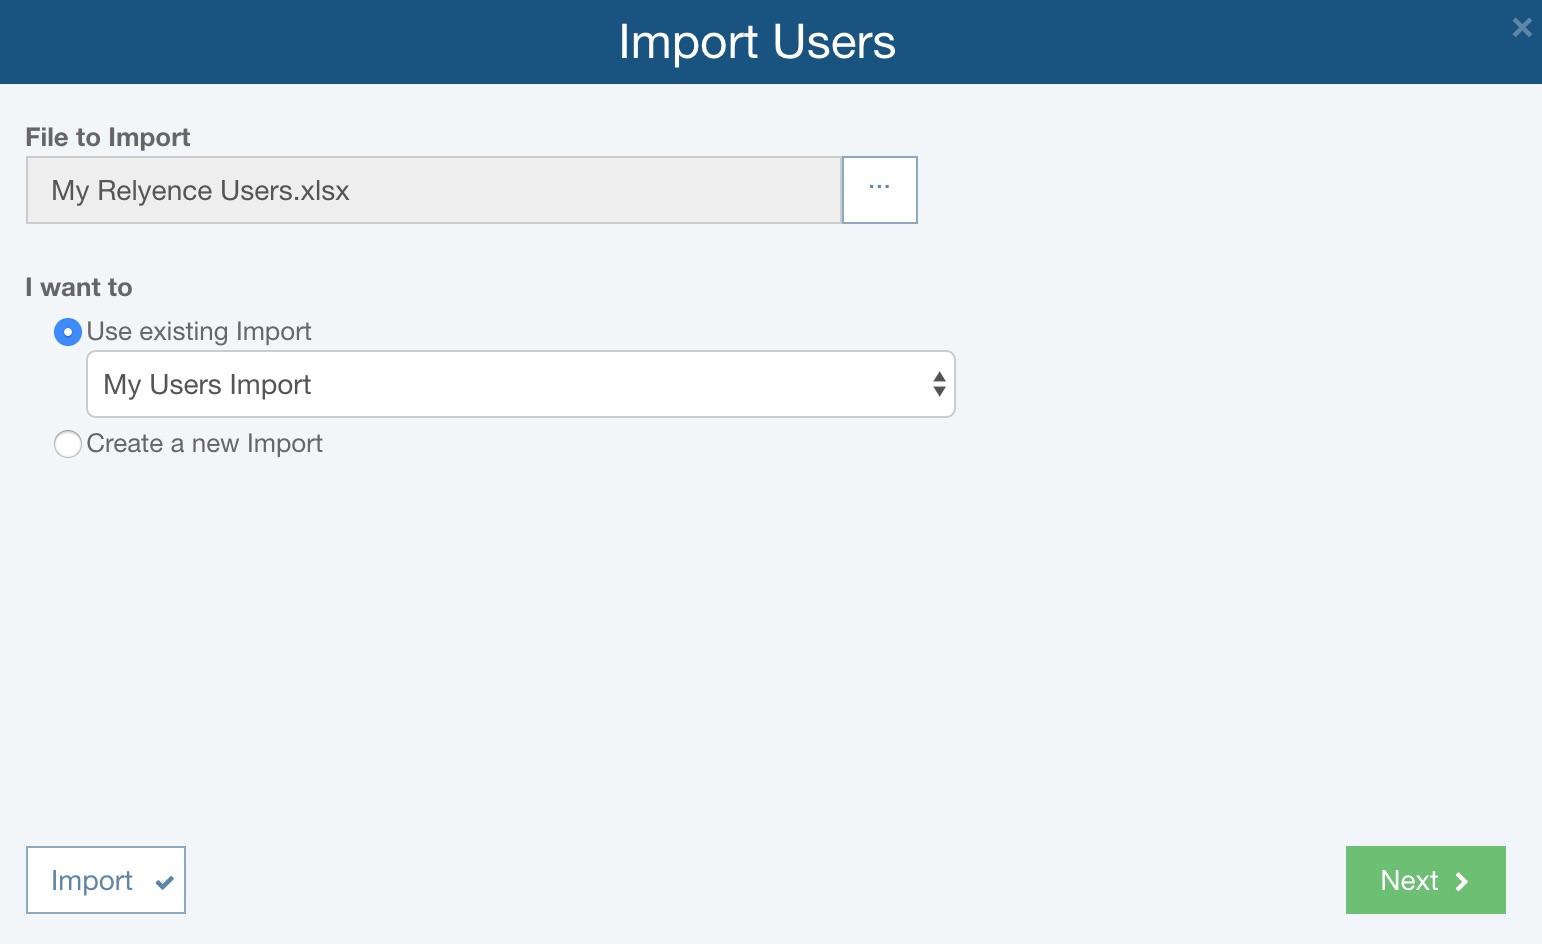
Select the Excel File to Import.
If you have a saved Import you want to reuse, select the Use existing Import option and select the Import you want to reuse. To skip the field mapping step, you can click the Import button and immediately start the import process.
If you have saved Imports, but do not want to use an existing one, select the Create a new Import option.
Click Next.
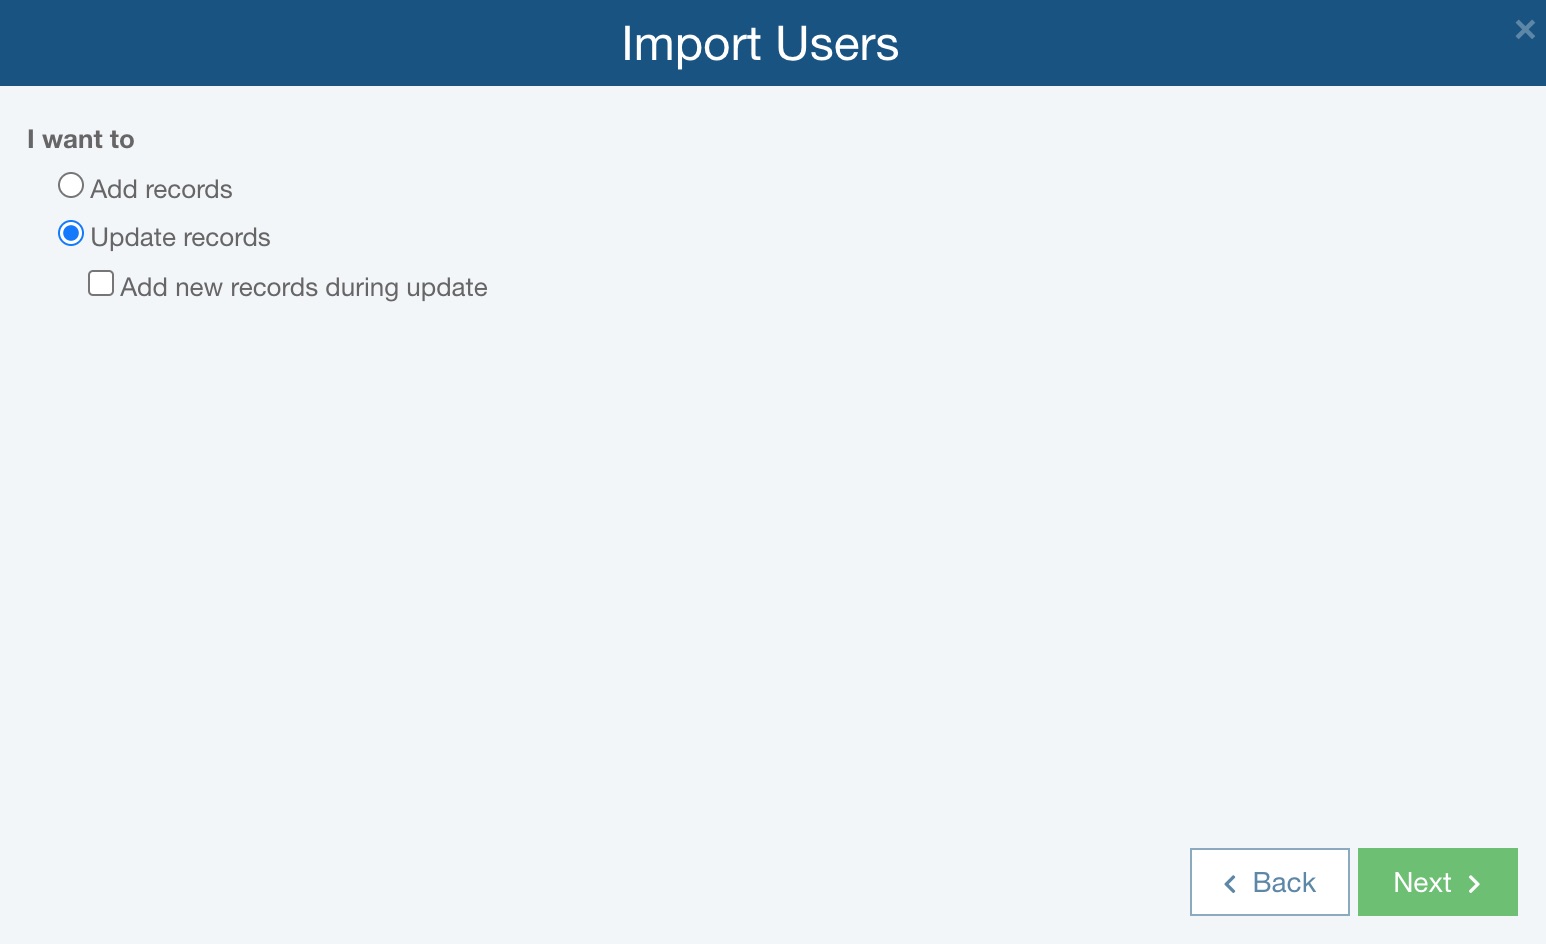
Choose whether you want to add or update User records during importing:
If you choose to Add records, all line items in your import file will be added as new Users.
If you choose to Update records, the import will proceed by locating matching Users from your import file, and then updating the matching records with data in the import file. For records not found, you have the option to Add new records during update. With Add new records during update checked, if a matching User record is not found, the User record will be added as a new User record. With Add new records during update cleared, if a matching User record is not found, the User record in the source file will be ignored during the import.
In order to update User records during importing, the import file must include an identifier data field. For Users, that identifier field is the Email field.
The optimal process to perform an import update are:
- Export with the Export all data fields option selected. This option will automatically include the unique identifier field (Email).
- Make the necessary changes to the exported file. You can change any of the non-identifier fields in order to update that data. If you wish to update the identifier field, Email, include the new email details in the New Email field when performing the update.
- Re-import using the Update records option.
The Import mapping table appears. Relyence will automatically map columns if possible. For any fields not mapped, select the field name from the dropdown list at the top of the column. The fields you can import include: Company, Email, First Name, Groups, Inactive, Last Name, New Email, Password, Phone, and Title. In the Groups column, enter the Group Names this User belongs to separated with semicolons.

Once all data columns have been mapped, click Next.
You can choose to save this Import for future reuse if you want. To save, select the Save this Import checkbox and enter the name of the Import.
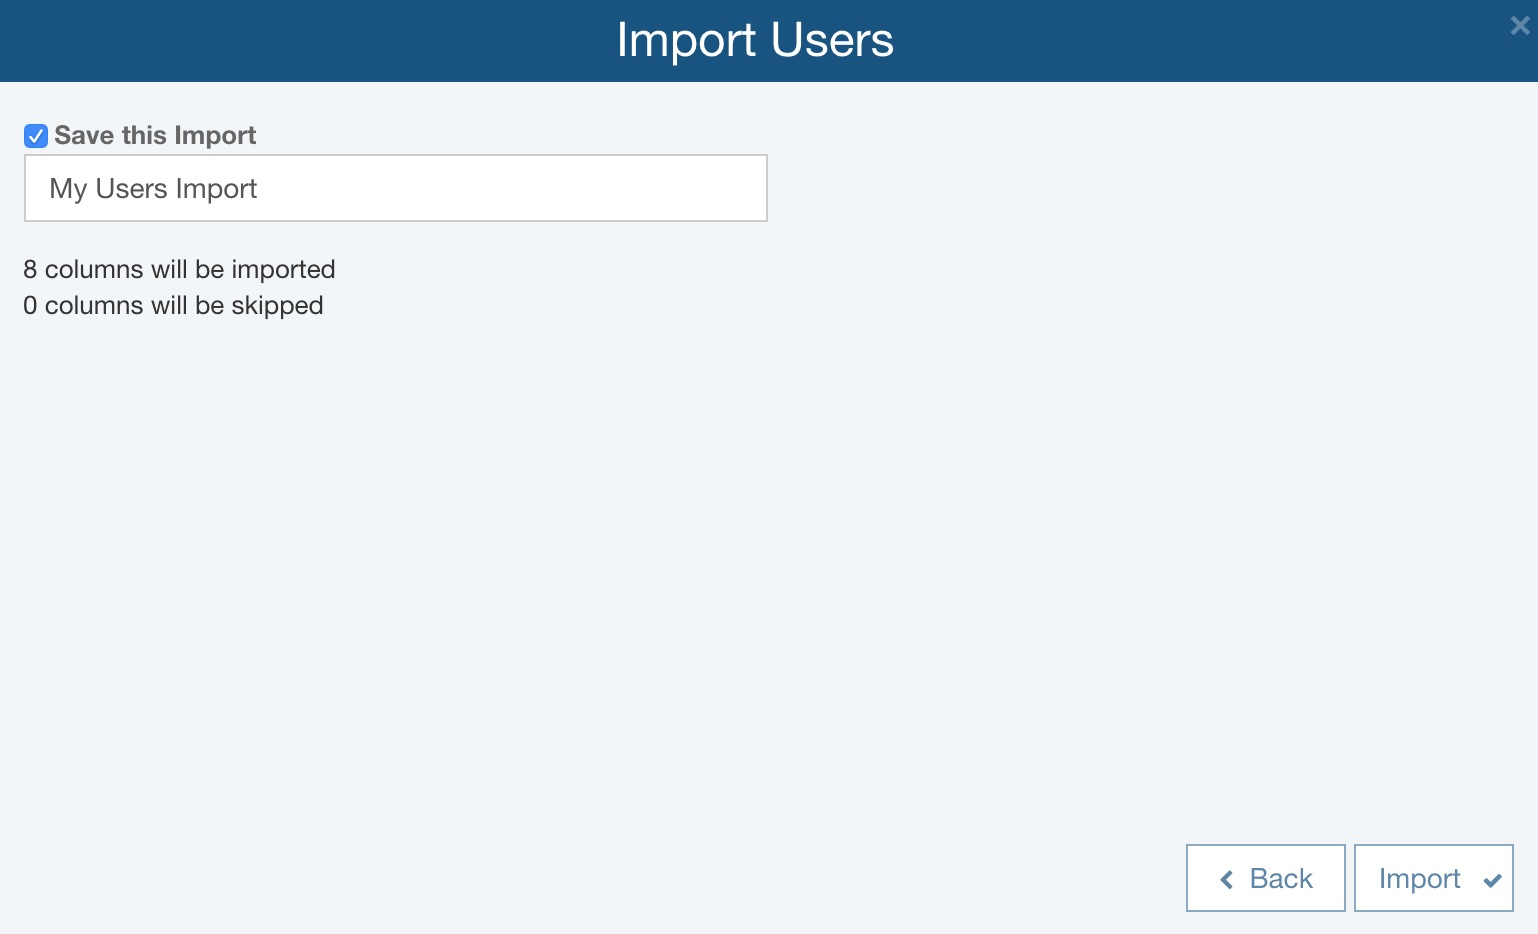
Click Import to begin the import.
Once completed, the Import Complete dialog appears. To review the status of the import, click the Click here to download the detailed import log.
Click Close.
Exporting Users
To export your current list of Relyence Users, click Manage Users and Groups from the Account Management dropdown menu in the upper right of the Header Bar.
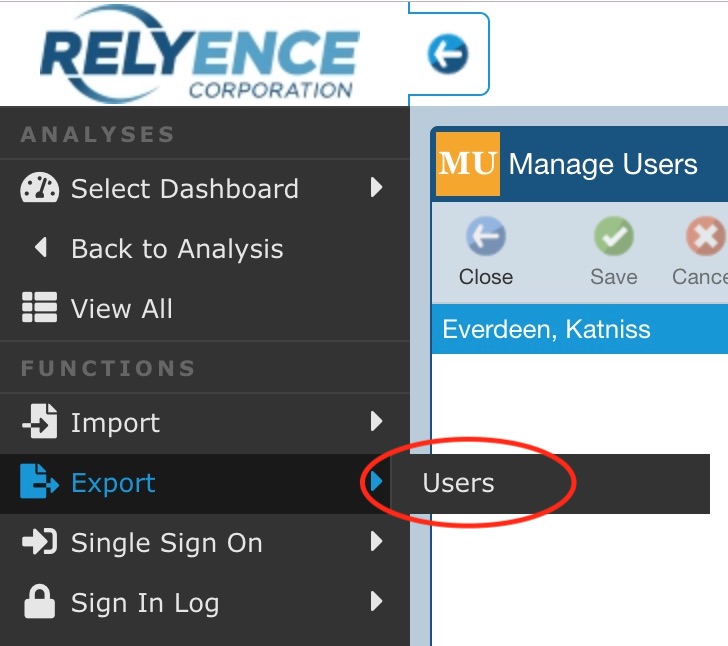
The Manage User and Groups page appears. Click Export>Users from the Sidebar menu.
The Export dialog appears.
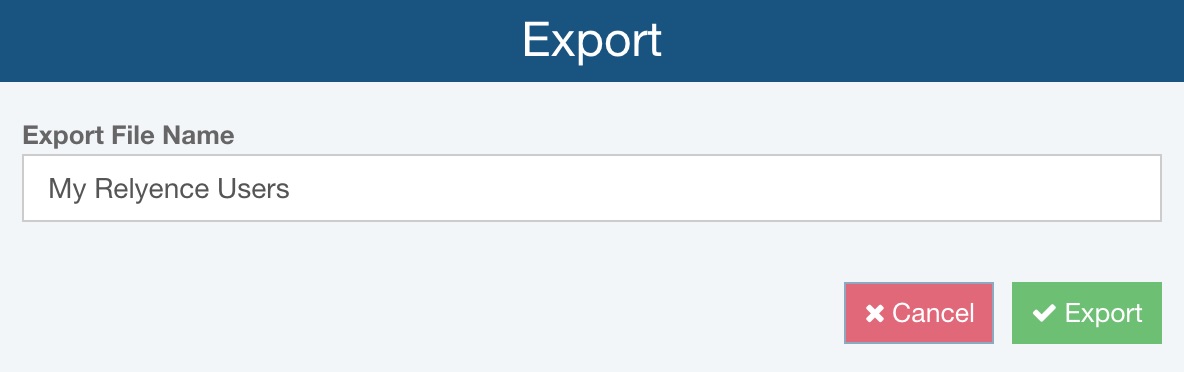
Enter the Export File Name and click Export. The list of Users and associated information will be exported to an Excel file and downloaded to your default download directory.
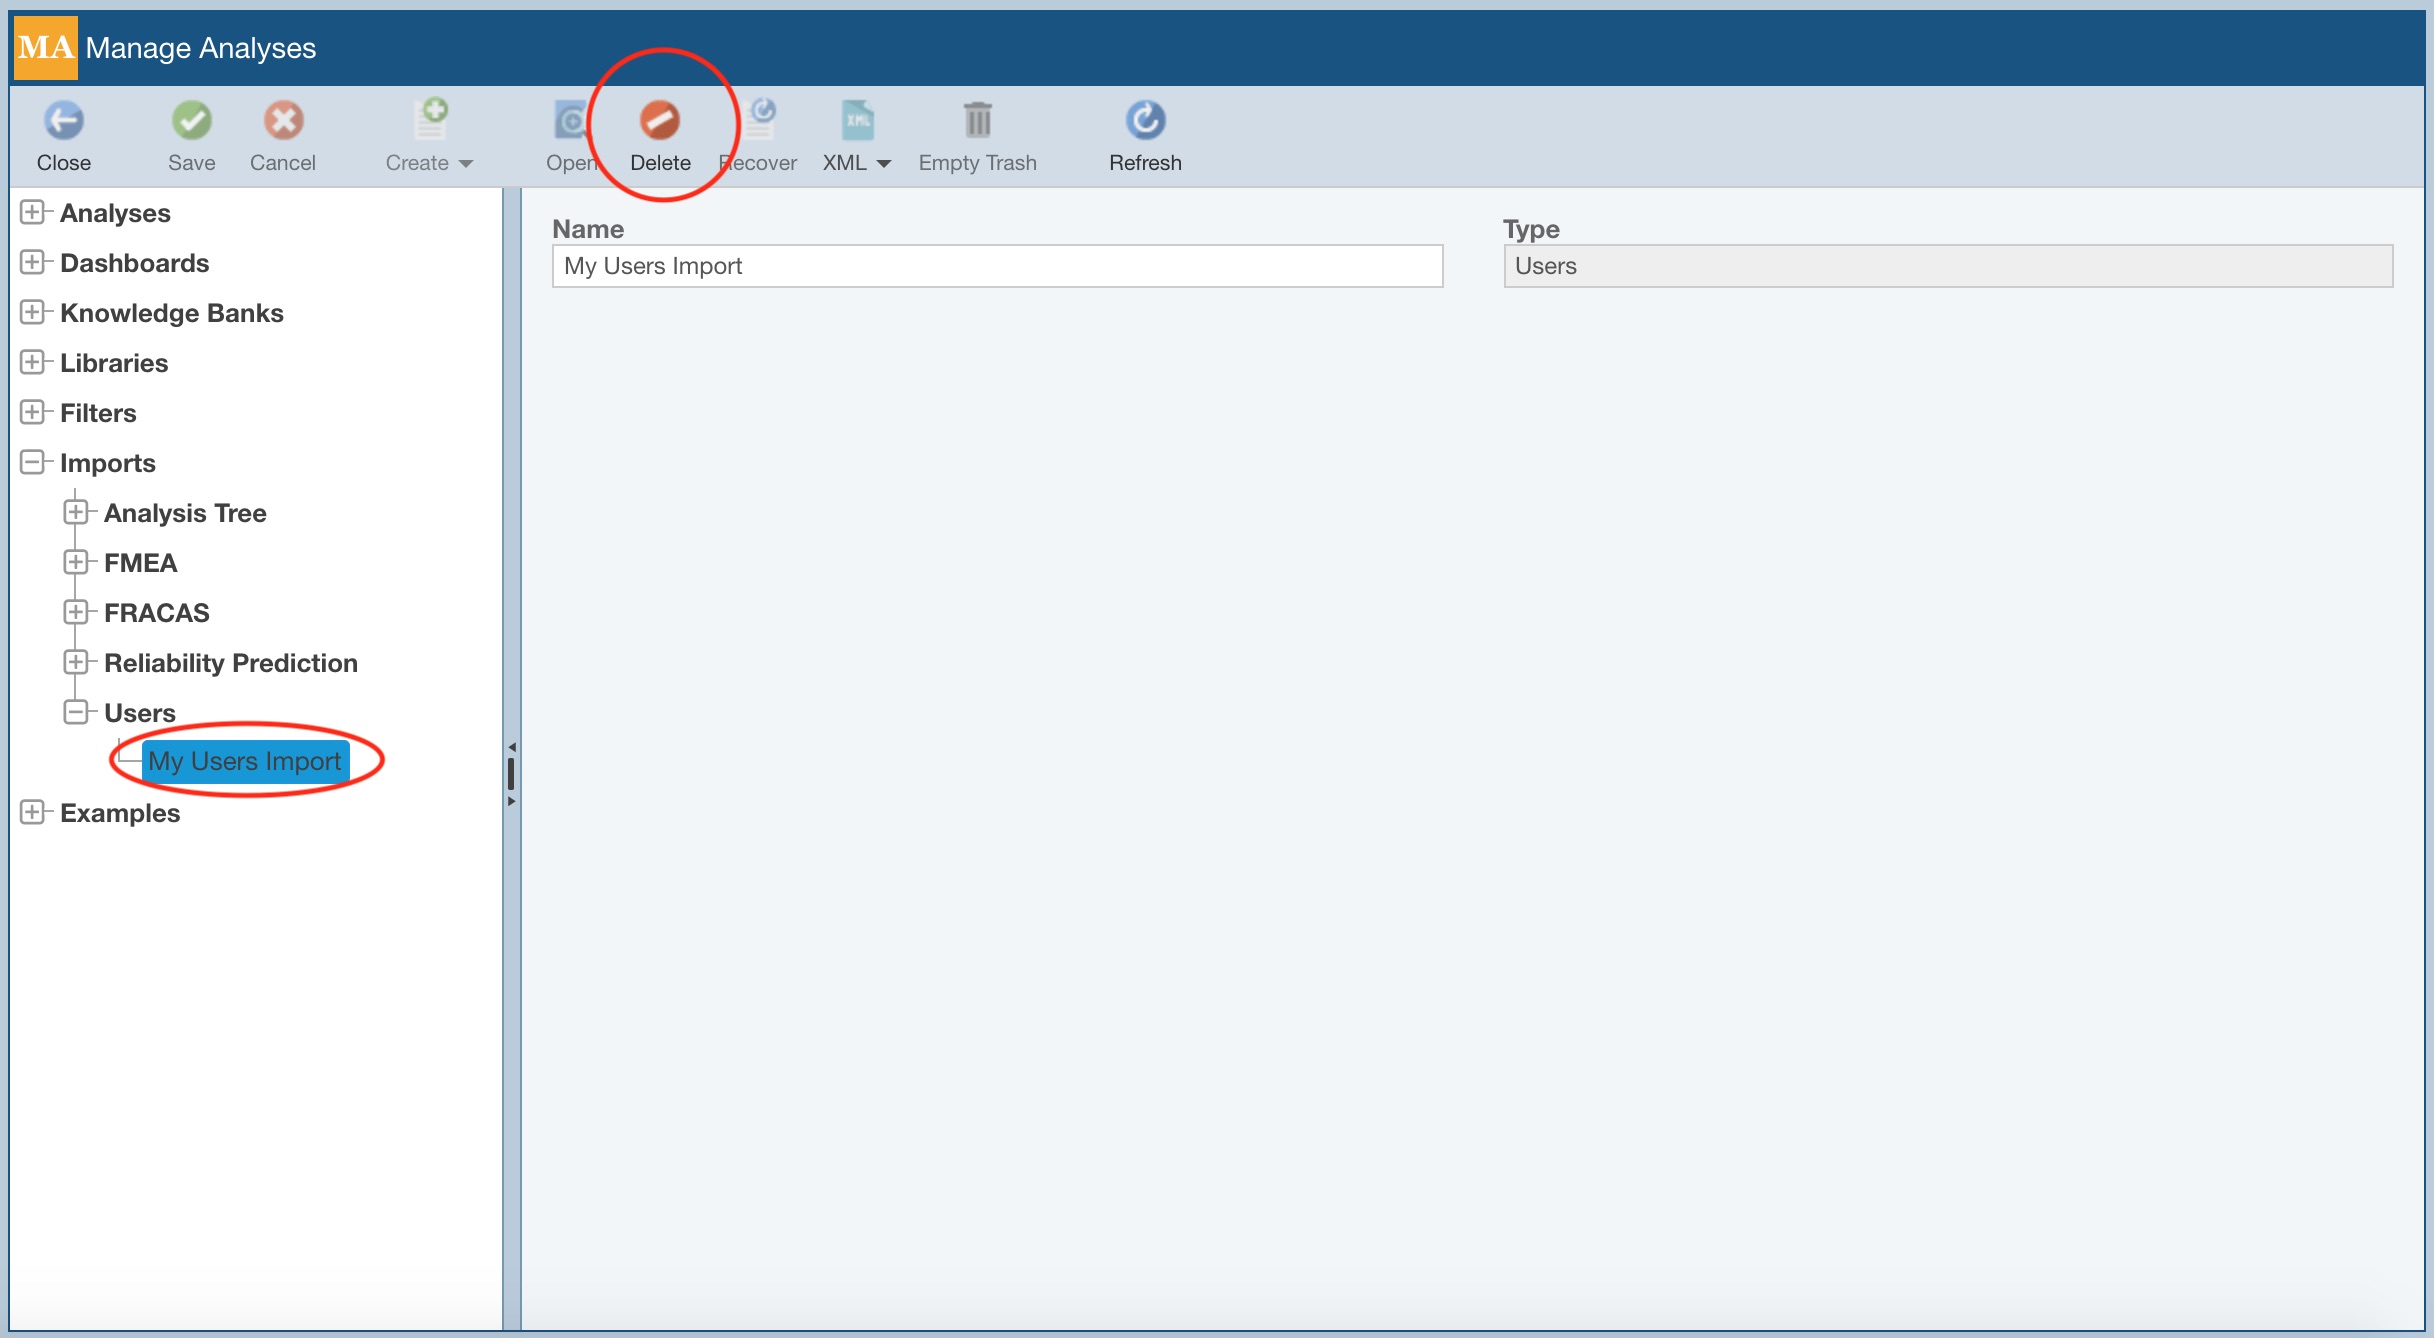
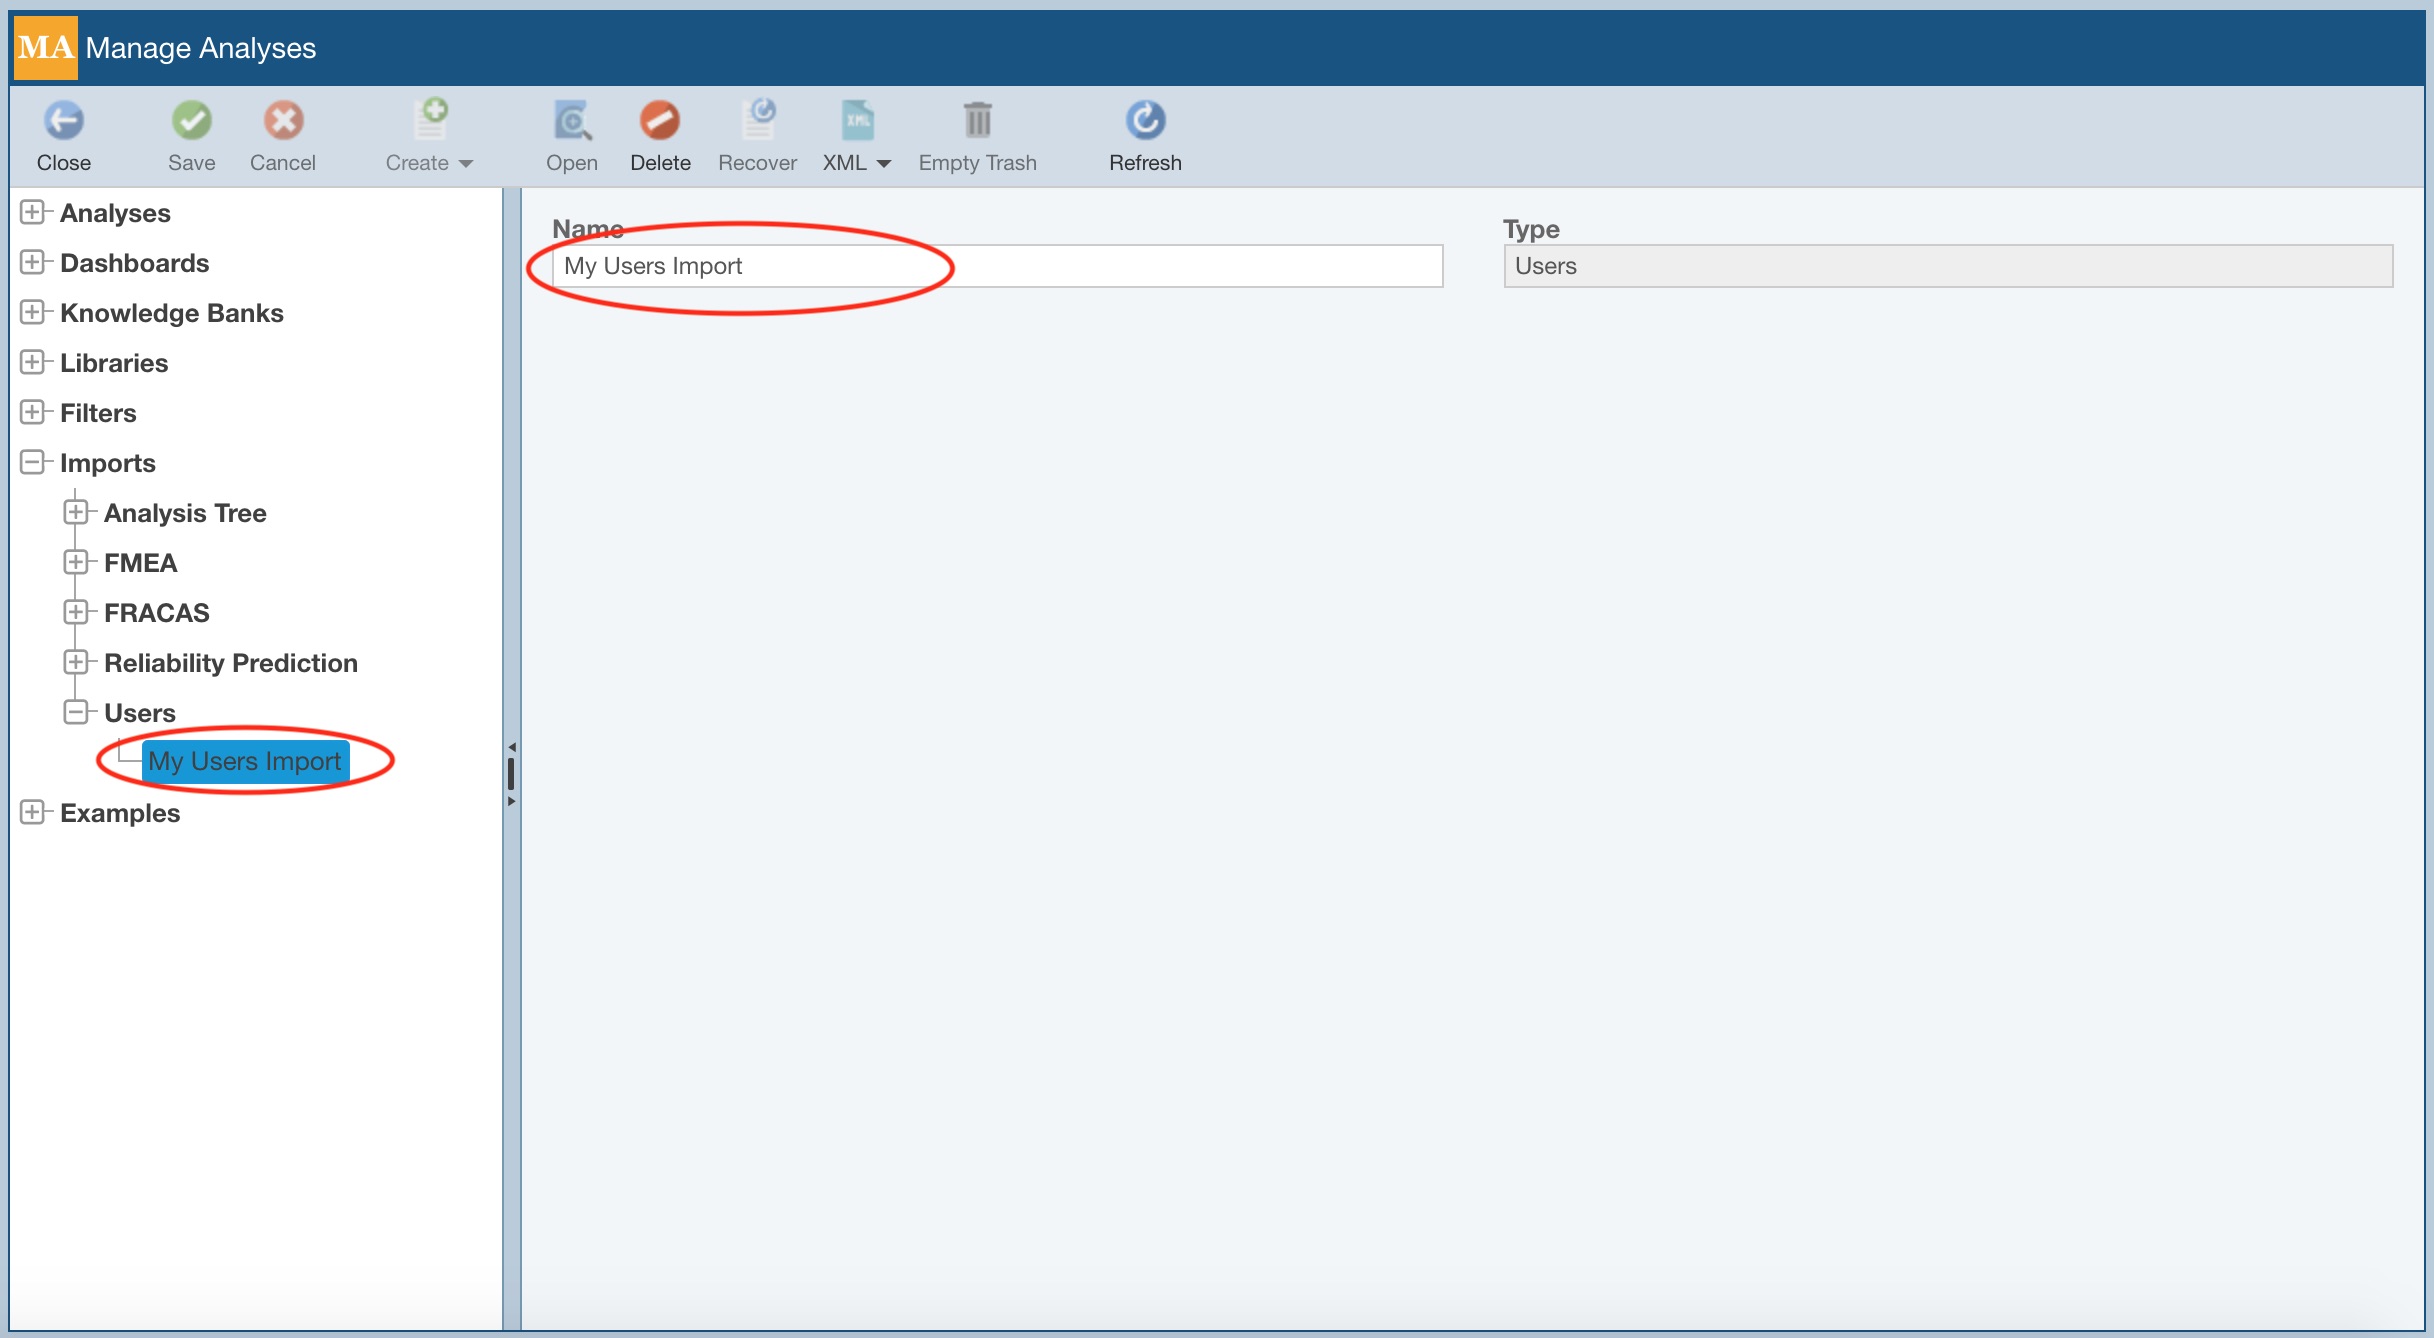
Managing Imports
During importing, you have the option to save your Import. If you would like to delete or rename any of your saved Imports, you can do so from Manage Analyses. For general details about the Manage Analyses feature, see the Help topic Using the Manage Analyses Function.
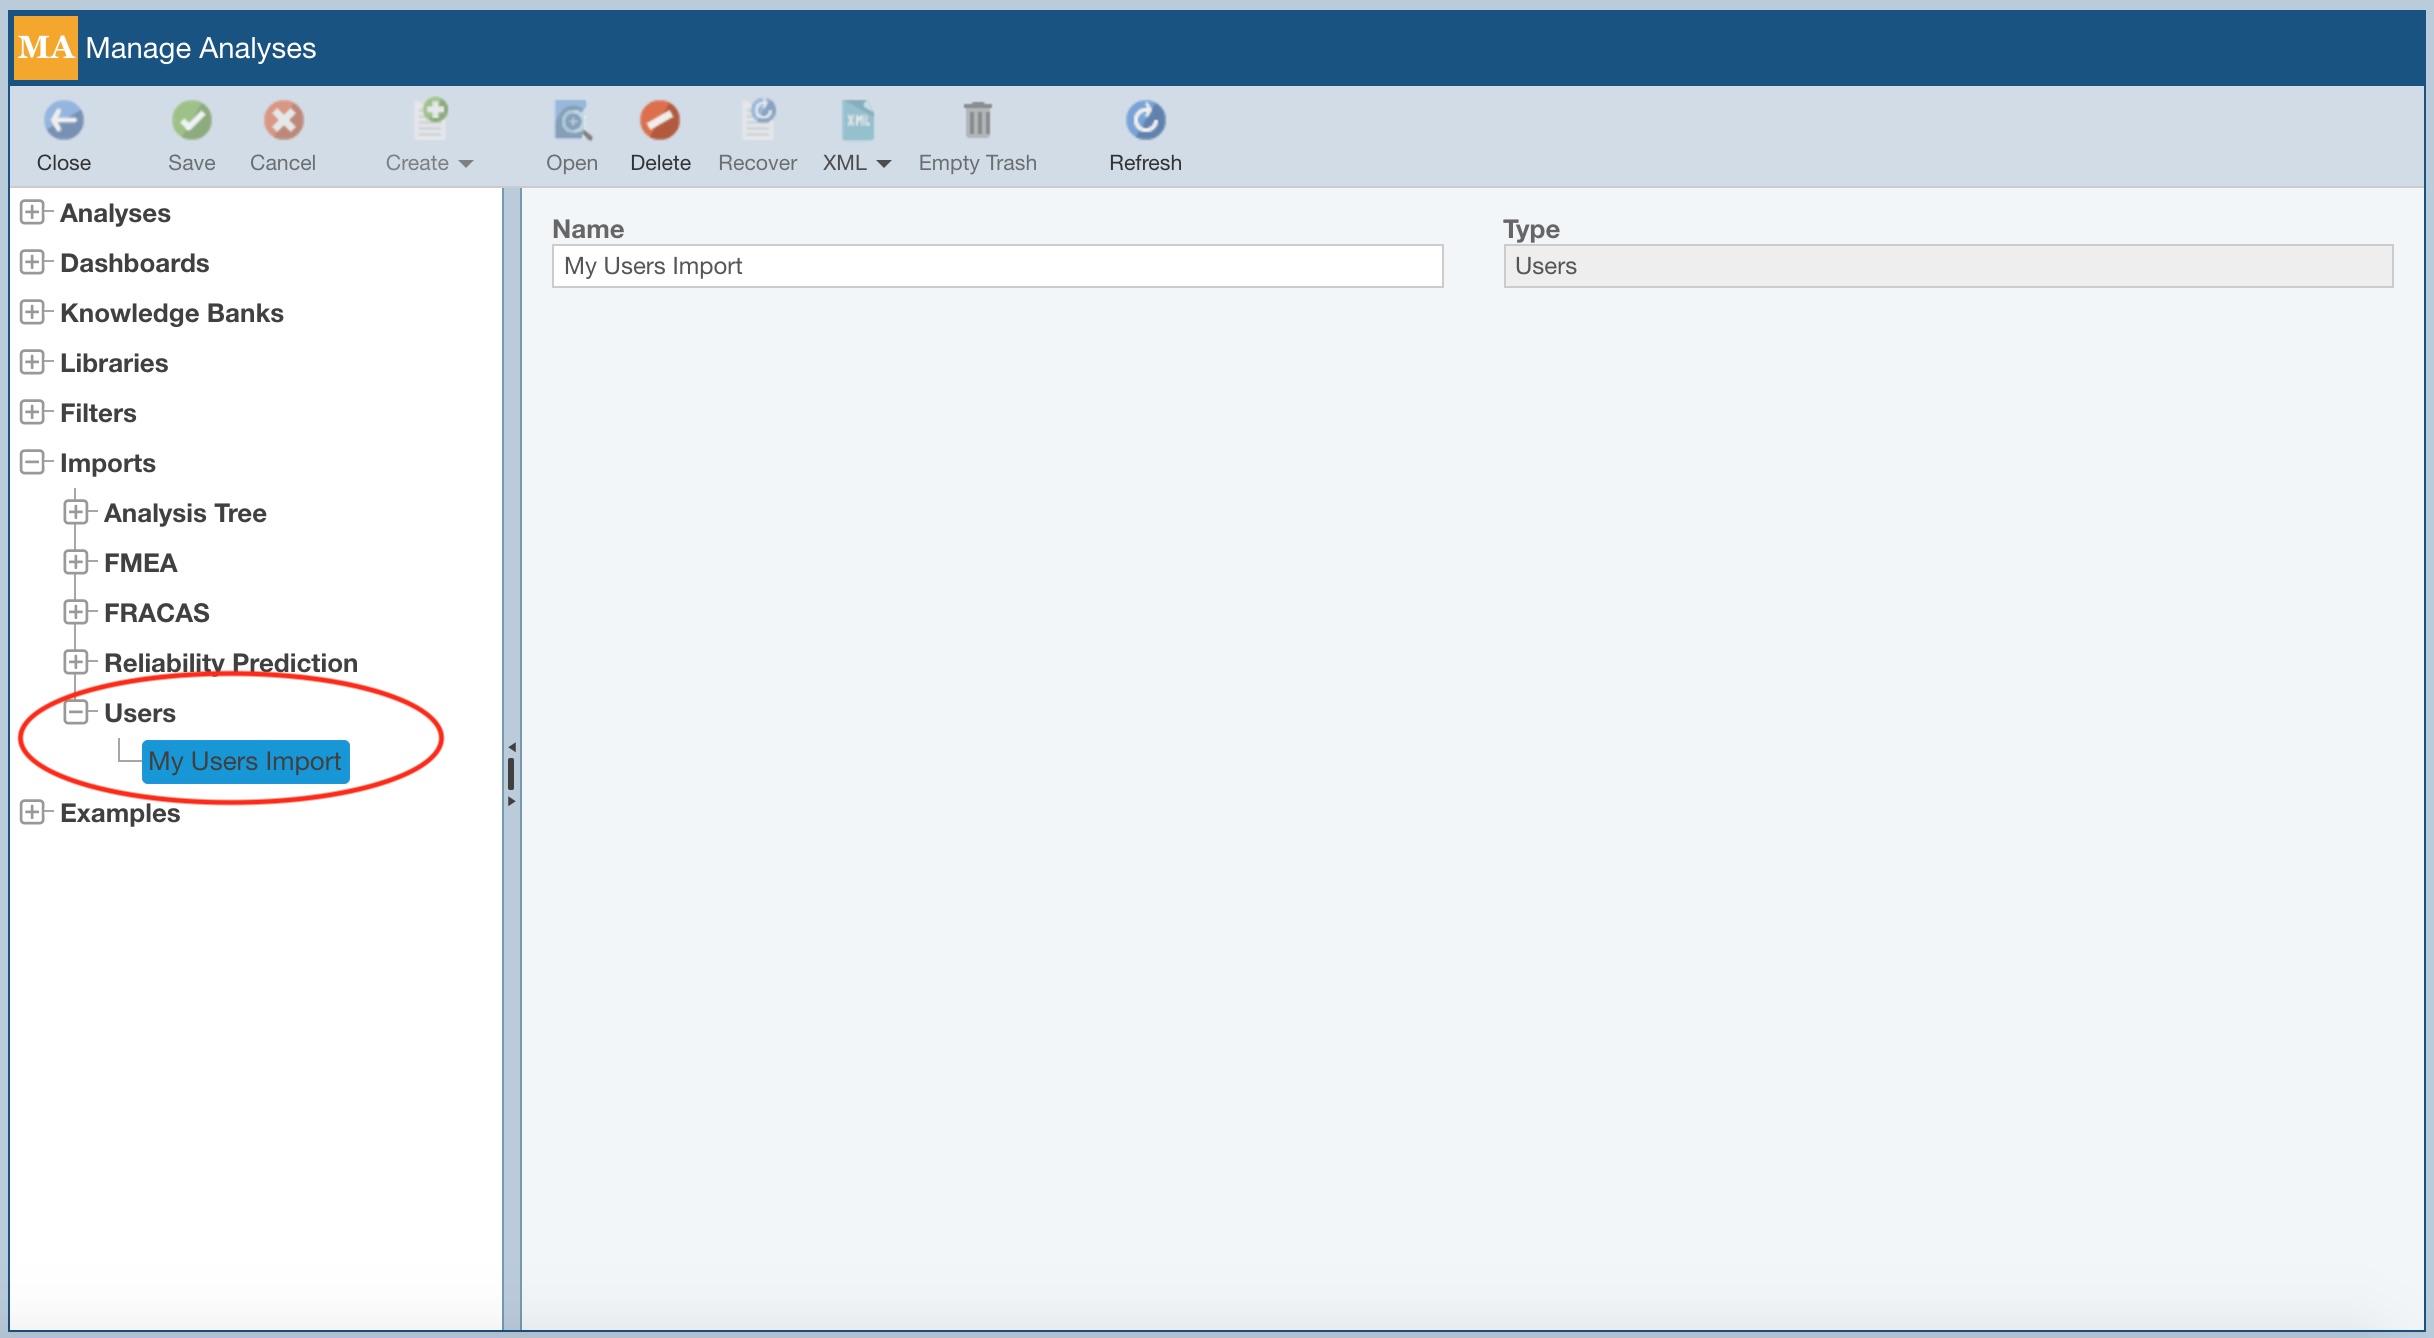
To access the Manage Analyses function, click Manage Analyses from the Account menu.
A list of all your current Imports will be shown, including those for users and groups.
To delete any of your Imports, select it and click Delete. On the Delete dialog, click Yes to confirm the deletion or No to exit and retain the saved Import.
To rename any of your Imports, select it and in the rightmost pane, enter a new Name for the saved Import. Save changes as needed.
To exit Manage Analyses and return to your Analysis, from the Sidebar, click Back to Analysis.