FRACAS Workflow and Approvals
Relyence FRACAS supports Workflow and Approvals as a mechanism for you to control the closed loop corrective action process. Relyence FRACAS Workflow and Approvals are optional, and by default are not enabled. You can choose not to use FRACAS Workflow and Approvals at all (the default), or use only FRACAS Workflow, or use FRACAS Workflow and Approvals together. You cannot utilize Approvals without Workflow.
FRACAS Workflow Steps for Incidents, Problems, Incident Subtables and Problem Subtables are created in the Workflow Steps dialog. For details on defining Subtables in Relyence FRACAS, see Using FRACAS Subtables.
Note that by default, there is a single Workflow for Incidents, Problems, each Incident Subtable and each Problem Subtable. If needed multiple Workflows can be defined for Incidents and Problems.
For each step you can then choose whether to include an Approval process or not. When Approvals are enabled, the Workflow cannot be advanced to the next step in your process until approval is received. You define who is allowed to Approve, as well as Approval Due Dates.
Defining the FRACAS Workflow
To define your FRACAS Workflows, click Configure>Workflow>Steps from the Sidebar when Incidents or Problems are displayed.
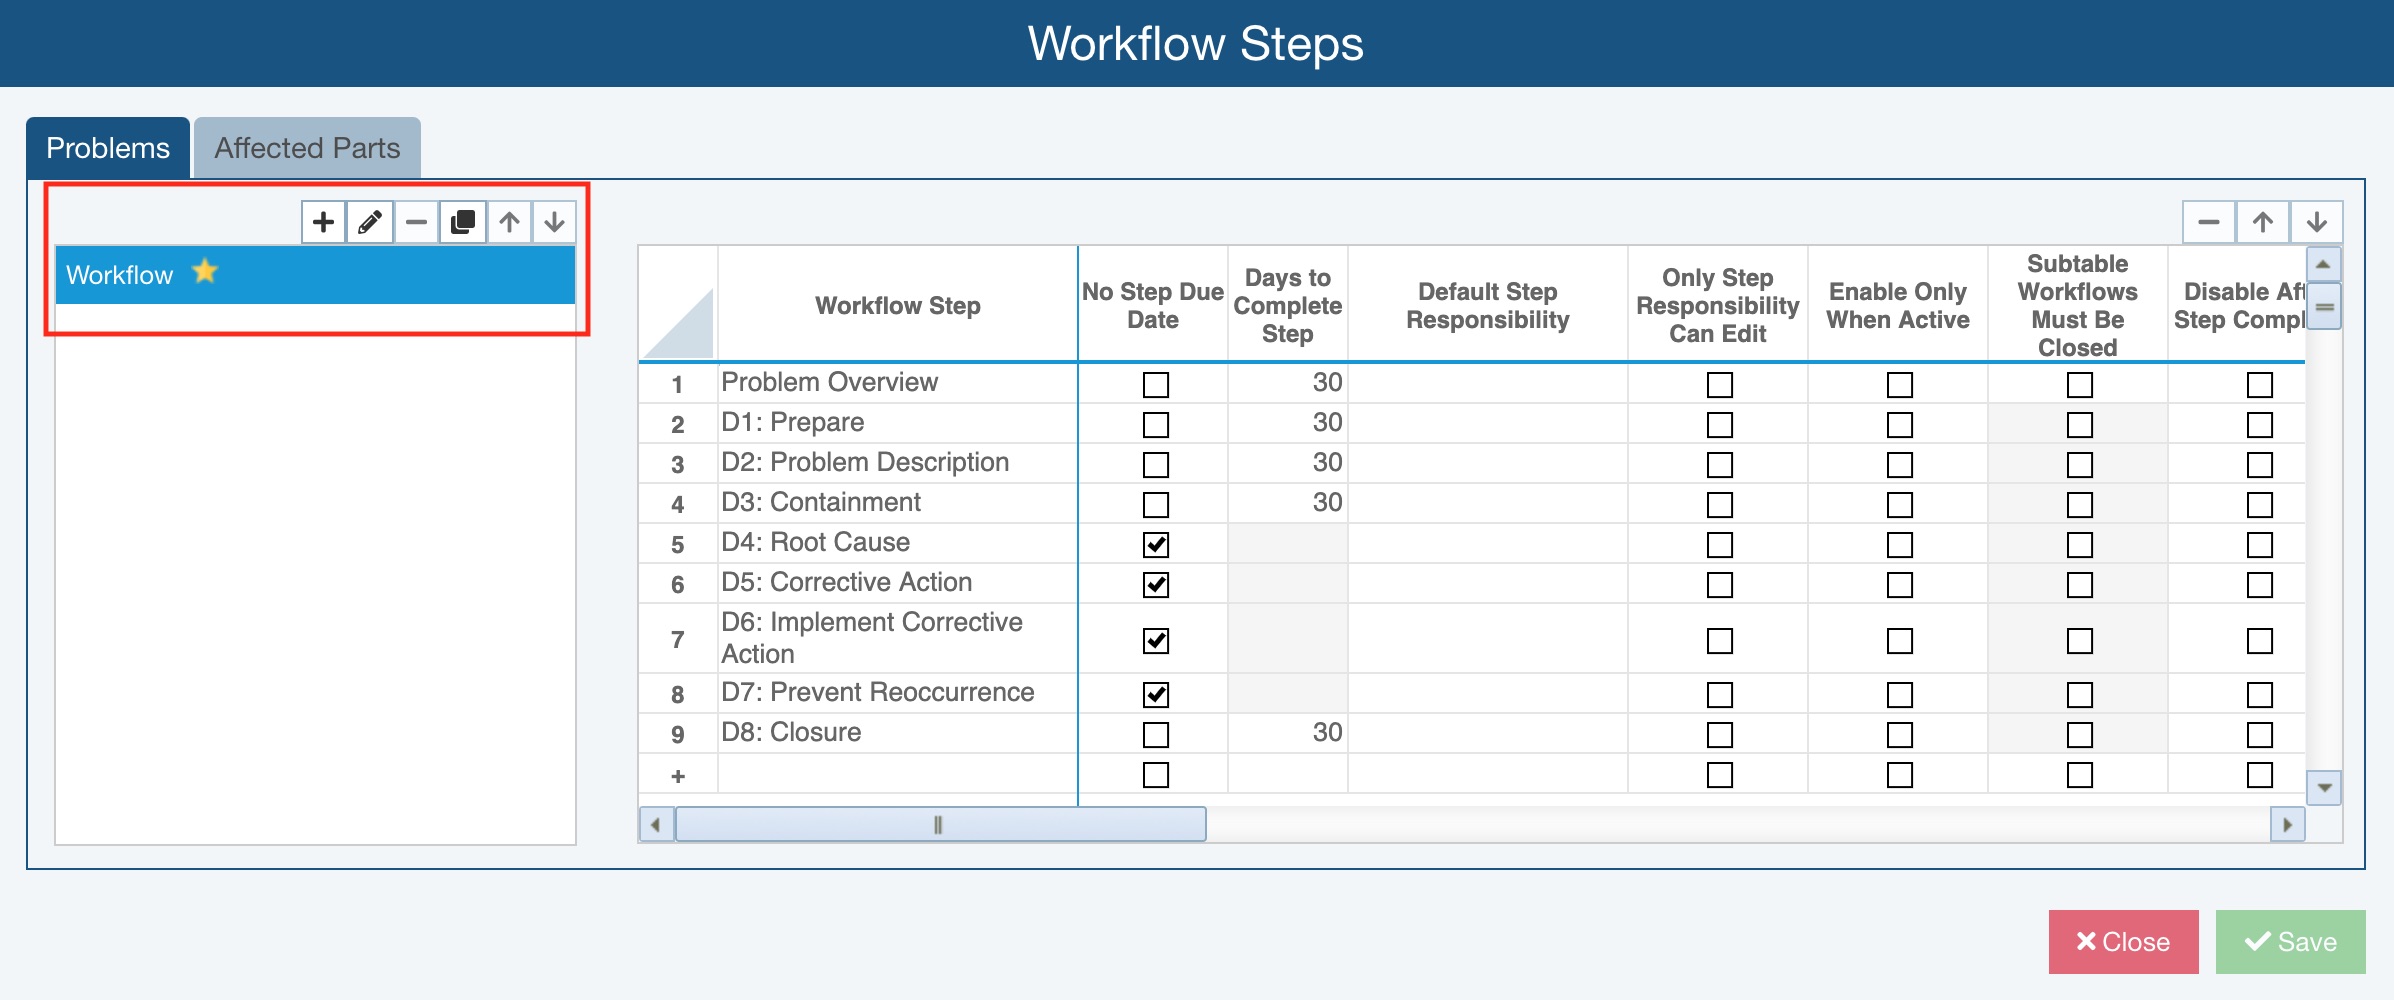
The Workflow Steps dialog appears.
- Workflow Steps for Incidents and Problems can be added in the last row of the table and then deleted and reordered using the buttons in the top right corner.
%20-%20NewLine-Btns.jpg)
- The following details are defined for each Workflow Step:
- Workflow Step: This is the name of the Workflow Step. For example, you may have steps defined to follow an 8D approach.
- No Step Due Date: Select Click this checkbox if you don't want to have a Due Date associated with this Workflow Step. Selecting this checkbox will disable the Step Due Date field for this workflow step.
- Days to Complete Step: The maximum number of days to complete the workflow step.
- Default Step Responsibility: The name(s) of team members who are responsible for completing the tasks in this Workflow Step. This is optional. You can enter the responsible team members directly on the FRACAS form if you prefer. You can select "Current User" to set the responsibility to the user who is currently signed in.
- Only Step Responsibility Can Edit: Select Only Step Responsibility Can Edit to ensure that only users in the Step Responsibility field can edit the FRACAS data. Users not assigned in the Step Responsibility field will see the FRACAS data fields disabled.
- Enable Only When Active: When selected, the FRACAS form for the currently active Workflow Step is the only one which can be edited or modified, all other forms for all the other Workflow Steps are disabled. This prevents team members from going to previous or next Workflow Steps and making changes. This setting essentially disables all FRACAS Forms except for the form for the currently active Workflow Step.
- Subtable Workflows Must Be Closed: Select Subtable Workflows Must Be Closed to to require that Workflows related to any Subtables must be closed to advance past this Workflow step.
- Disable After Step Complete: When selected, the form for this step becomes disabled when the Workflow advances past this step.
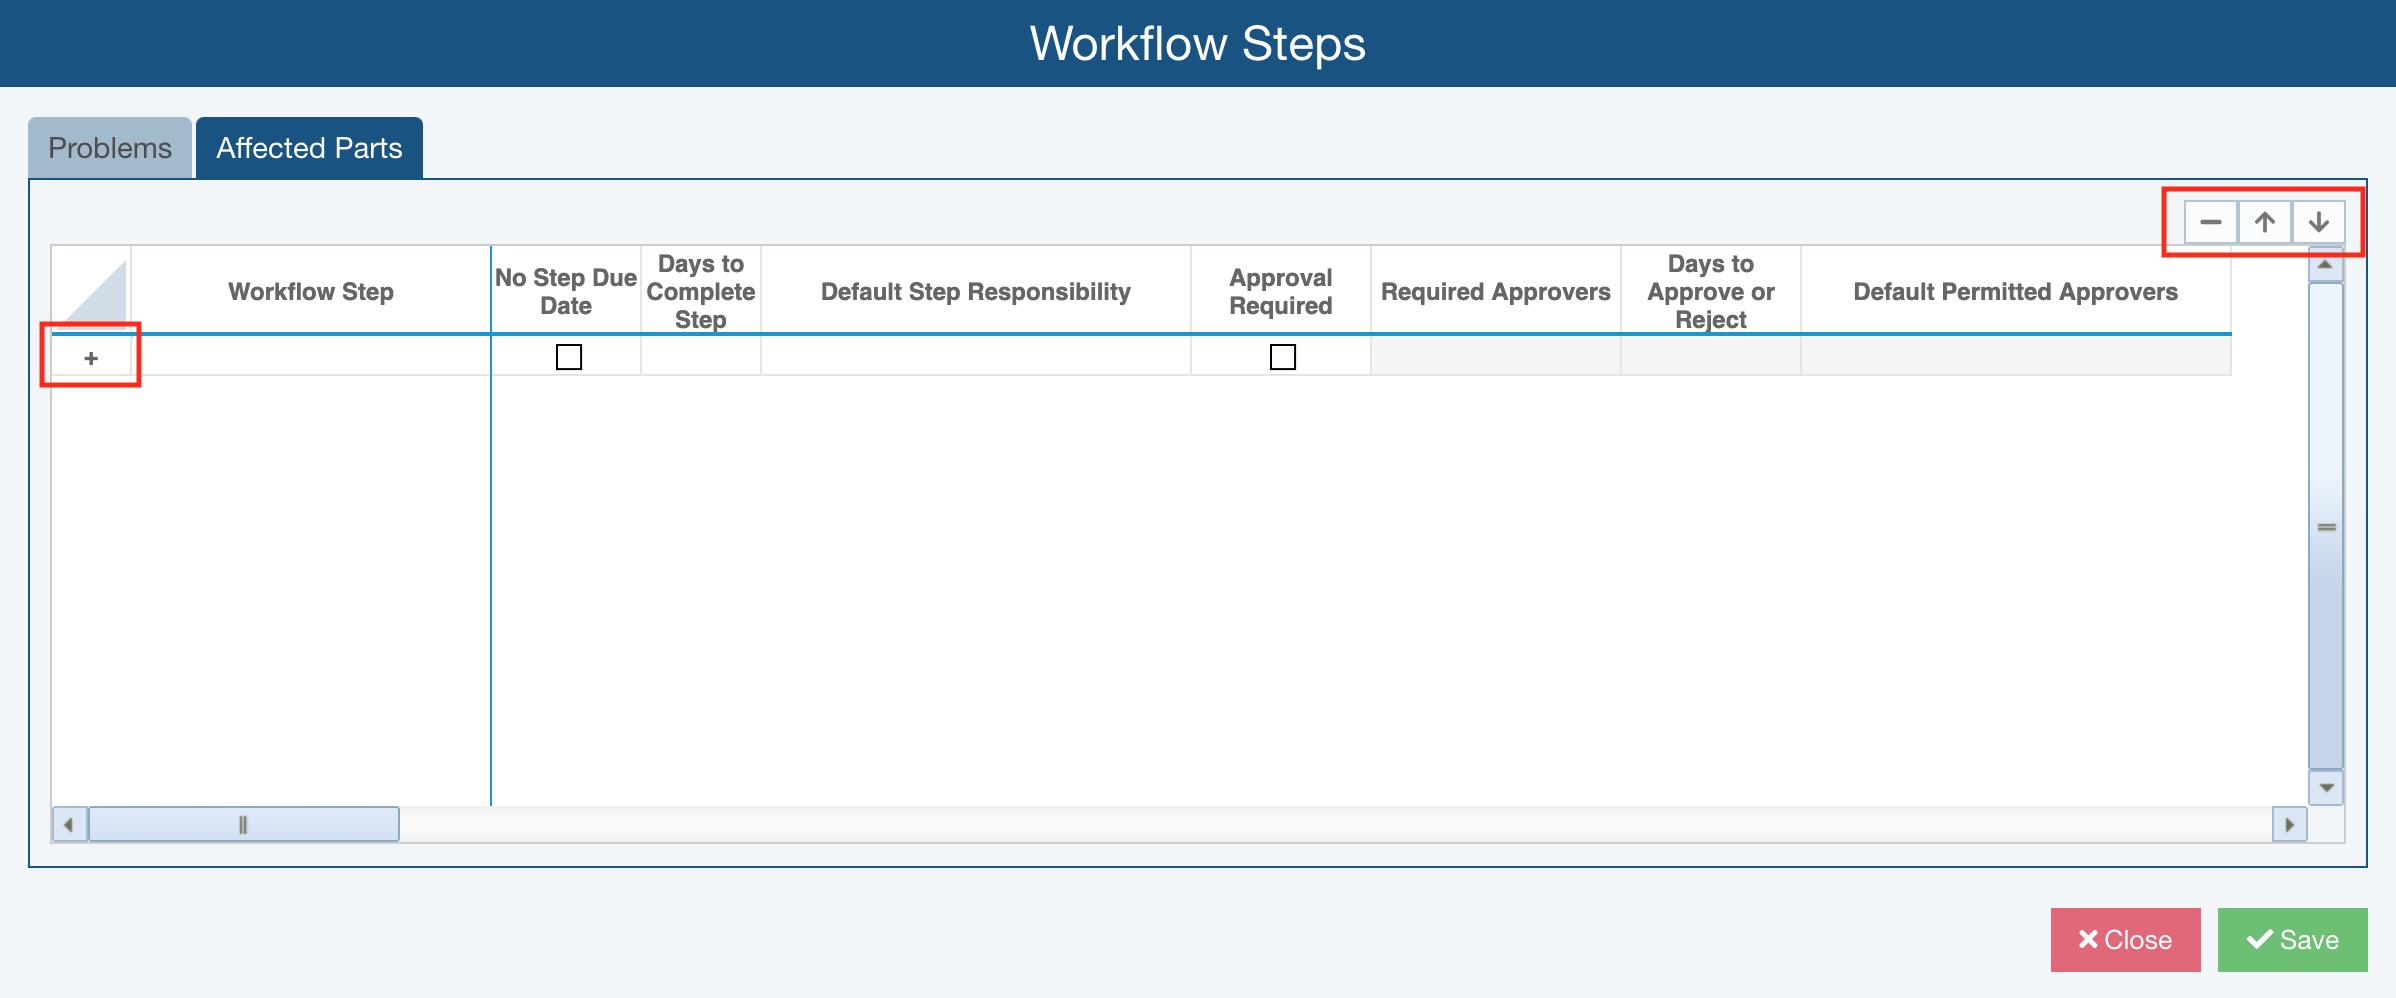
- Approval Required: Select Approval Required to enable approvals for this Workflow step. If Approval is required, the Workflow step cannot be advanced until approval is made.
- Required Approvers: You can indicate if approval is required by just a single approver by selecting One Approver or if approval by all approvers is required by selecting All Approvers. When All Approvers is selected, the Workflow will not advance to the next Workflow Step until all Approvers have approved.
- Days to Approve or Reject: This number is used to set the Approval Due Date. The default number of days is set to 30. If desired, you can set up Notifications to be sent to the Approver based on the Approval Due Date. For example, if you set up a Notification to occur once the Approval Due Date has passed, the permitted Approvers will get notification emails when the approval is overdue.
- Default Permitted Approvers: The name(s) of team members who are allowed to Approve the work for this Workflow Step. This is optional. You can enter the responsible team members directly on the FRACAS forms if you prefer.
- Multiple Workflows can also be defined for Incidents and Problems. Each of the selectable Workflows can have its Workflow Steps and relevant details defined. Using the buttons, you can add, edit, delete, copy and move Workflows. For more details about defining and using multiple selectable Workflows, see Multiple Selectable Workflows.
- Workflow Steps for Incident Subtables and Problem Subtables can be added in the last row of the table and then deleted and reordered using the buttons in the top right corner. Workflow Steps can be defined for each Subtable.
To be most effective, especially if using Approvals, FRACAS Workflows for Incidents, Incident Subtables, Problems, or Problem Subtables should be used in conjunction with FRACAS Notifications. FRACAS Notifications provide a way for team members to receive notifications when they are assigned tasks, their approval is required, due dates are overdue, etc. For more details, see the FRACAS Notifications topic.
Example FRACAS Workflow
An example of a FRACAS Workflow process is shown below.

In this example, the workflow steps to follow an 8D approach have been configured.
Adding the Workflow Data Control and Other Workflow Fields to your FRACAS
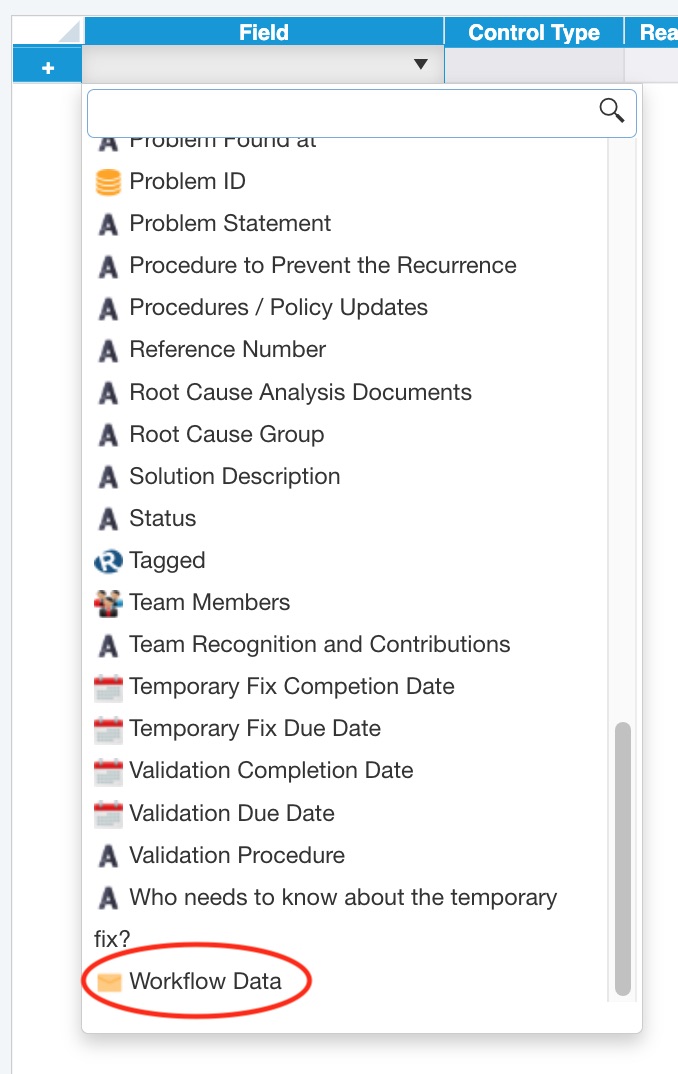
As supplied, the Drone Example Analysis includes the Workflow Data fields on the FRACAS Incident and Problem forms as needed. If you add FRACAS Workflow fields, you will need to add them to your FRACAS Incident or Problem Forms. Use the Customizing the FRACAS Interface topic for more details about customizing Forms in Relyence FRACAS. The Workflow Data control will appear in the data field lists. This is applicable for Workflow for Incidents, Problems, Incident Subtables, and Problem Subtables.
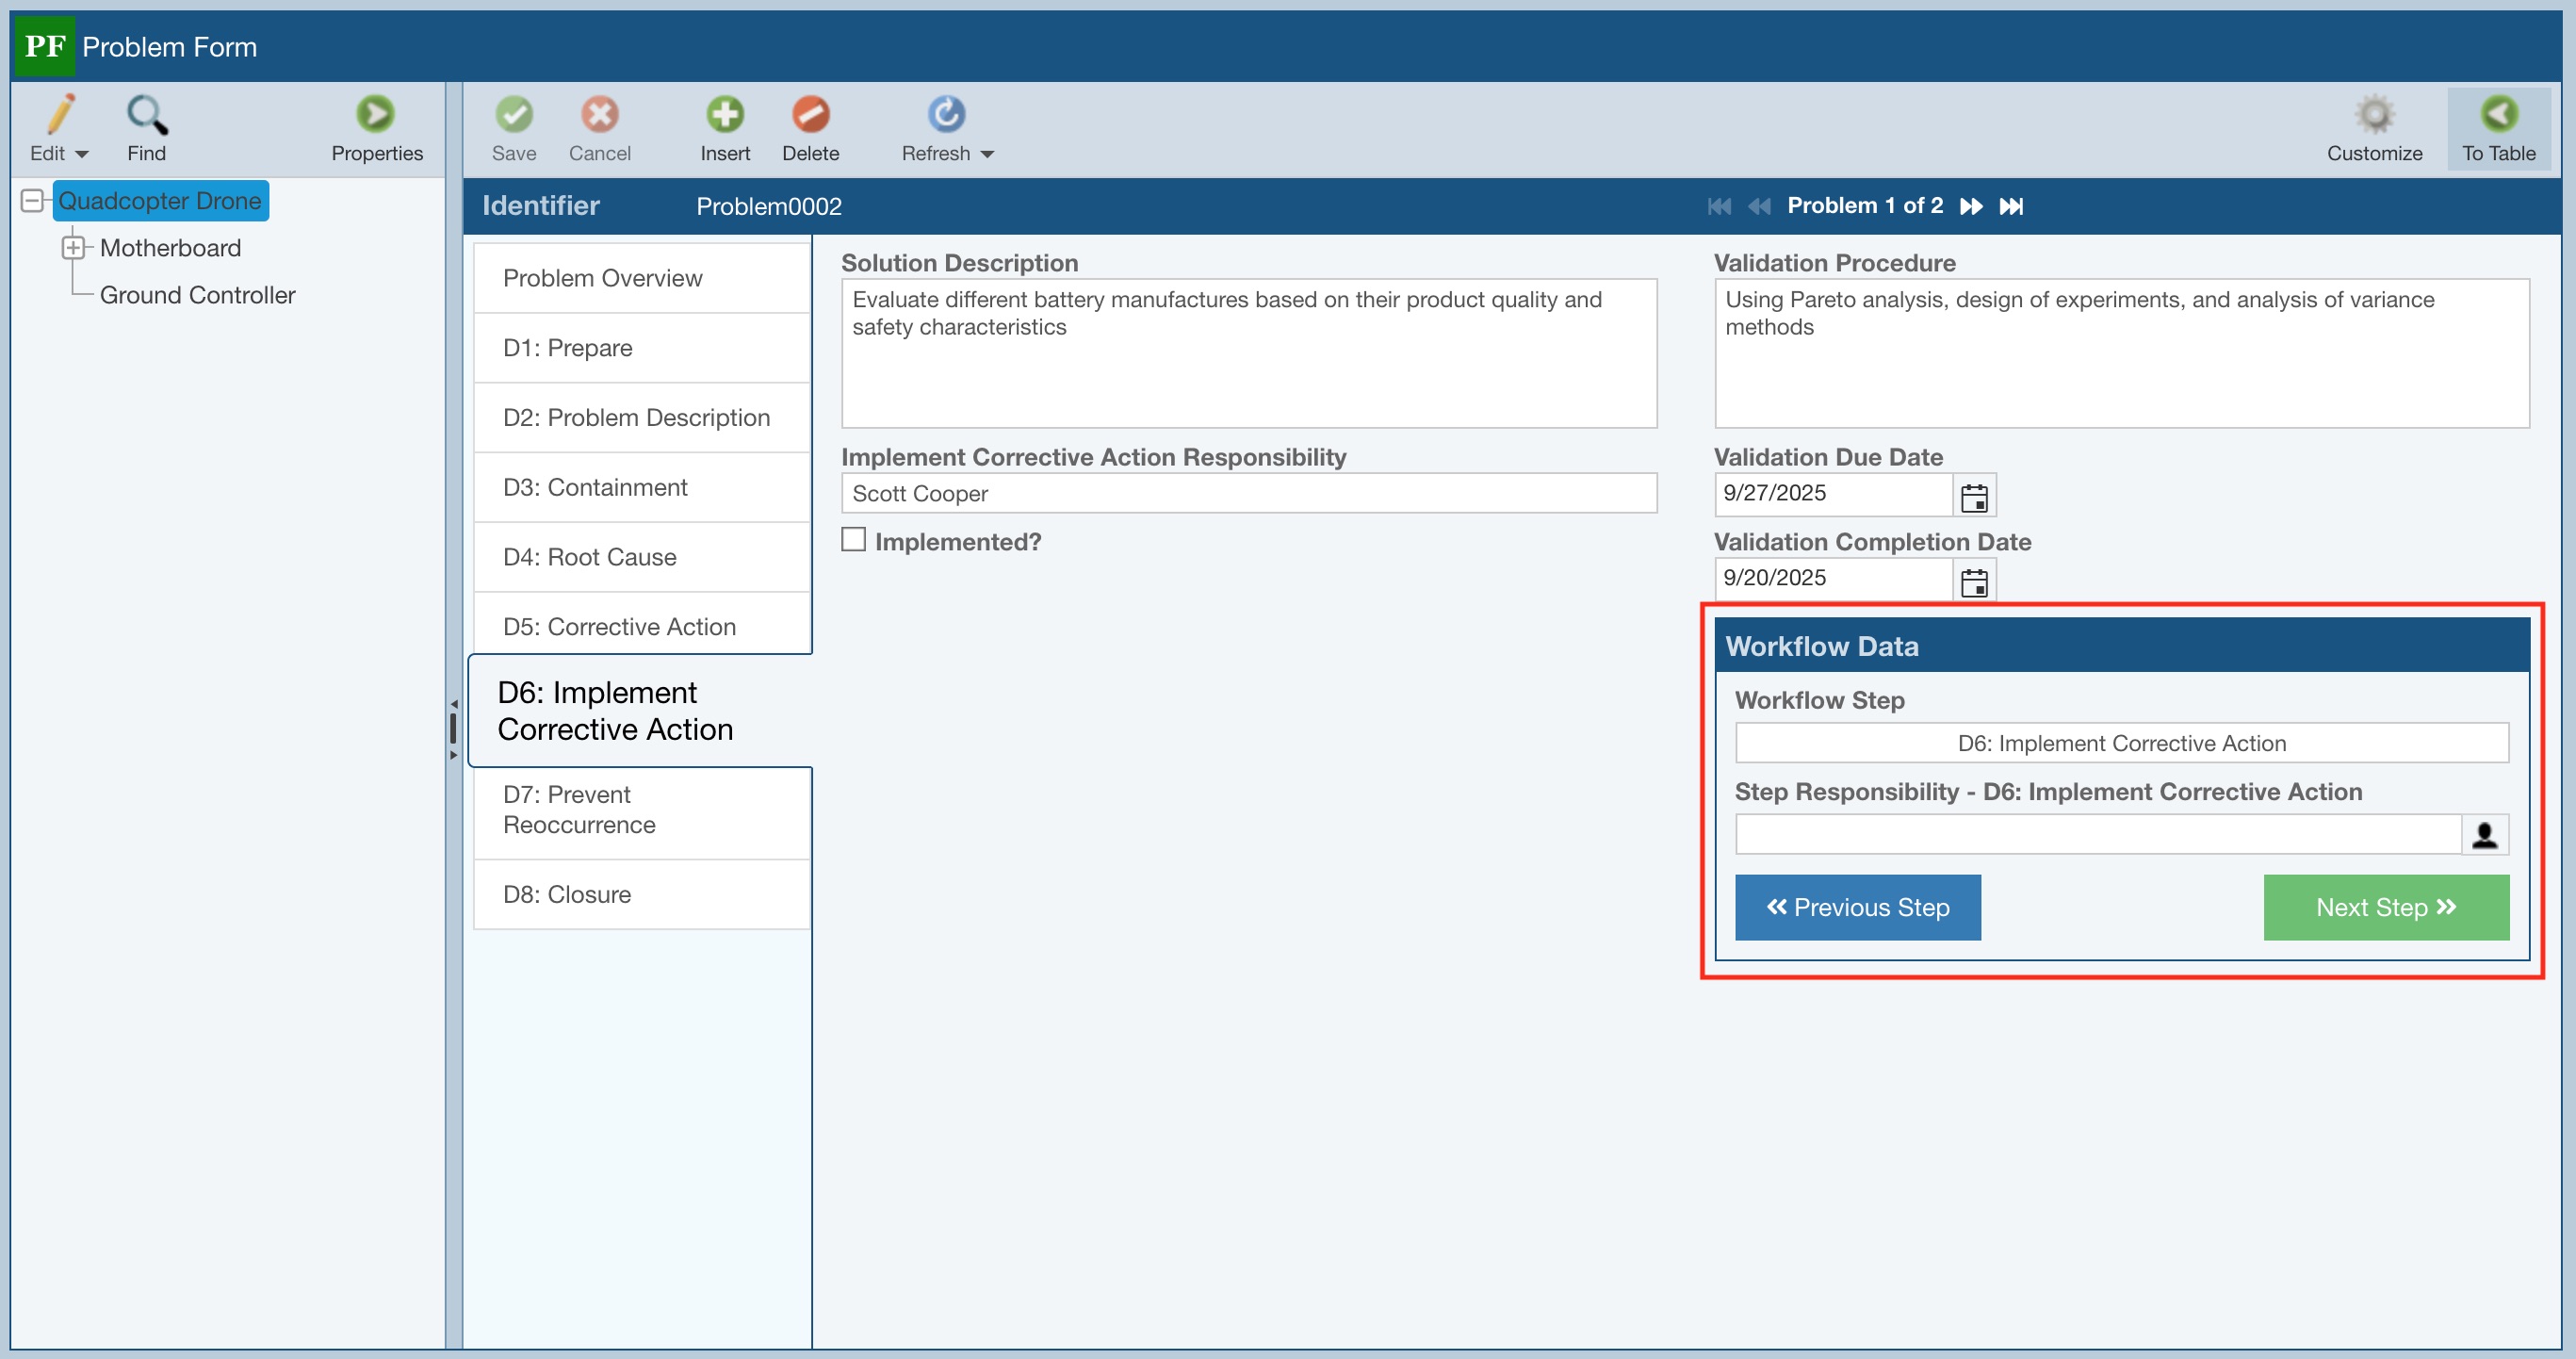
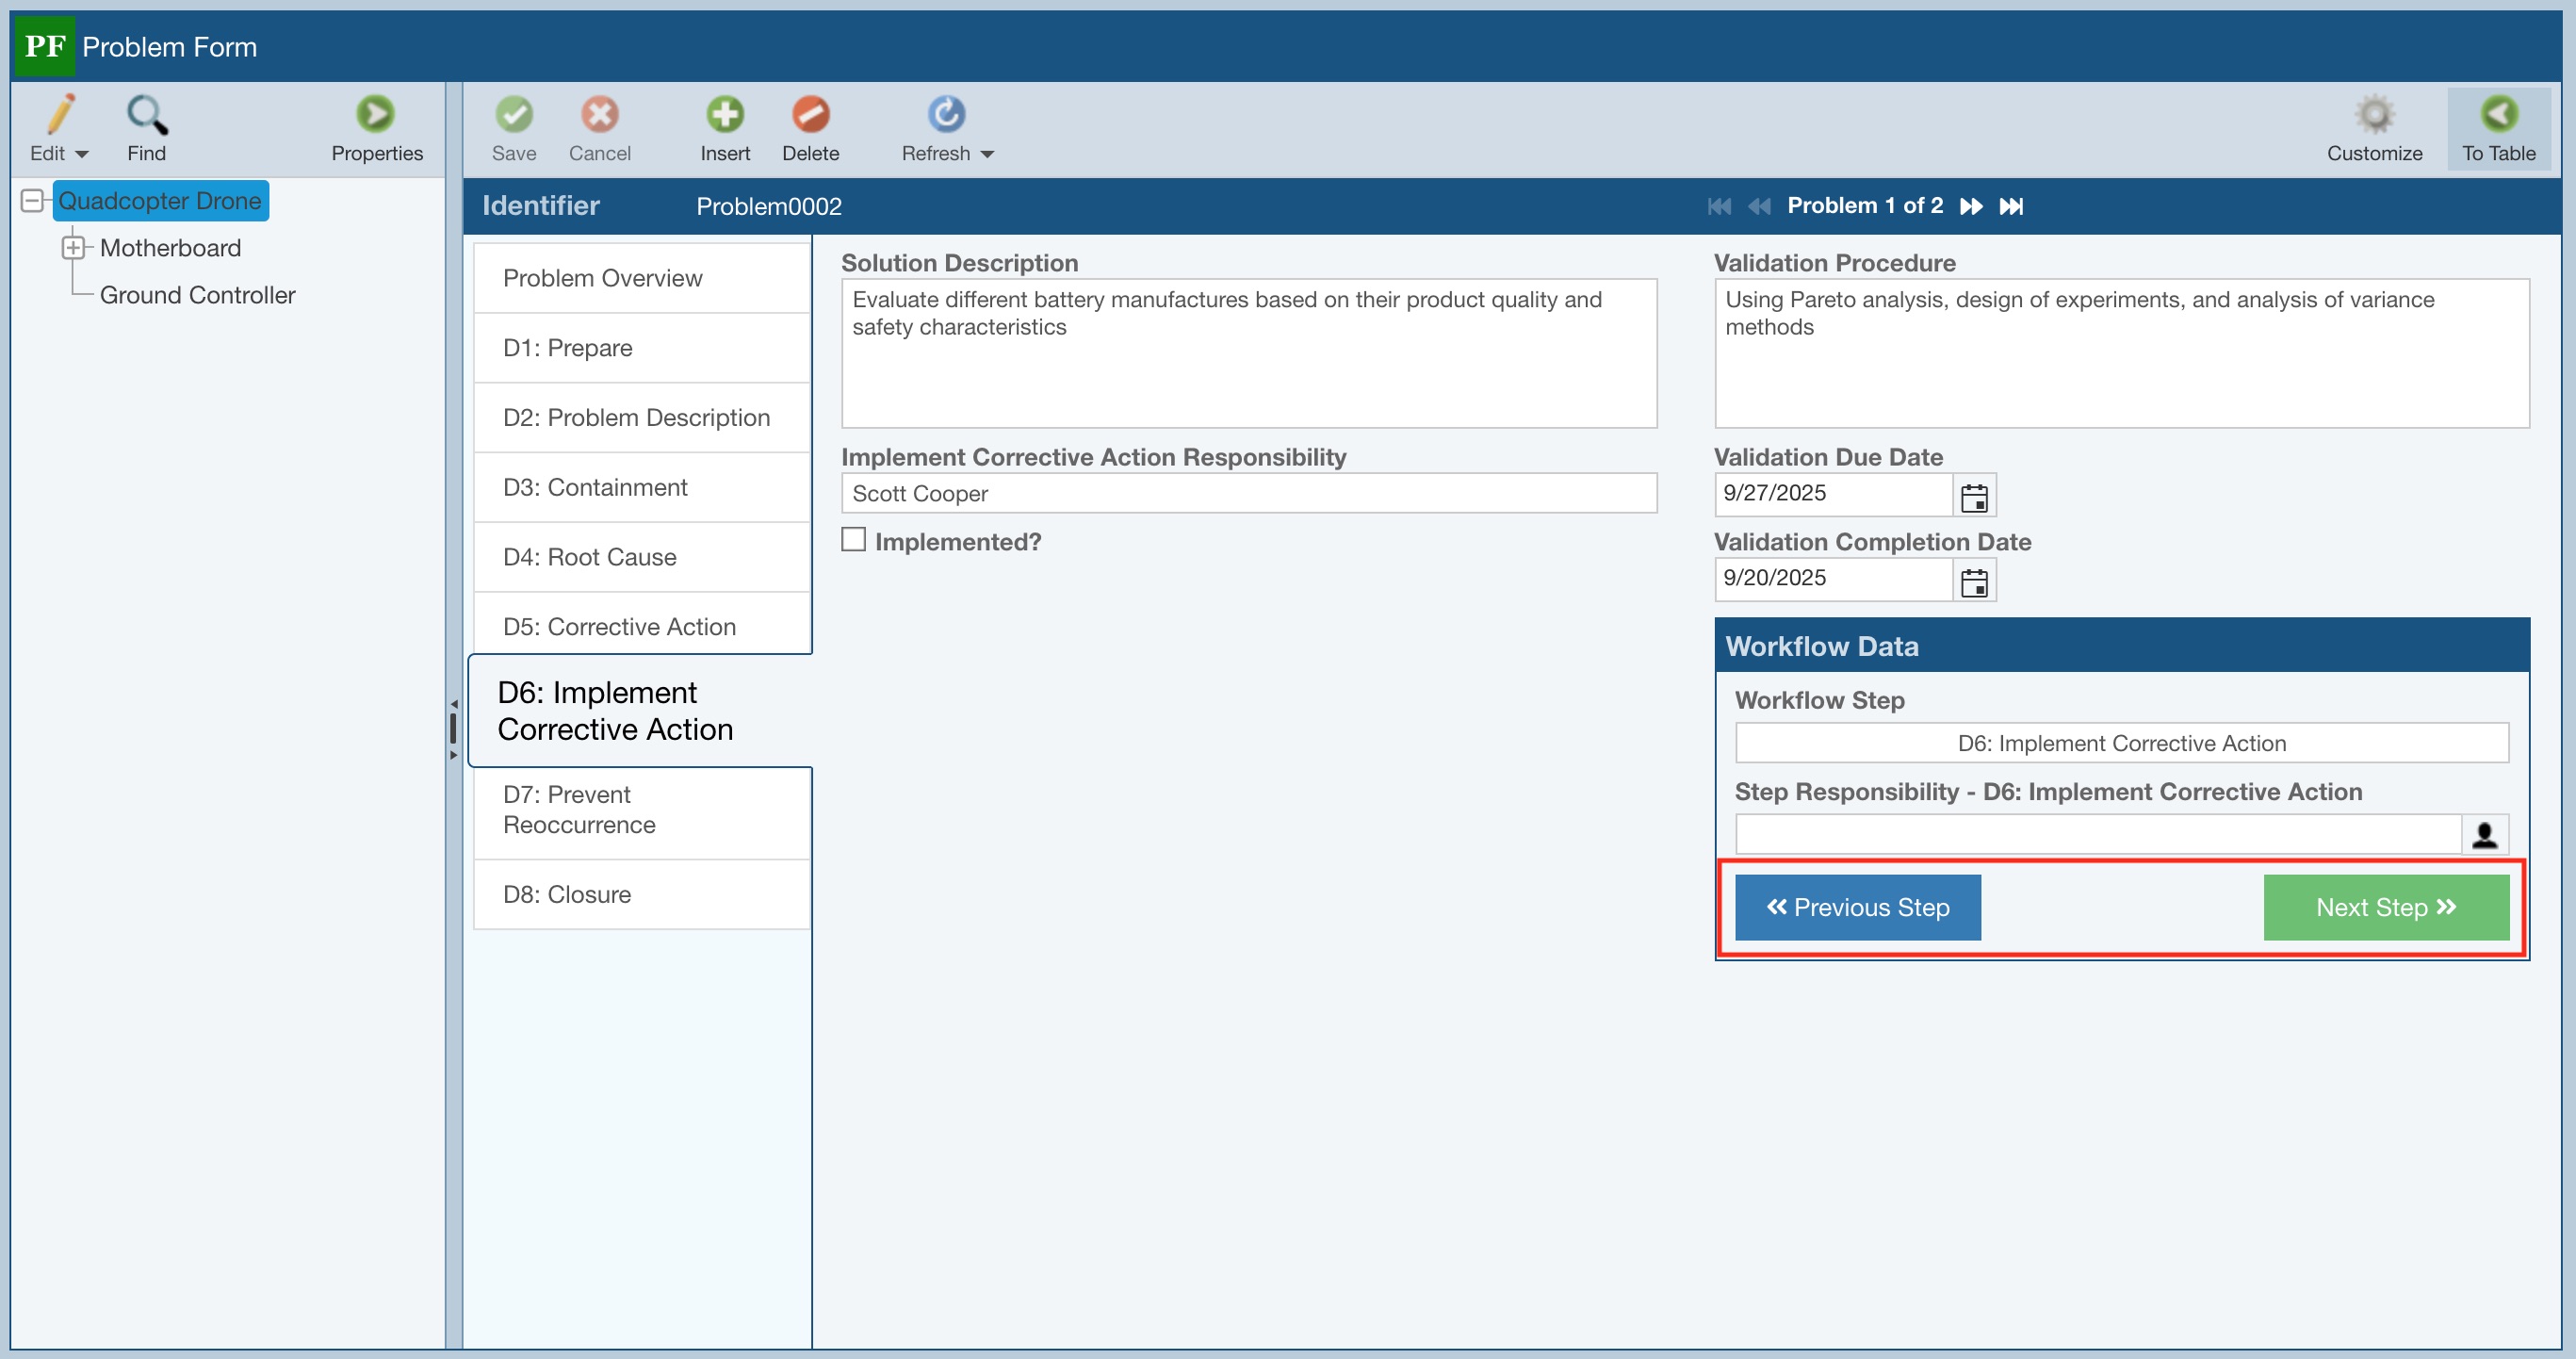
Once added, the Workflow Data control will appear on the FRACAS Incident or Problem forms.
The image below shows the Workflow Data field on a Problem form. As-supplied, the Relyence Drone Example Analysis includes a single Problem Workflow; note that the Workflow Data control will look slightly different if multiple selectable Workflows are included in an Analysis. For more details, see Multiple Selectable Workflows
For Workflow for Incident Subtables or Problem Subtables, you need to add the Workflow Data field to the subtable. This is completed on the Configure Subtables dialog. For more details, see Using FRACAS Subtables.
Using the FRACAS Workflows
Once your FRACAS Workflows for Incidents, Incident Subtables, Problems, and Problem Subtables are defined, you can use the Workflow as part of your FRACAS process.
You use the step buttons on the Workflow Step field to move your Incident, Problem, or Subtable through the steps of your Workflow.
Or, if a Workflow step has Approvals enabled, the steps to advance the Workflow incorporate the Approval process.
The Approval Process
When a Workflow Step has Approvals enabled, the Workflow Step section of the FRACAS form includes the Approval controls. If an approval is necessary for the Workflow Step, you cannot move to the next Step in your process until the approval has been received.
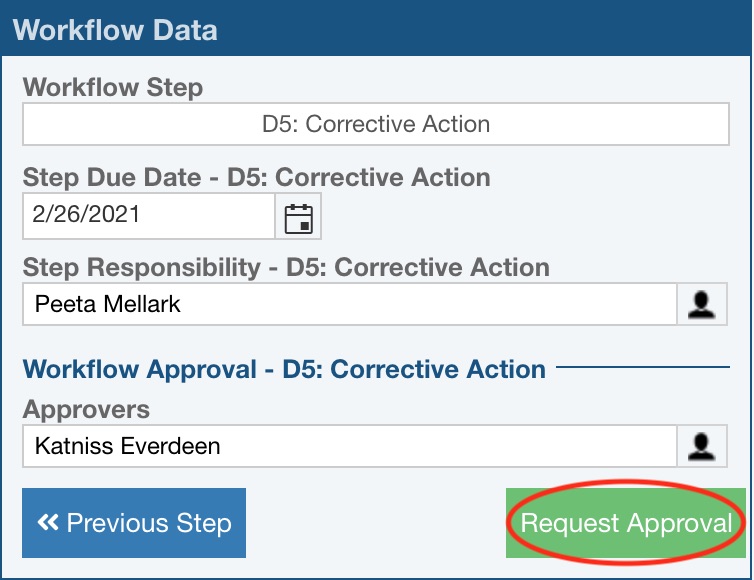
Once the task for the process Workflow Step is complete, click the Request Approval button on the form.
The approval request is noted in the Workflow Step box along with the Team Member requesting approval and the date approval was requested. The names of the Default Approvers you specified in Approval setup are filled in automatically in the Approvers field. To modify or add to this list, click the Team button to the right of the Approvers field to bring up the Team Members dialog and select from the list. The Approval Due Date is filled in based on the default setting specified in Approval setup. You can modify the Approval Due Date if you desire.
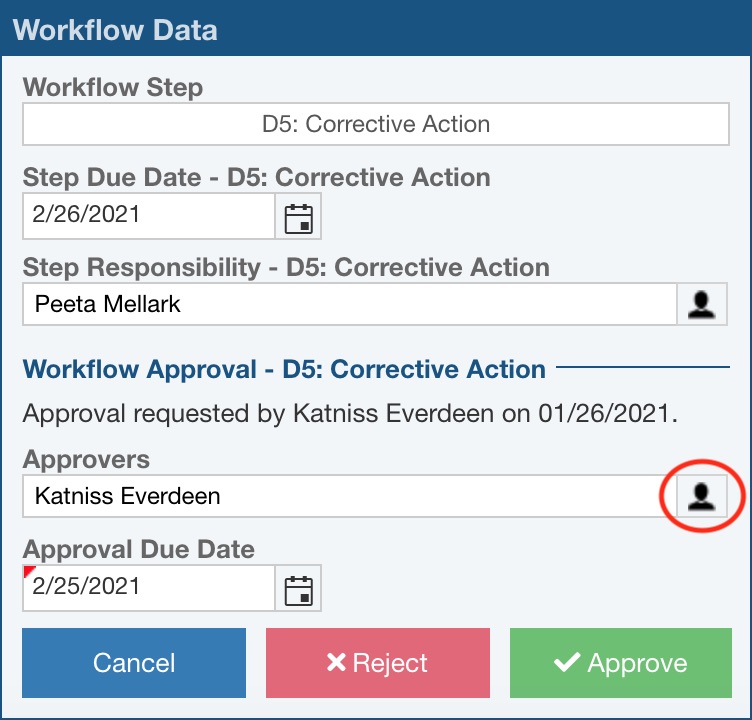
Once an Approval has been requested, a permitted Approver is required to either approve or reject before the Incident or Problem can advance through the FRACAS Workflow. When a permitted Approver is signed in, the Incident or Problem requiring approval appears with Approve and Reject buttons.

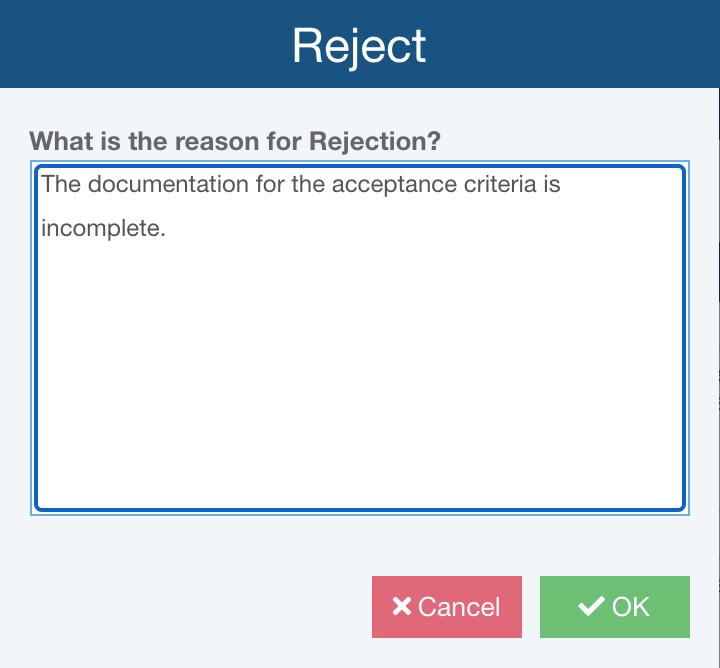
Upon review, if the request needs to be rejected, click the Reject button. The Reject dialog appears. Enter in the reason for why the approval request is rejected and click OK.
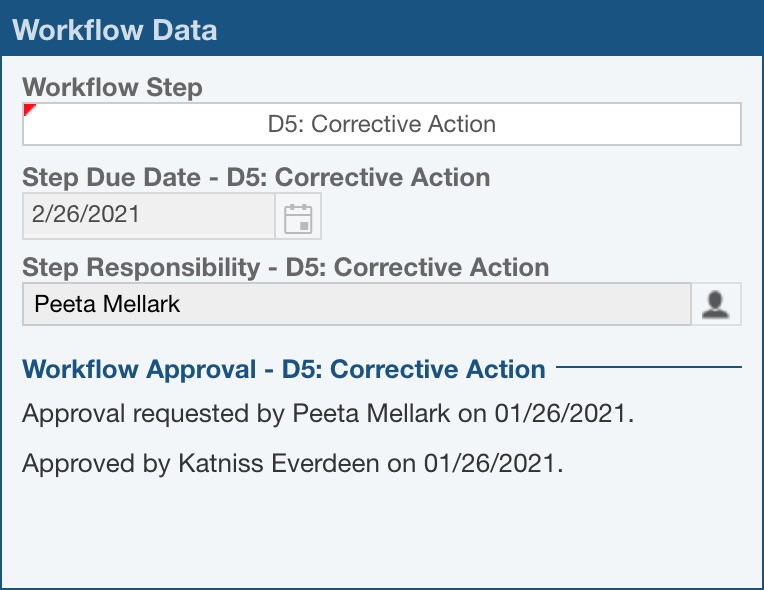
Upon review, if the request can be approved, click the Approve button. The "Approved by" note is added along with the Approver's name and Approval date. The Workflow Step is automatically advanced to the next step in the FRACAS Workflow.
Note that if the Required Approvers option for the Workflow Step is set to All Approvers, the Workflow will not advance to the next step until all required Approvers have marked the Workflow as approved. The Workflow Data details will show who requested approval and when, as well as which Approvers have already approved, for reference.
Click Save in the toolbar to save your changes.
Note that when the Workflow has reached the final step, if at any time you need to restart the Workflow and return to the first step to proceed through the Workflow again, click Restart Workflow.