Importing and Exporting FRACAS Data
You can import and export your FRACAS data, including Incidents, Problems, Time Logs, Incident Subtable and Problem Subtable records.
Importing
You can import data from a Microsoft Excel (.xlsx file) spreadsheet into Relyence. The import is a multi-step process, and Relyence will guide you through the steps to import your data.
If the Incident Table is active, click Import>Incidents to import Incidents. If the Problem Table is active, click Import>Problems to import Problems.
The Import dialog appears.
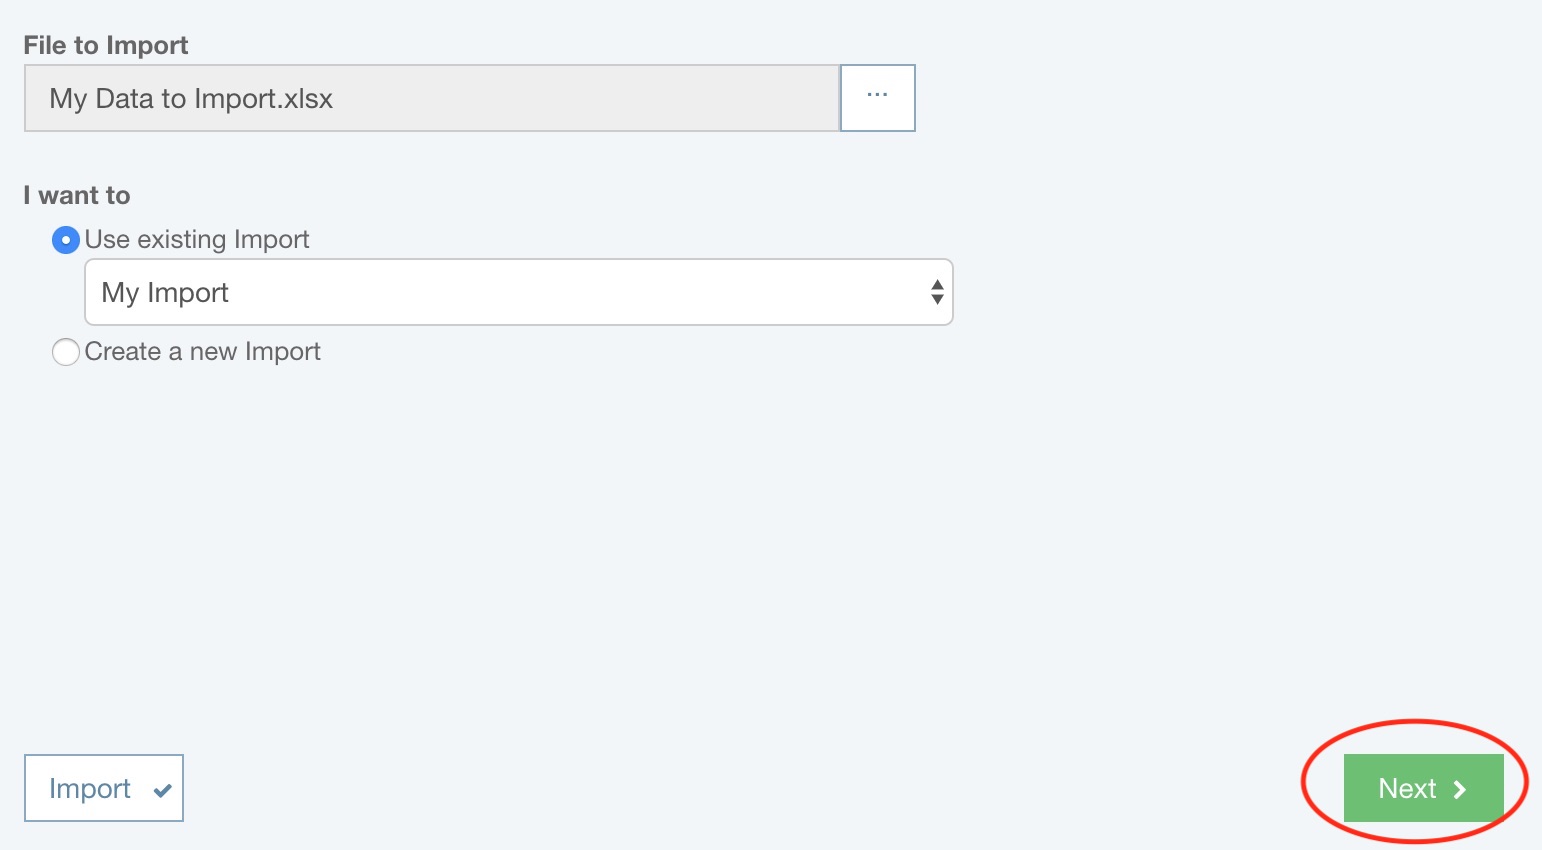
Step 1: Select the file to import and whether you want to reuse an existing Import
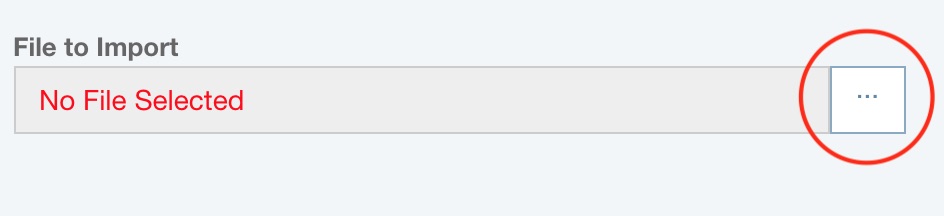
Select the File to Import. Click on the File Select (...) button to bring up the file explorer dialog. Navigate to the file you wish to import and select it.
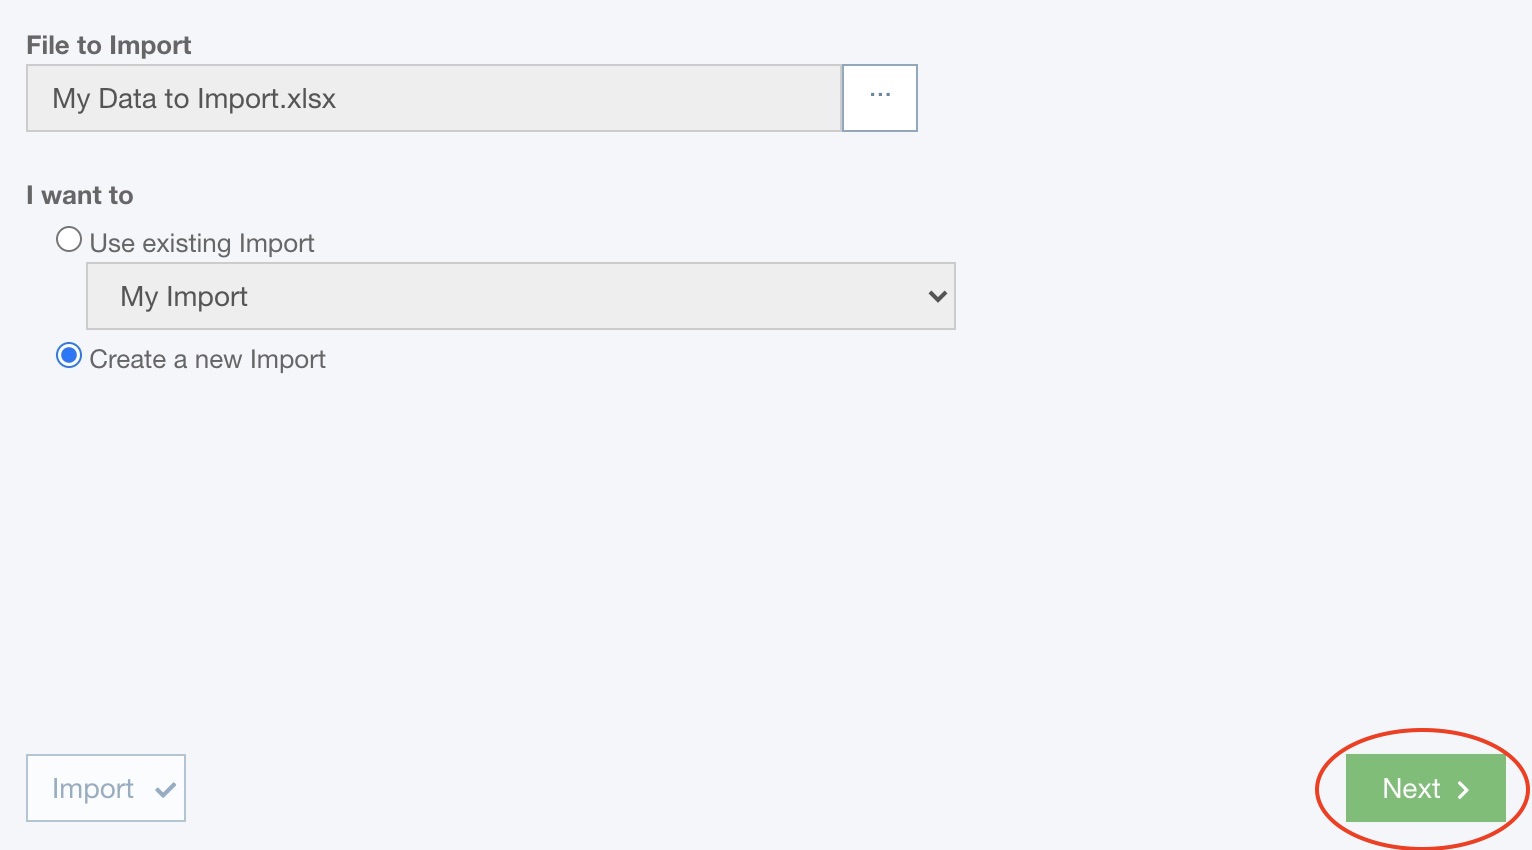
If you have not yet performed and saved any Imports, no further data is requested. Click the Next button to proceed.
Otherwise, you can select either Use existing Import or Create a new Import.
If you do not want to reuse an existing Import, select Create a new Import and click the Next button.
If you want to reuse an existing Import, select the Import you wish to use from the dropdown list of choices.
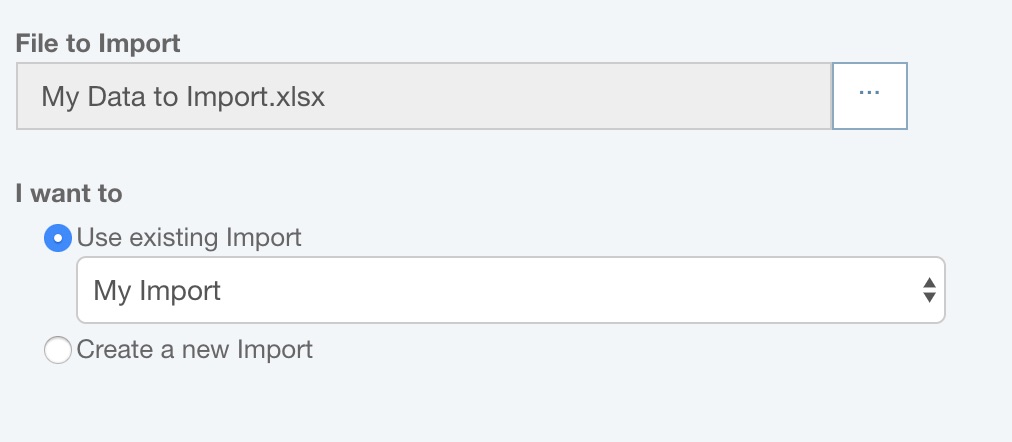
At this point, the Import button will be enabled, and you can choose to directly proceed to the data import step. This bypasses the import mapping steps and allows easy reuse of saved Imports.
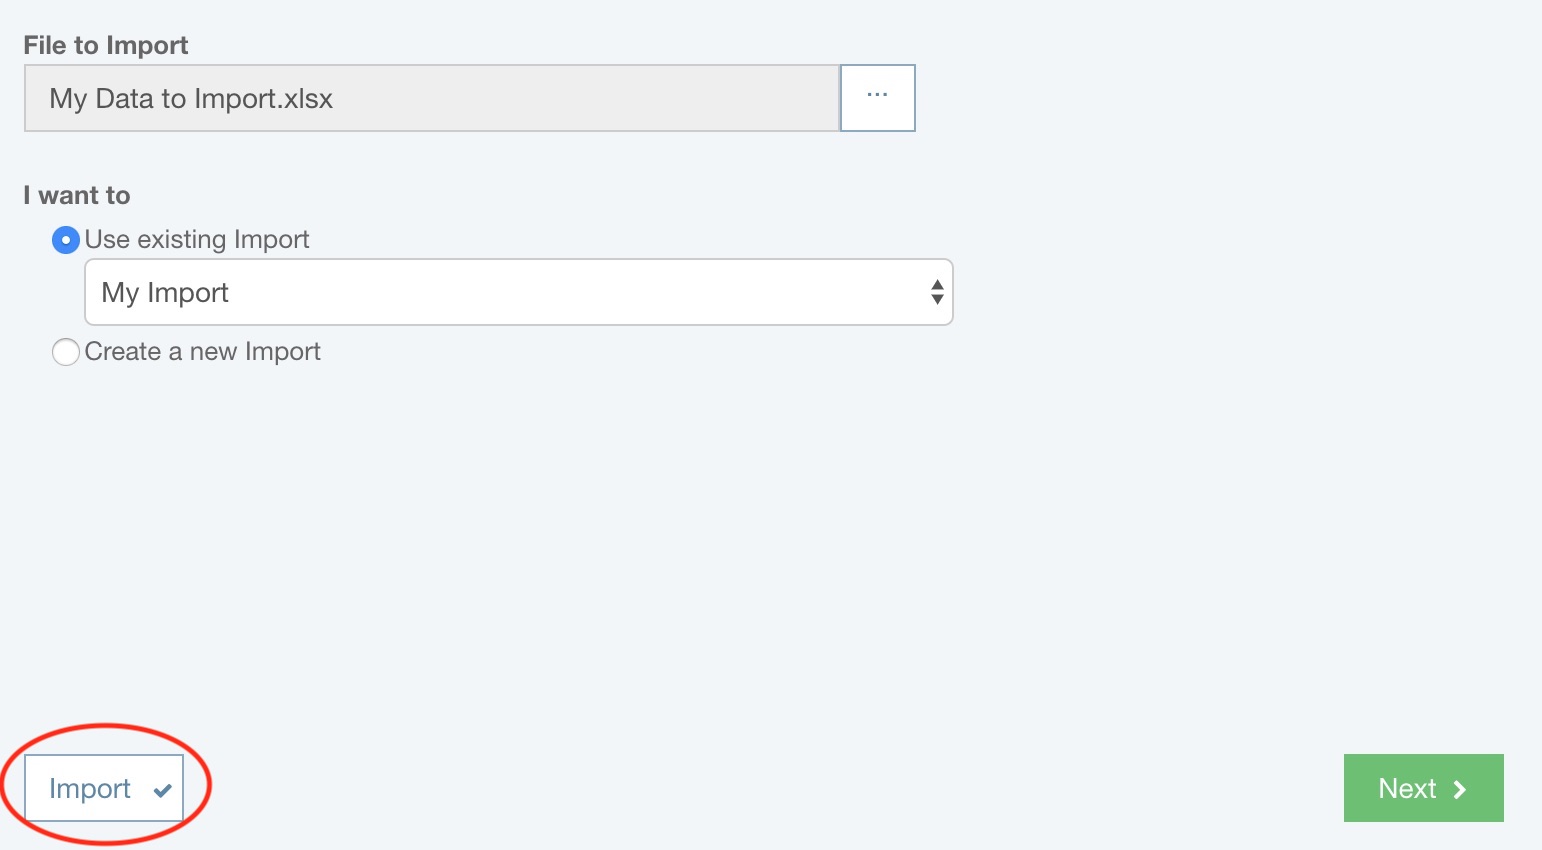
Otherwise, click the Next button.
Step 2: Select if you want to add or update records
If prompted, choose whether you want to add or update records during importing.

Note: The option to Add or Update records does not apply when importing Weibull Life Data or Weibull Reliability Growth Data.
If you choose to Add records, all line items in your import file will be added to your Analysis.
If you choose to Update records, the import will proceed by locating matching items from your import file in your Analysis, and then updating the matching records with data in the import file.
For Reliability Prediction importing, if you select Add records, you can optionally select Split Parts into multiple records by Quantity. When cleared, even if Quantity is greater than 1, a single Part record will be imported from the row with the Quantity value; whereas, when checked, if the Quantity is greater than 1, Relyence will import multiple identical Part records equal to the Quantity value. For example, if Quantity = 3, there will be 3 identical Part records created during the import. Additionally, if the Reference Designator is imported, comma separated Reference Designators can be separated and assigned to single Parts. This option is ideal for importing Parts lists to Relyence Reliability Prediction when part-level FMECA is also planned.
For FRACAS, Reliability Prediction , and Maintainability Prediction data importing, if you select to Update records, you can optionally select to Add new records during update. In this case, if a matching item from the import file is not found in the Analysis, a new record will be added.
Note that if you are importing DFMEA Worksheet or PFMEA Worksheet data, an extra choice will appear in addition to Add records and Update records - Add new Failure Mode records to existing Functions or Add new Failure Mode records to existing Process Steps. For more details on this type of import, see Importing New Failure Mode Records to Existing Function or Process Step Records.
Note that if you are importing Control Plan data, an extra choice will appear in addition to Add records and Update records - Add new Control Plan records to existing Process Steps. For more details on this type of import, see Importing New Control Plan Records to Existing Process Step Records.
Update Records
In order to update records during importing, the import file must include identifier data fields. These fields provide a unique identifier to locate the record to update. Because data fields such as Name are not required to be unique, these unique identifier fields are needed. Typically, these are referred to as "ID" fields.
The process to perform an import update are:
- Export with the Export all data fields option selected. This option will automatically include the unique identifier fields.
- Make the necessary changes to the exported file.
- Re-import using the Update records option.
The data fields that are required to perform an Update are:
- FMEA: ID field for any type of data that you want to update (i.e. , Mode ID, Cause ID, Effect ID, or Action ID if updating Function/Process Step, Mode, Cause, Effect, or Action records). For example, if you map any Cause field to be updated, you must include the Cause ID.
- FRACAS: Incident ID for Incidents, Problem ID for Problems.
- Fault Tree: ID
- Reliability Prediction: Part ID
- Maintainability Prediction Data: Maintainability Task ID
Connect records
Note that if you are importing DFMEA Worksheet data, an extra choice will appear - Connect Effects to higher level Failure Modes. For more details on this type of import, see Connecting Effects to Higher Level Failure Mode Records in DFMEA.
Merge duplicate rows
If your FMEA Worksheet has consecutive duplicate rows, you can optionally check to have Relyence merge duplicate rows so as to create one record upon import.
For DFMEA and FMEA-MSR, you can merge duplicate rows for Functions, Failure Modes, Effects, and Causes. For FMECA, you can merge duplicate rows for Functions and Failure Modes. For PFMEA, you can merge duplicate rows for Process Steps, Failure Modes, Effects, and Causes.
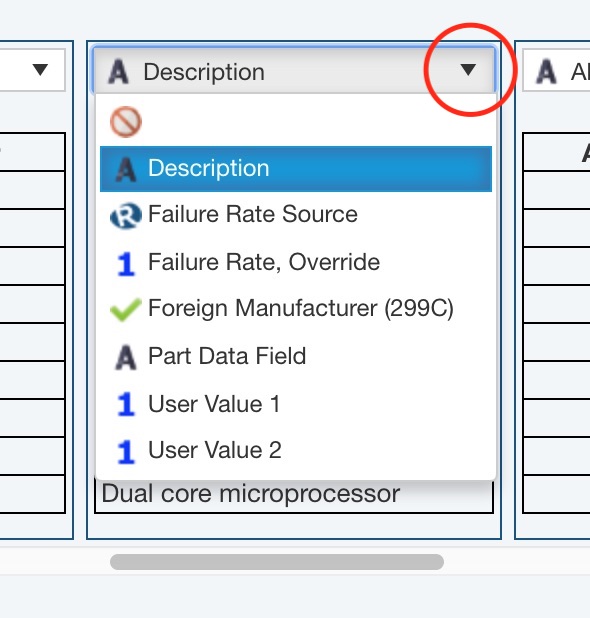
Step 3: Map data fields
The Import Mapping dialog appears. In this dialog, you will see your data. If Column names contained in row is selected, select the row number and Relyence will attempt to automatically map your data columns. Any columns unrecognized will be unmapped. The number of unmapped columns will appear in the upper right and all unmapped columns will appear with a red border.
To map any unmapped columns, or remap a column, click the dropdown list at the top of the column and select from the list of available data fields. The type of data field will be indicated by the icon to the left of the data field name. The first icon in the list is always the crossed out "skip", or "do not map", indicator. The "A" icon indicates a text field, the Relyence logo icon indicates a unique Relyence database field, the "1" icon indicates a numeric field, and the "check mark" icon indicates a yes/no field.
Note: If you are importing Reliability Prediction data fields that appear on the Part Form, additional guidance can be found here: Importing Part Form Data.
When you have completed mapping all your data, click Next.
Step 4: Optionally save Import and begin import process
The Save Import dialog appears. If you want to save this Import for later use, select Save this Import and enter the name for your Import. The number of columns to be imported and skipped will be shown.
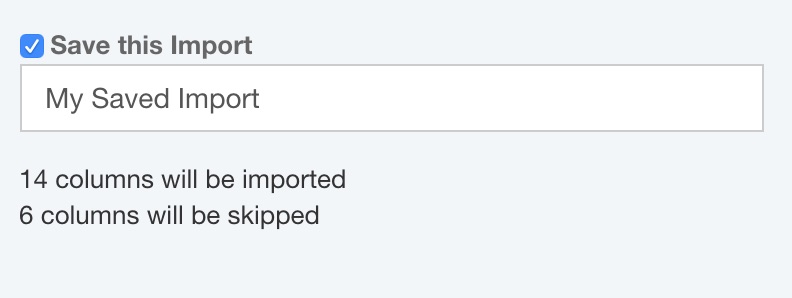
Click Import.
The import process will start up automatically, and the data will be imported. A progress indicator will appear as your data is being imported. When importing is finished, the Import Complete dialog appears.
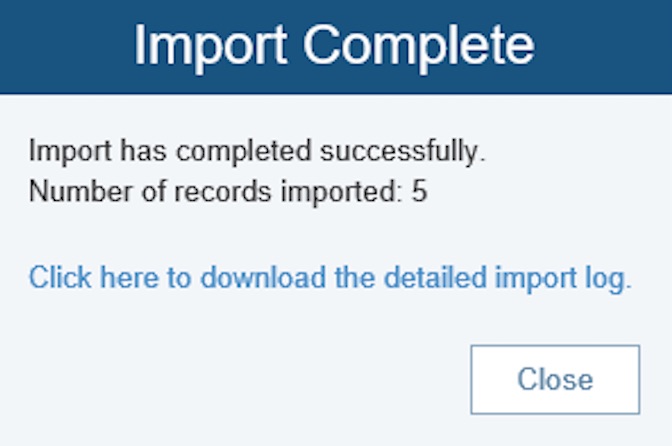
If successful, the number of records imported will be noted. If you want to view the import log, click the download link. If unsuccessful, the Import Complete dialog will note this. To view the import issues, click the link to download the import log and review the error(s) encountered during import.
If no valid data can be found in a row of your Microsoft Excel file, no new item will be added; i.e. there will be no "blank" data records imported into your Relyence Analysis.
Step 5: Complete import process
Click Close to close the Import Complete dialog.
Importing data may take a few minutes depending on the size and complexity of the data you are importing.
An easy way to ensure your Microsoft Excel import file is properly set up is to use the Export function to create a sample file. You can then use this file as a starting point for creating your import file. You can then remove fields you don't use or need, change the order of the fields as you prefer, and add your data.
The following data fields are ignored during importing:
- Incident and Problem Identifiers (these are automatically assigned when importing)
- Attachments
- Team Members
- FRACAS calculated data fields such as Failure Rate and MTBF
You can import Associations. When importing Problems, you can import associated Incidents by using the Associated Incidents field when mapping your data fields. When importing Incidents, you can import associated Problems by using the Associated Problems field when mapping your data fields. And you can import Incidents or Problems, you can import associated Subsystems by using the Associated Subsystems field when mapping your data fields. Associated Incidents and Problems will import based on Identifier. Associated Subsystems will import based on Subsystem Name. Multiple items in these fields must be separated by semicolons.
Click the following link if you would like to download and review a sample FRACAS Incidents import file:
Importing FRACAS Lists
You can import your own lists for use in your FRACAS Incident or Problem Tables and Incident or Problems Forms using an Excel file which includes the list information.
Click Import>Lists from the Sidebar menu.
The Import Lists dialog appears.
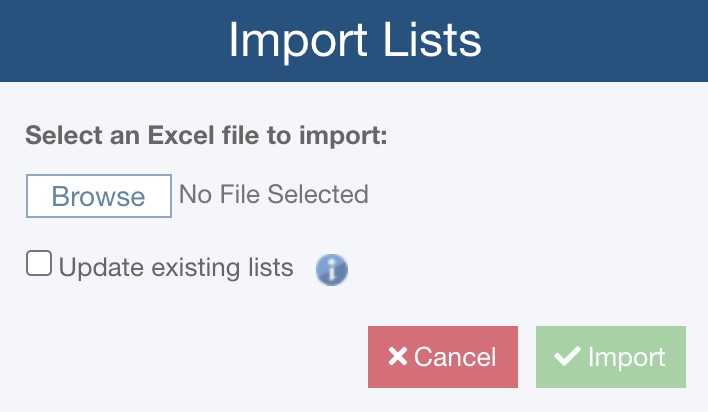
Click Browse to select the Excel file to import. If you want existing Lists to be overwritten with data from the import file, select Update existing lists. Otherwise, duplicate Lists found in the import file will be ignored and your existing Lists will remain intact.
Click Import to import your Lists. When the import is complete, the Import Complete dialog appears with status about the import. You can also review the log file if you desire. Click Close to close the dialog.
The format for the importable Excel Lists file is simply two columns of ListName and ListItem. You can include as many Lists as you want in the import file.
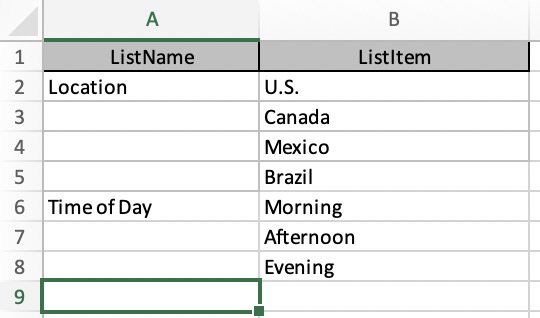
Once imported, all the Lists will be available in the List Name dropdown choice list. Select the List to use for this data field using the dropdown choice list.
Click the following link if you would like to download the sample Lists import file:
Importing the Analysis Tree
You can import the Analysis Tree into Relyence if you prefer not to build your tree structure using the Relyence user interface. To import the Analysis Tree, click Import>Analysis Tree from the Sidebar.
Importing the Analysis Tree works in the same manner as described above for importing Analysis data.
When importing Analysis Tree data, it can be used to add records or update records.
When using the Add records option:
- When mapping the data fields to import when performing an Analysis Tree import, the Parent field or Level field is used to indicate which subsystem is the parent to the current subsystem. This enables you to define the hierarchy of your tree using the Analysis Tree import function.
- For example, consider if you wanted to import Subsystems to create the following Analysis Tree structure:
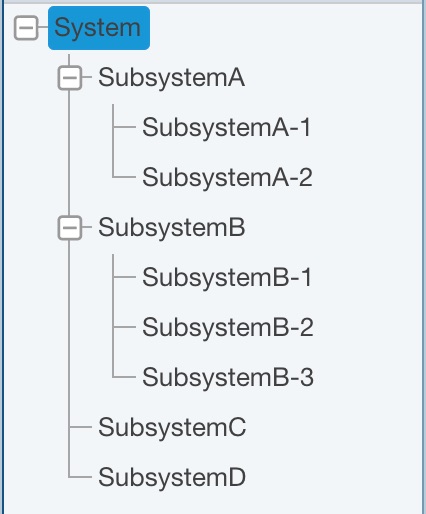
- Your source file would need to contain, at a minimum, the Name and Parent values or the Name and Level values as shown in the tables below:
| Name | Parent |
| System | |
| SubsystemA | System |
| SubsystemA-1 | SubsystemA |
| SubsystemA-2 | SubsystemA |
| SubsystemB | System |
| SubsystemB-1 | SubsystemB |
| SubsystemB-2 | SubsystemB |
| SubsystemB-3 | SubsystemB |
| SubsystemC | System |
| SubsystemD | System |
- or -
| Name | Level |
| System | 1 |
| SubsystemA | 2 |
| SubsystemA-1 | 3 |
| SubsystemA-2 | 3 |
| SubsystemB | 2 |
| SubsystemB-1 | 3 |
| SubsystemB-2 | 3 |
| SubsystemB-3 | 3 |
| SubsystemC | 2 |
| SubsystemD | 2 |
- Note: If you import both Parent and Level, the Parent field is used and Level is ignored.
When using the Update records option:
Make sure your source file includes the Subsystem ID field to update most data fields
Make sure your source file includes the Parent Subsystem ID or Parent field as well if the update needs to reassign the Subsystem to a new parent Subsystem
Importing Problem Subtable and Incident Subtable Records
You can add Subtables to your FRACAS Forms. Subtables enable you to put a small table of data on your Forms to capture a list of information.
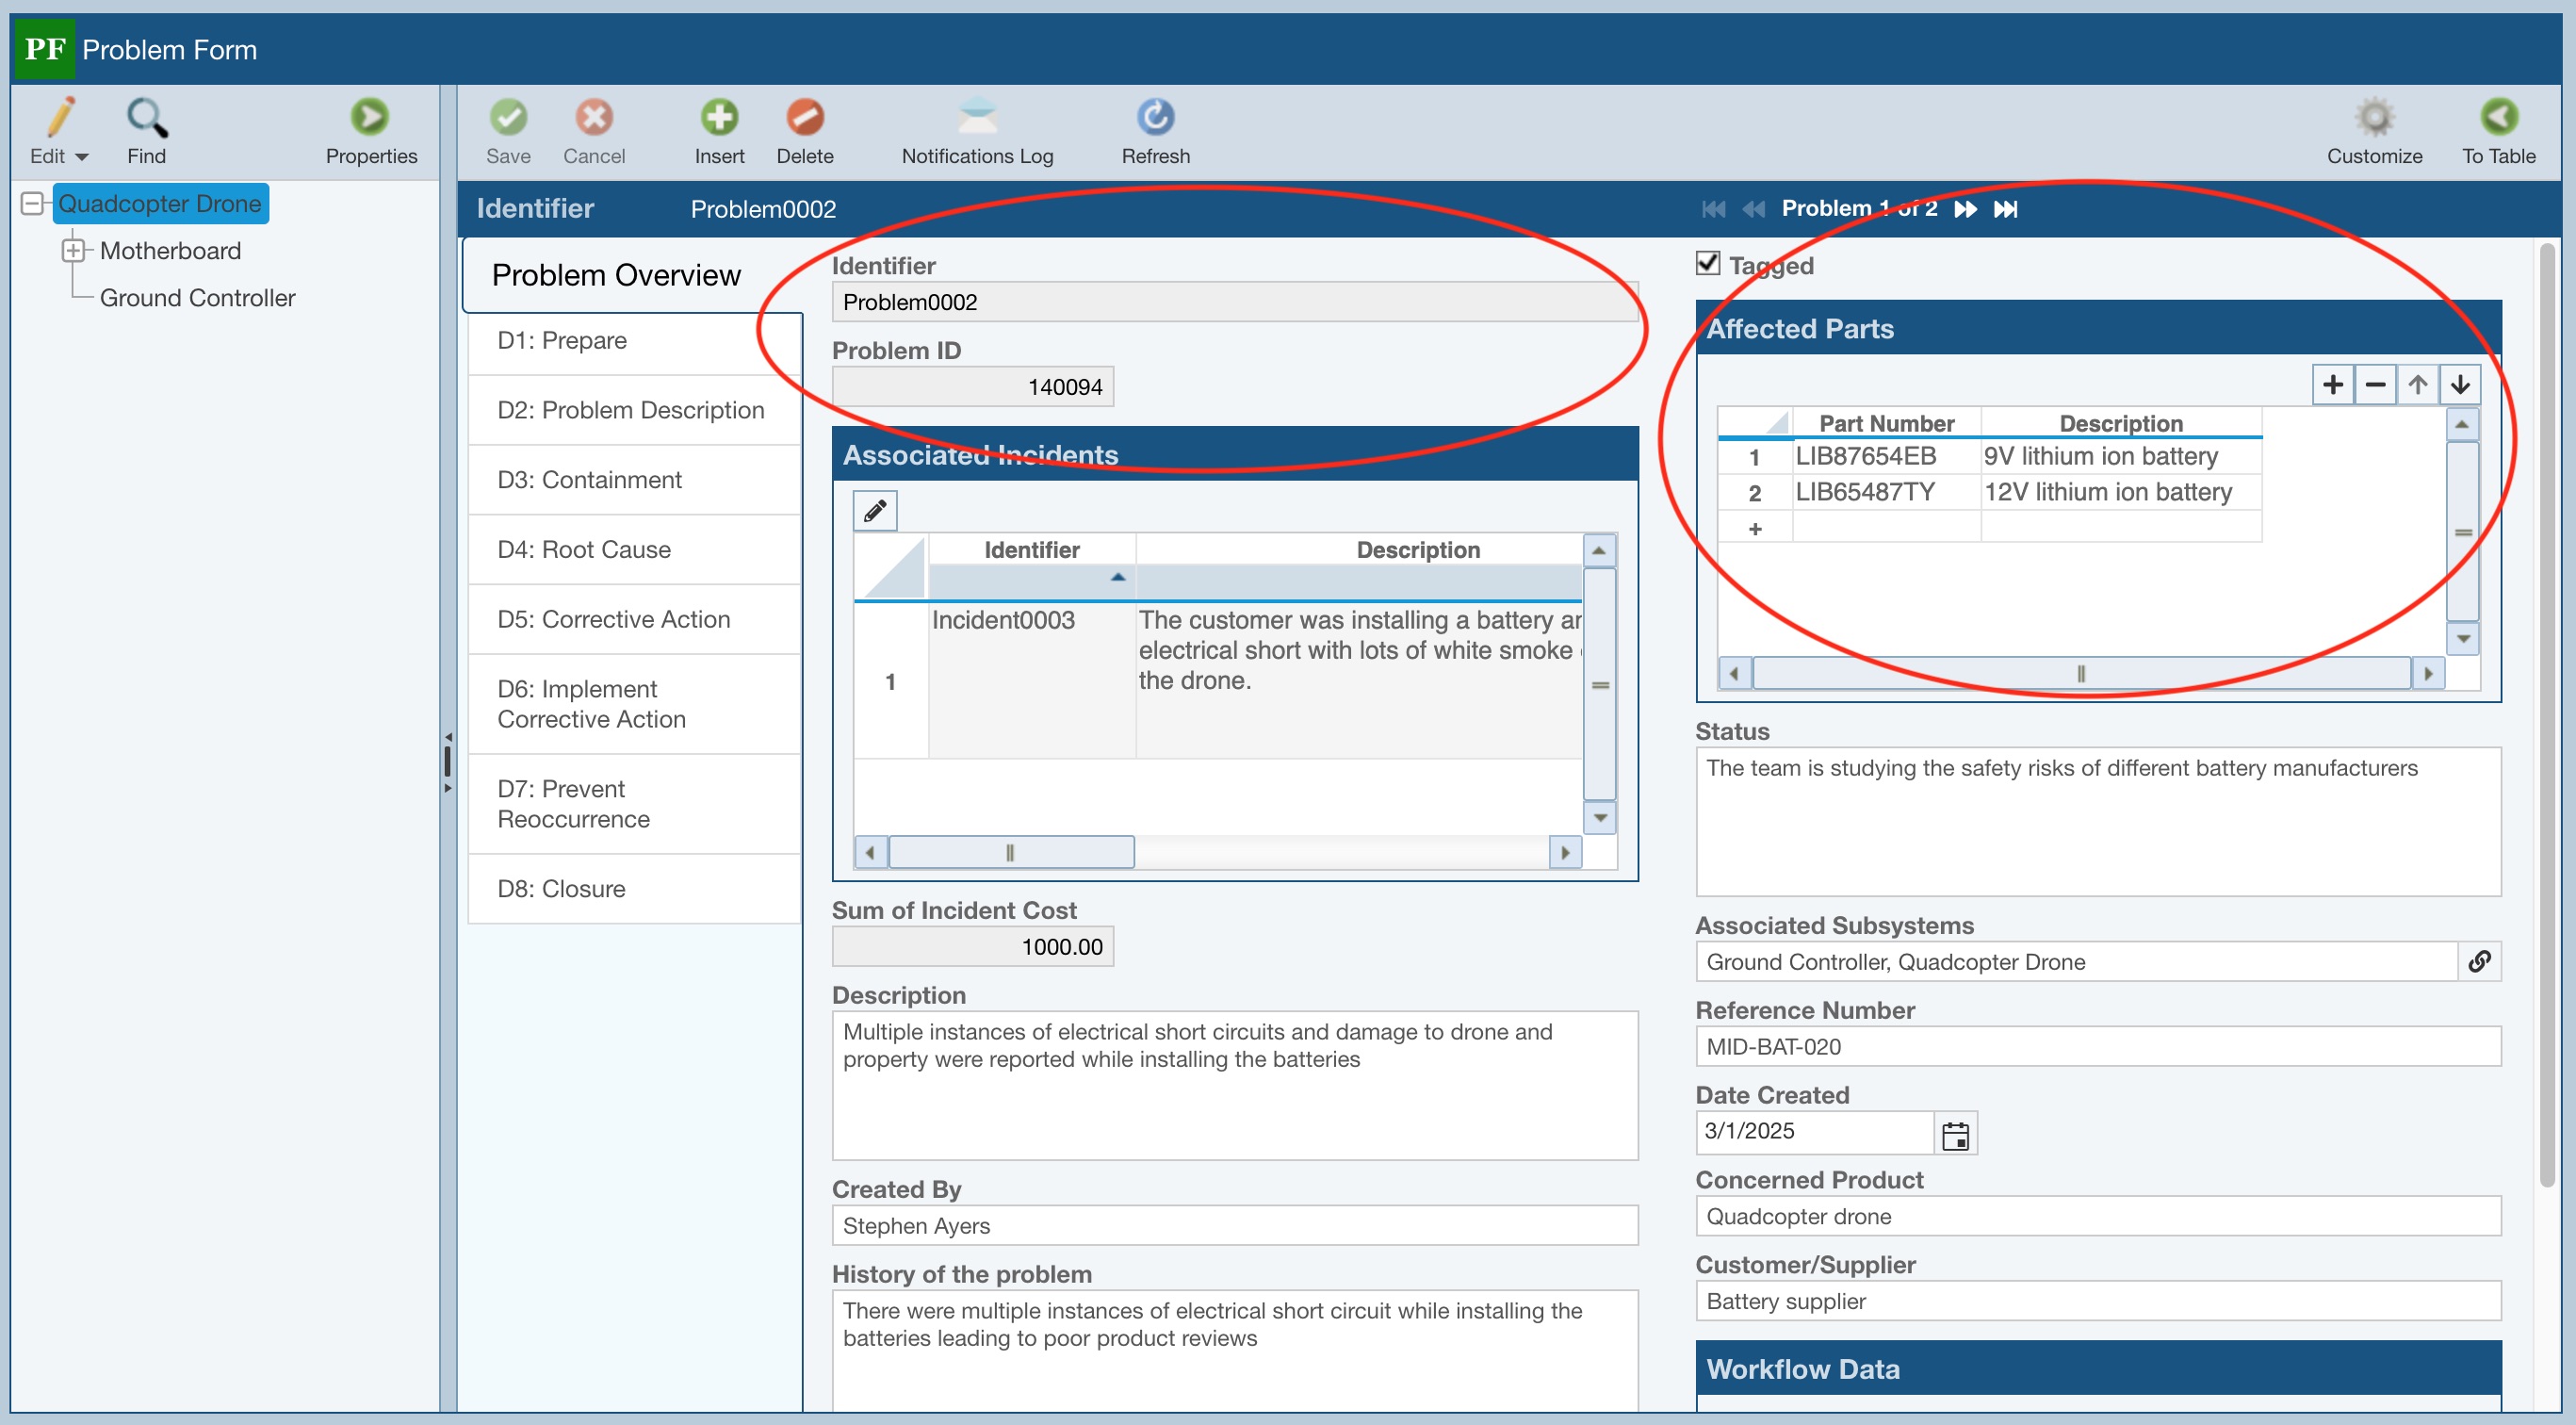
Subtables can be used for any purpose, such as documenting team members who attended a meeting, a list of steps taken, a list of parts replaced, or any other type of data you want to enter on a FRACAS Incident or Problem. For example, in the Relyence-supplied Analysis Drone Example, you can find a subtable for "Affected Parts" on the Problem Overview form.
For more details about subtables, see Using FRACAS Subtables.
You can import data into any subtable. To import subtable data, click Import>Problem Subtable or Import>Incident Subtable from the Sidebar.
Importing subtable data works in the same manner as described above for importing any FRACAS data.
When mapping the data fields to import when performing a subtable import for Problem Subtable records, the Problem ID field or Problem Identifier field is used to indicate which Problem is the parent to the subtable record. Likewise, when mapping the data fields to import when performing a subtable import for Incident Subtable records, the Incident ID field or Incident Identifier field is used to indicate which Incident is the parent to the subtable record.
Note that if the parent field (Problem ID field or Problem Identifier field or Incident ID field or Incident Identifier field) is blank for any imported Problem or Incident subtable record, the record will be associated with the last parent record.
Data within the Affected Parts Problem Subtable in the Drone Example Analysis can help to explain the data format required for successful subtable imports.
On the Problem Overview tab, for Problem0002, the Affected Parts subtable contains two records.
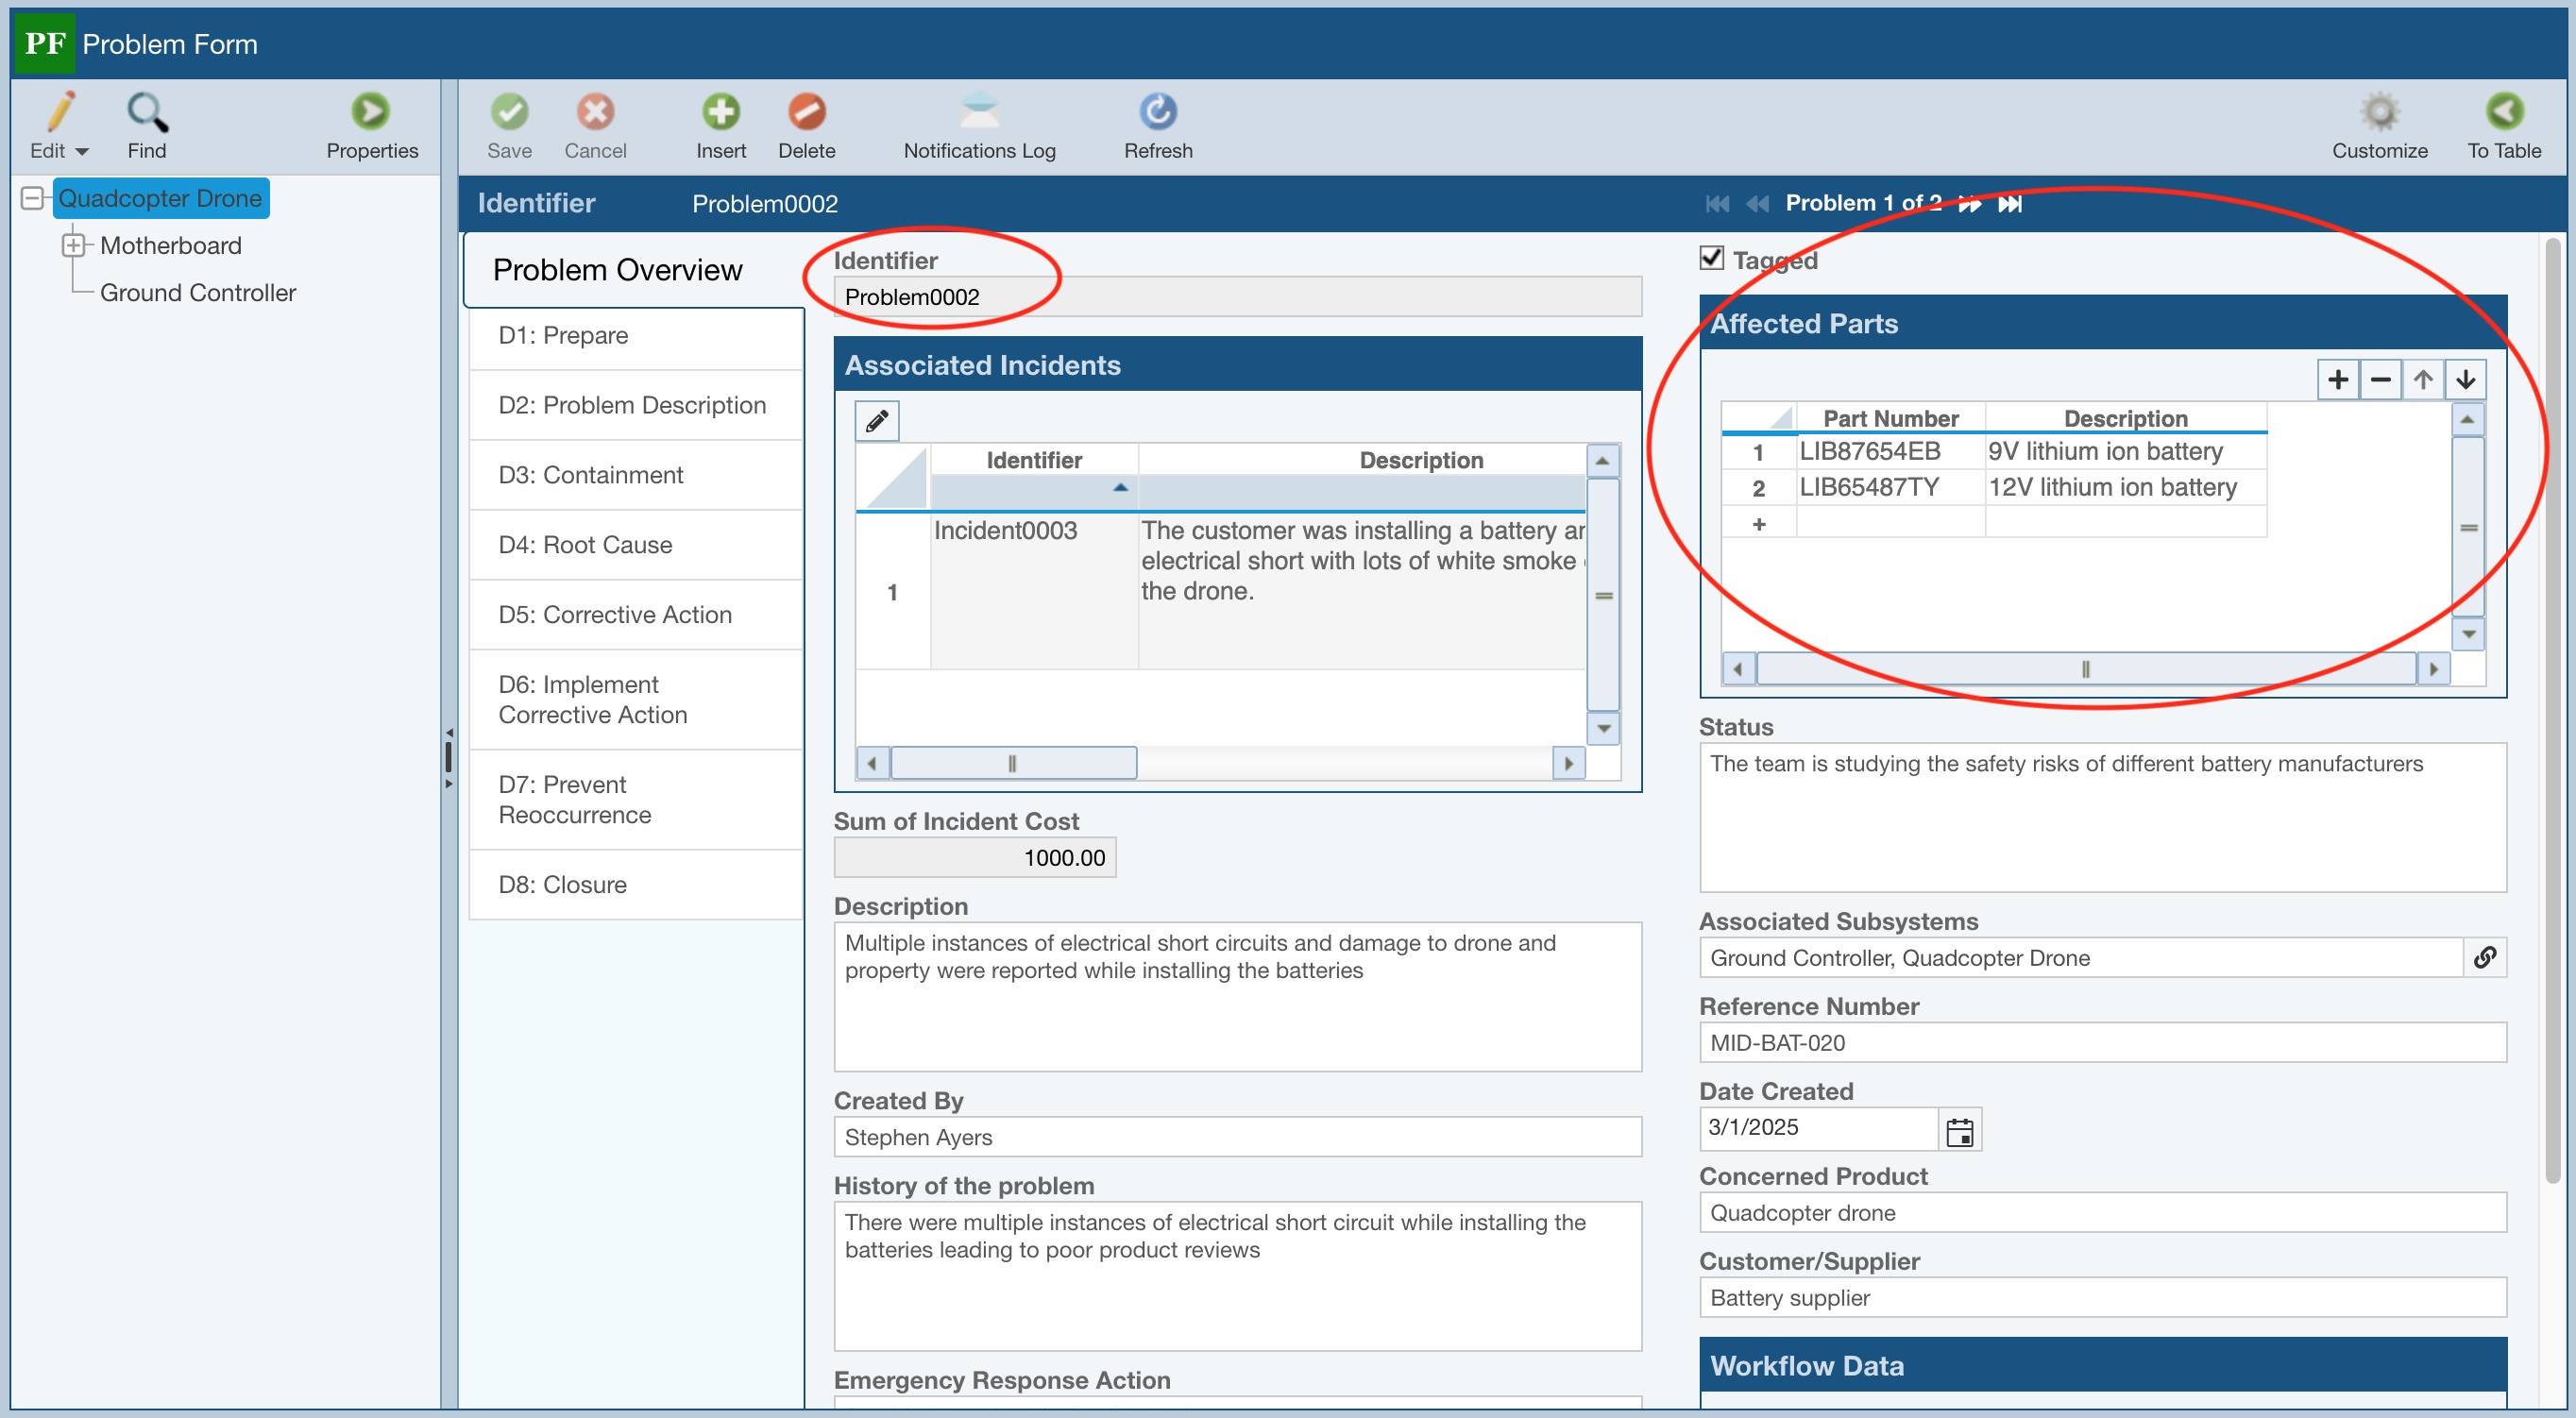
The records in the Affected Parts subtable are associated with Problem0002 via that Problem Identifier field as well as via the Problem ID field. To identify the Problem ID field for any Problem record, you just need to add that field to the Problem Overview form or Problem Table. You can find details about customizing tables and forms in Relyence FRACAS in the Customizing the FRACAS Interface topic.
Consider if you wanted to import similar data to Problem0003, you could use sample data such as that shown below, where you map either the Problem ID field or Problem Identifier field.
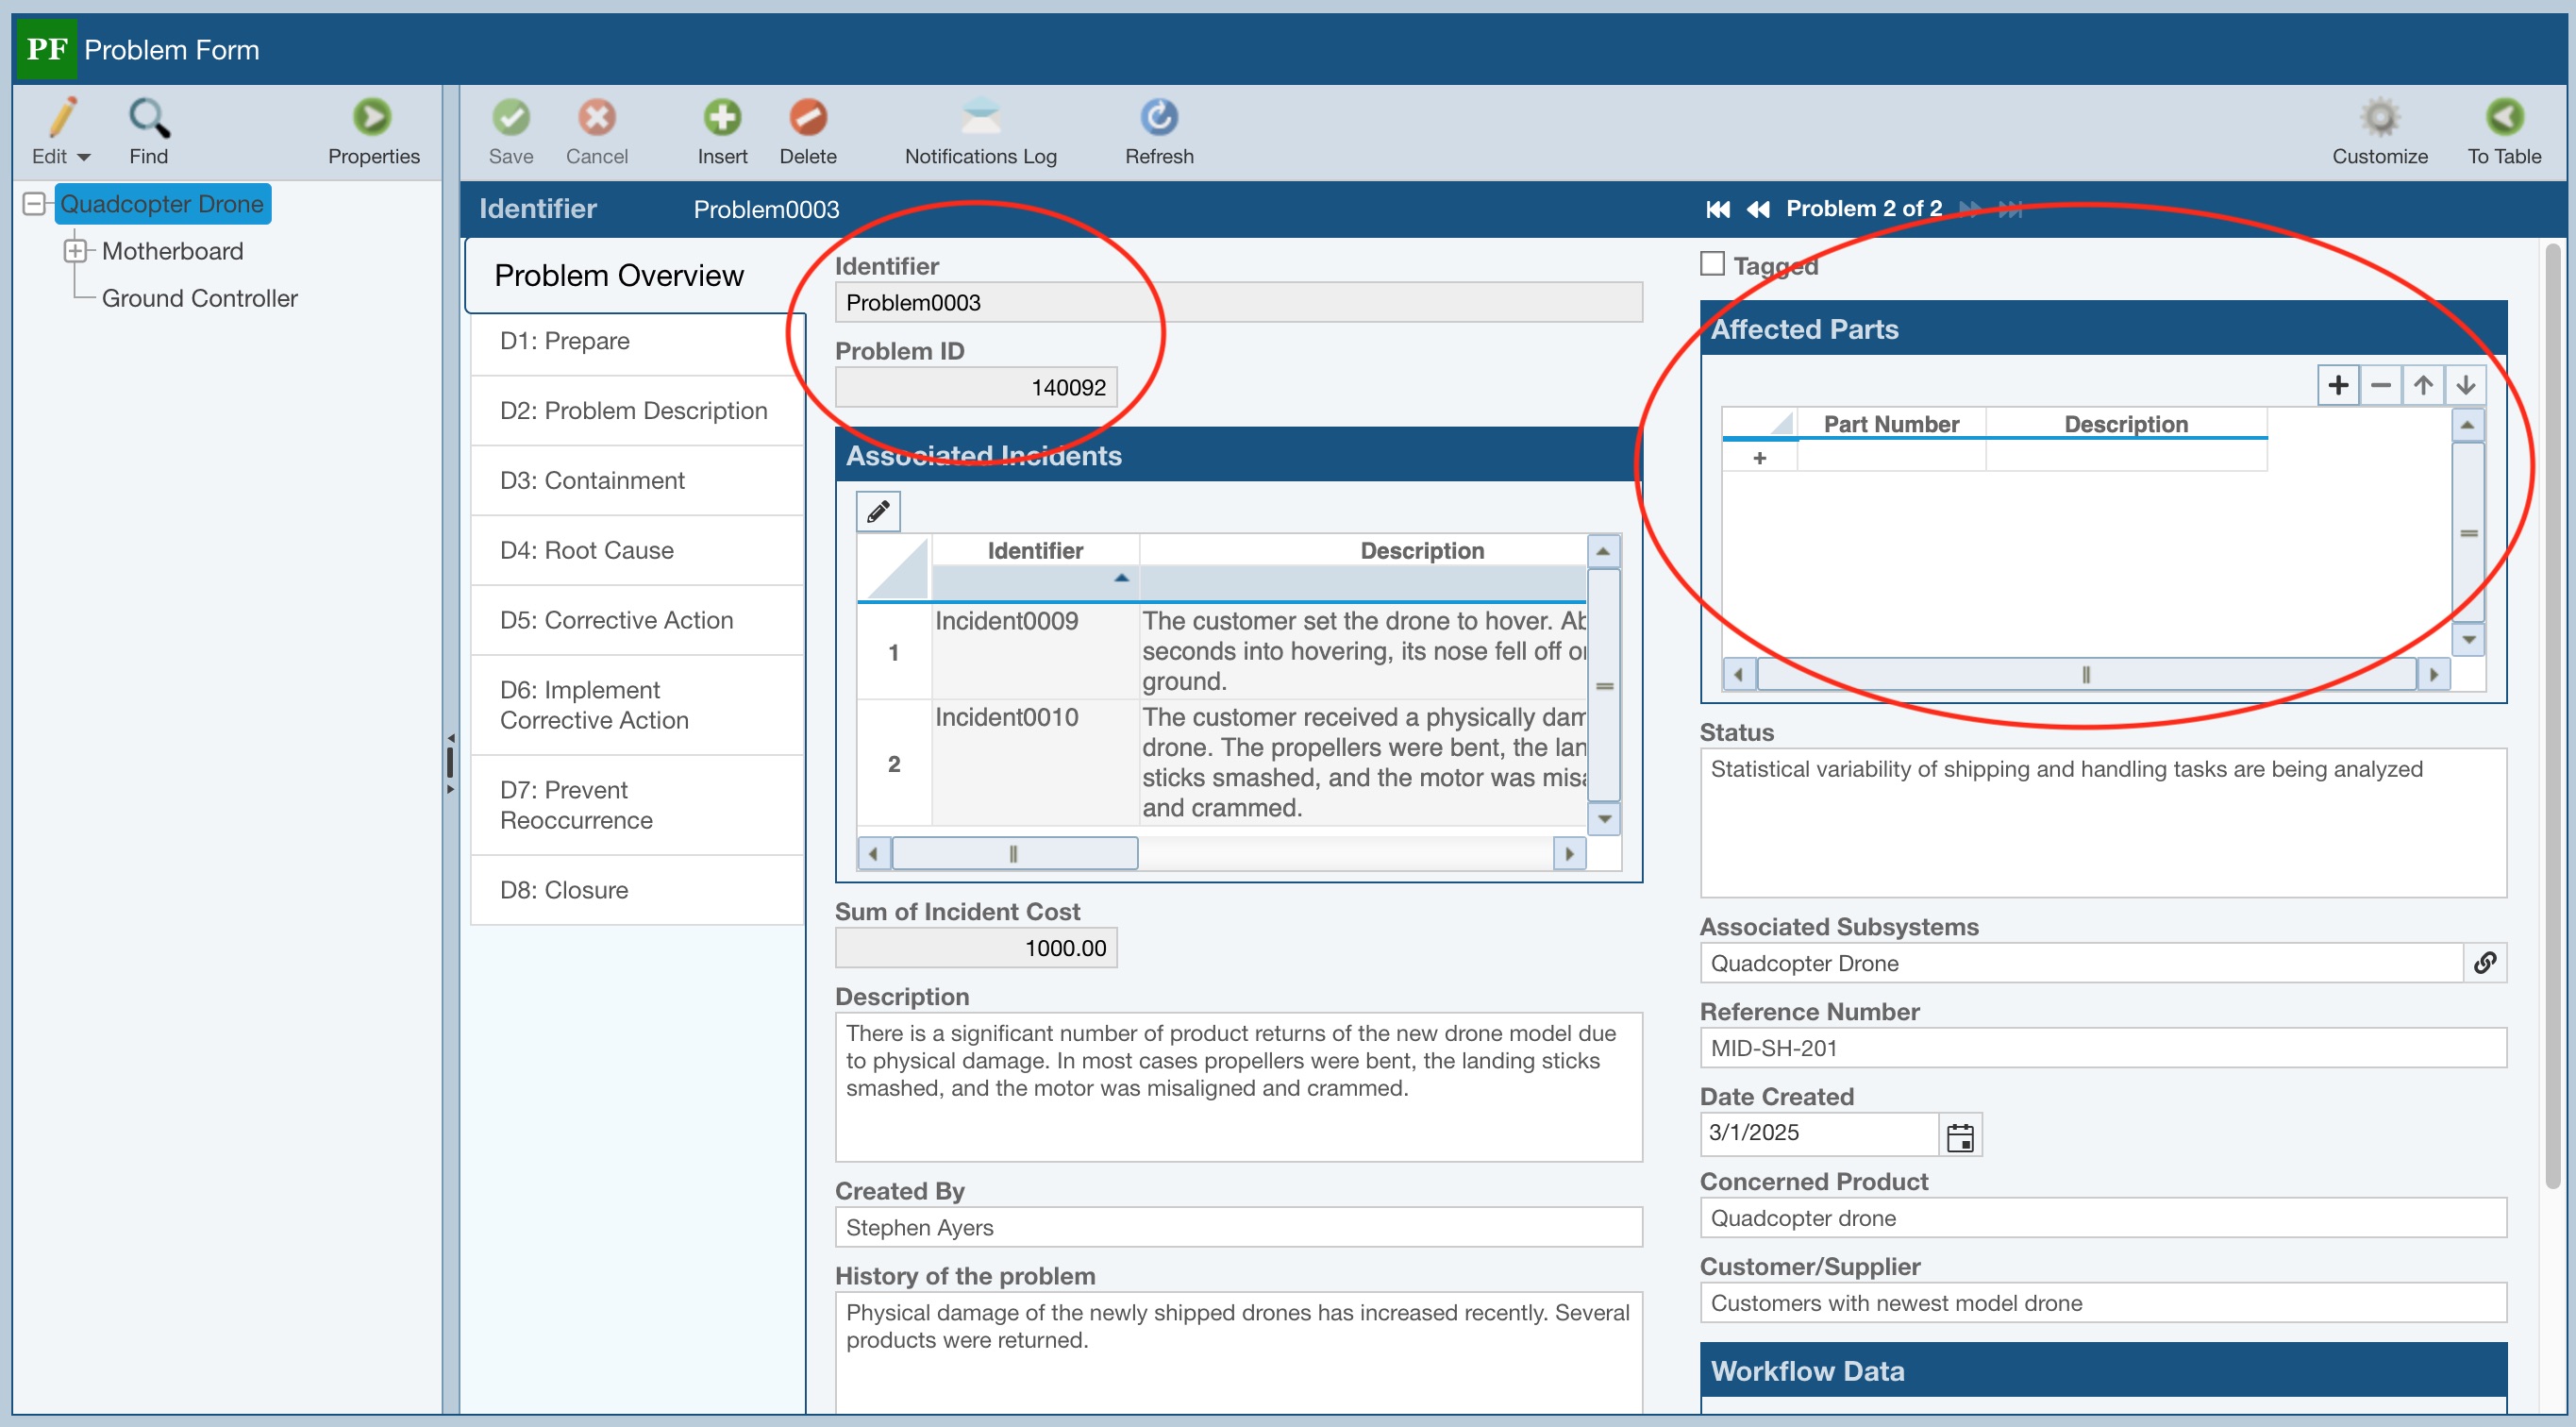
| Part Number | Description | Problem ID |
| SB12345 | Shipping box | 140092 |
| 67890PM | Packing material | 140092 |
- or -
| Part Number | Description | Problem Identifier |
| SB12345 | Shipping box | Problem0003 |
| 67890PM | Packing material | Problem0003 |
Note: If you import both Problem ID and Problem Identifier, the Problem ID field is used and Problem Identifier is ignored. Likewise, if you import both Incident ID and Incident Identifier, the Incident ID field is used and Incident Identifier is ignored.
Managing Imports
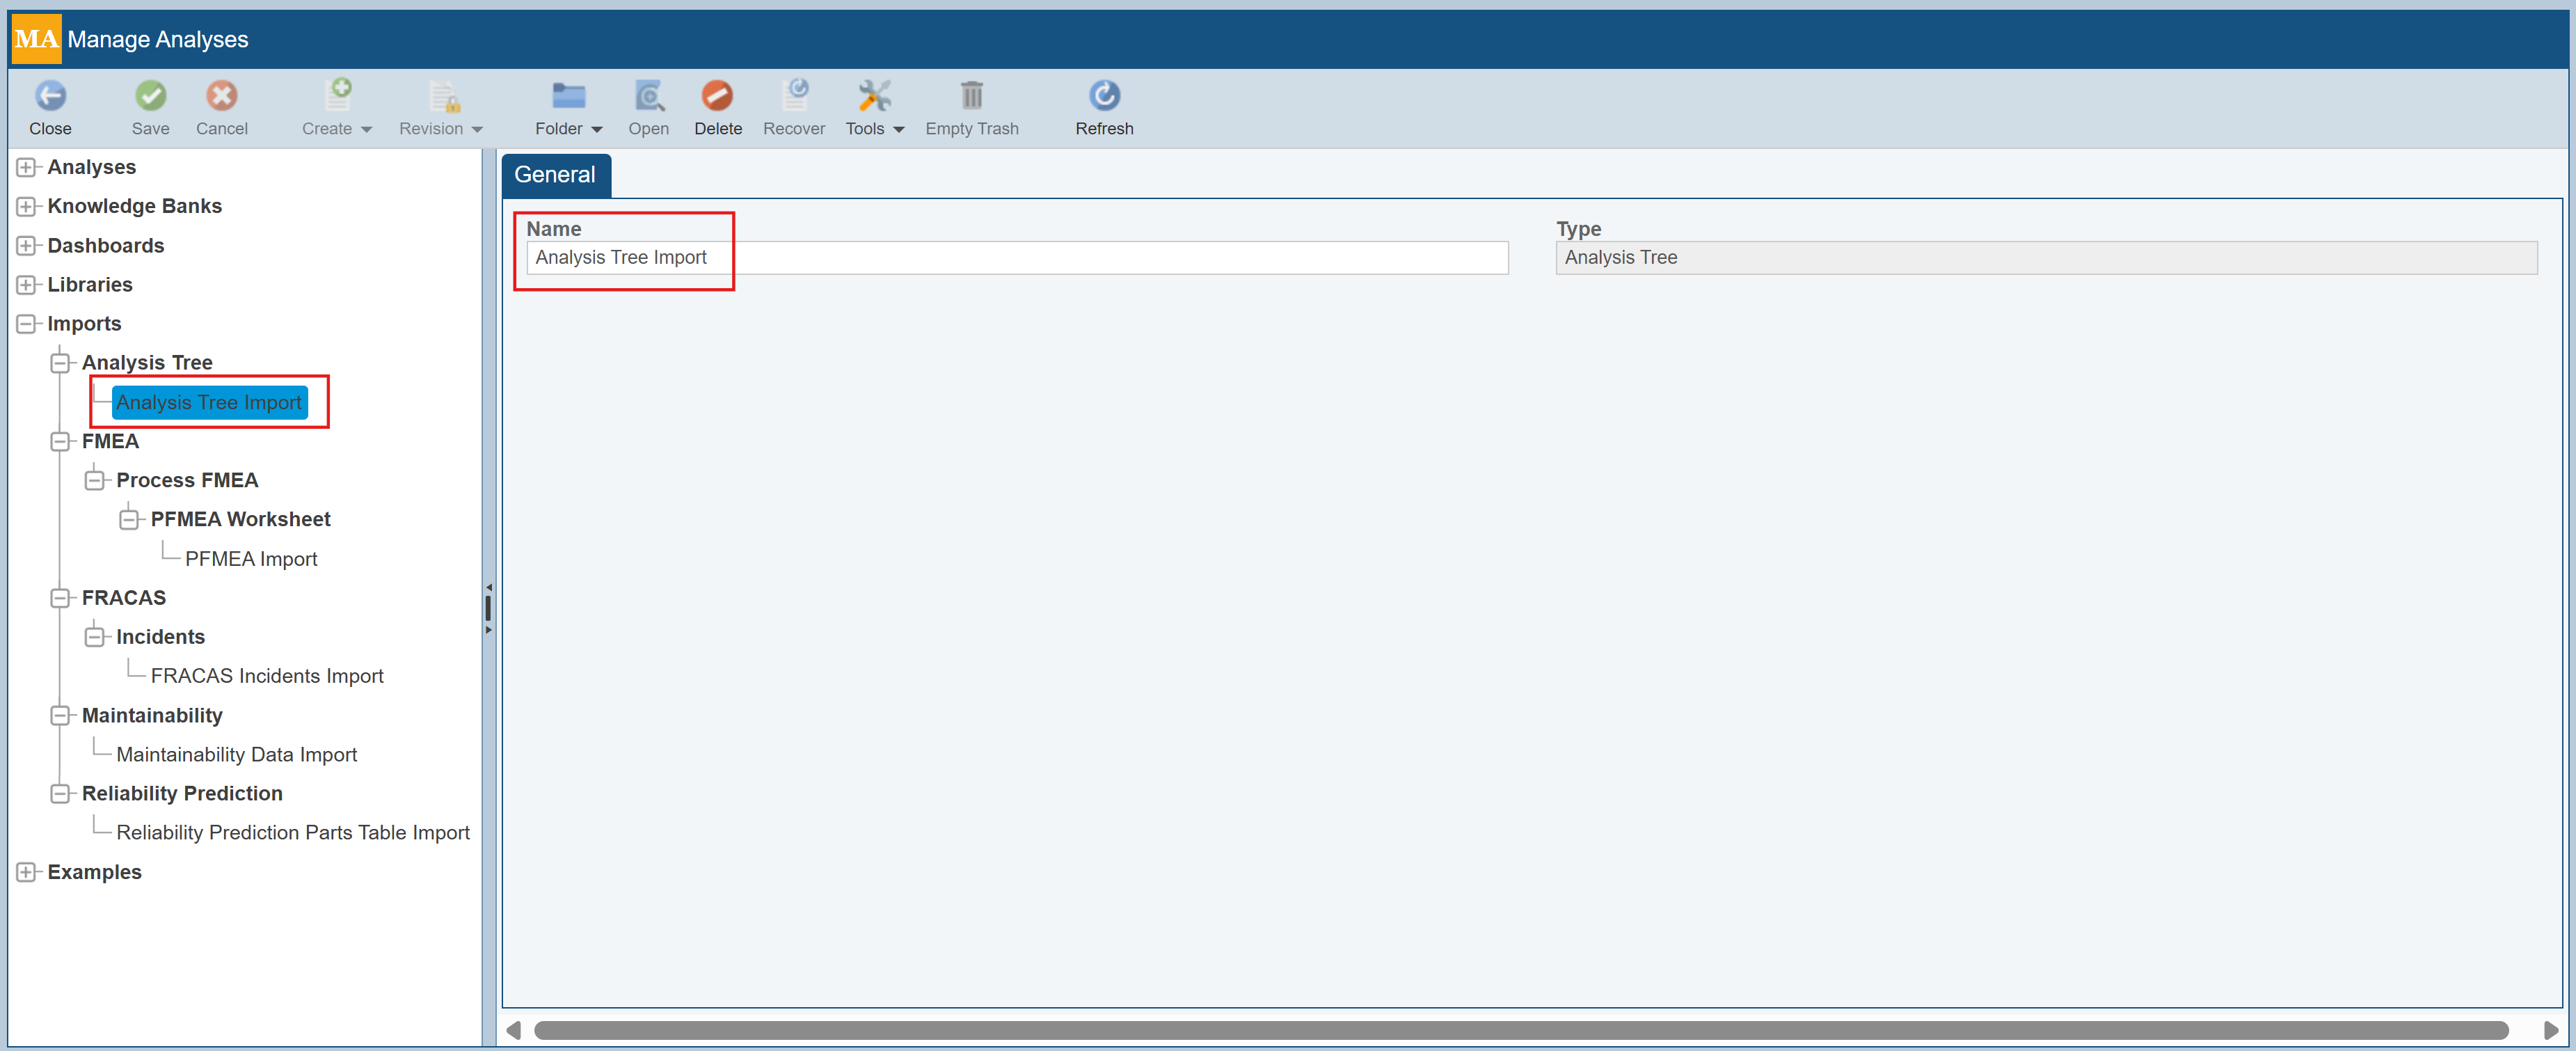
During importing, you have the option to save your Import. If you would like to delete or rename any of your saved Imports, you can do so from Manage Analyses. For general details about the Manage Analyses feature, see the Help topic Using the Manage Analyses Function.
To access the Manage Analyses function, click Manage Analyses from the Account menu.
A list of all your current Imports will be shown, along with the Product type they are associated with, and the type of data that is imported.

To delete any of your Imports, select it and click Delete. On the Delete dialog, click Yes to confirm the deletion or No to exit and retain the saved Import.

To rename any of your Imports, select it and in the rightmost pane, enter a new Name for the saved Import.
To exit Manage Analyses and return to your Analysis, from the Sidebar, click Back to Analysis.
Exporting
To export the data you are currently viewing, click the first item in the Export submenu item on the Sidebar.
The Export dialog appears.
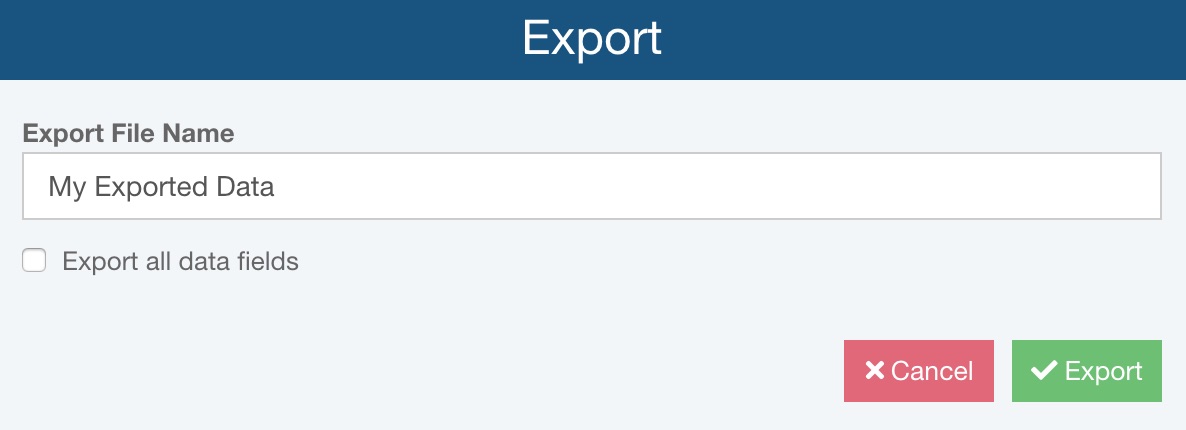
You can enter the name for the exported file or accept the default.
When exporting from Tables that support different Views, Relyence will export only the data fields shown in your current View. If you want to export all the data fields for the Table, and not just those shown in your current View, select Export all data fields. This option does not appear if multiple data Views are not available.
Click Export to start the export process. A progress indicator will appear.
If needed, click Cancel to stop the export.
When complete, the exported Microsoft Excel file will be available in your default download location.
The first row in the exported file will contain the data field names.
Only the records currently being viewed will be exported. If you have a filtered or sorted view of your data displayed, only those records will be exported. This allows you to control exporting to include only those records you want. To export all records, make sure all filters are cleared.
Exporting the Analysis Tree
To exporting your Analysis Tree, you must first make the Analysis Tree Properties pane active.
Click the Properties icon in the Analysis Tree toolbar.
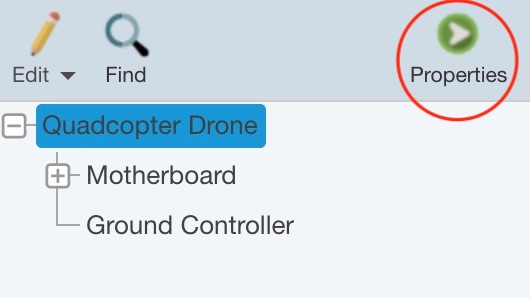
The Analysis Tree properties display in the right pane.
Click Export>Analysis Tree from the Sidebar menu.
The Export dialog appears.
Enter your preferred Export File Name. If you want to export all the Analysis Tree data fields, select the Export all data fields checkbox. Otherwise, leave it clear to export only those data fields that are shown.
Click Export to start the export process. A progress indicator appears in the lower right.
If needed, click Cancel to stop the export.
When complete, the exported Microsoft Excel file will be downloaded to your default download location.
The first row in the exported file will contain the data field names.
Exporting FRACAS Subtables
If you have Subtables on your FRACAS Incidents or Problems, you can also export the data from the Subtables.
To export FRACAS Subtable data, click Export>Incident Subtable or Export>Problem Subtable from the Sidebar menu. The Export dialog appears.
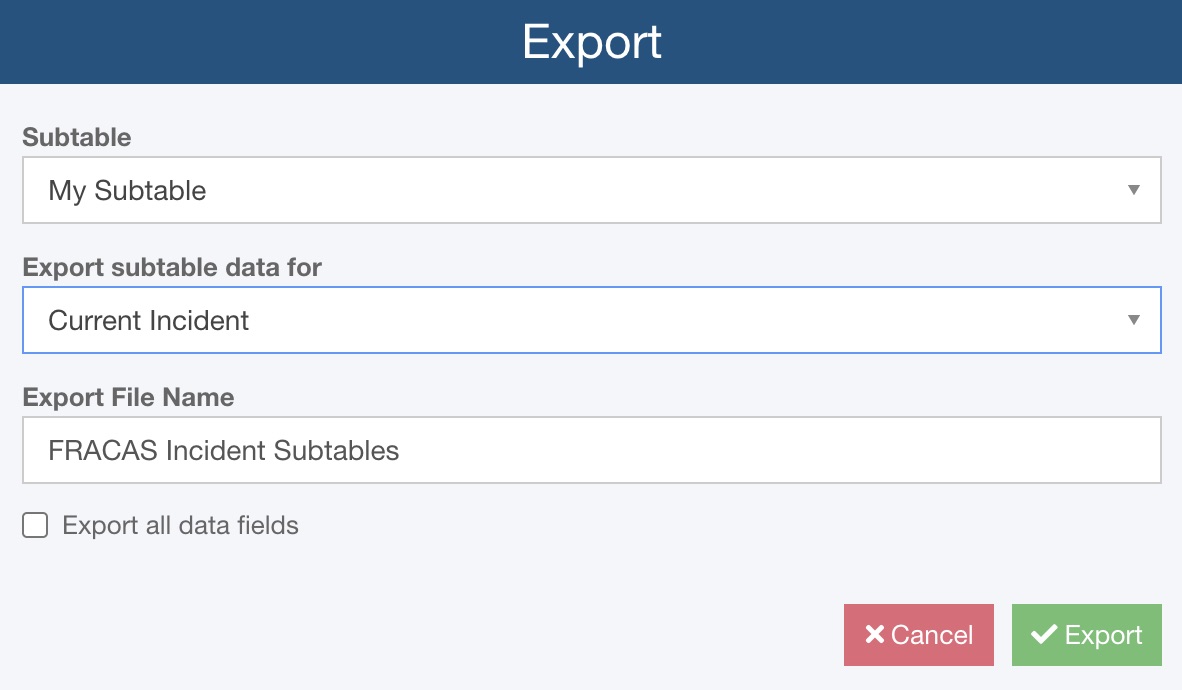
Select the Subtable to export.
For Export subtable data for you can choose either Current Incident/Problem to export the Subtable data from the current Incident or Problem, or All Incidents/Problems to export the Subtable data for all the Incidents or Problems in your Analysis.
Enter the Export File Name.
If you want to export only the visible fields on the Subtable, keep Export all data fields clear. To export the database identifiers for each of the Subtable records in addition to the visible data fields, select Export all data fields. Exporting the identifiers may be helpful if you are using this data in another application and need to have unique identifiers for each Subtable record.
Click Export to begin the export. A progress indicator will appear. Once complete, the file will be automatically downloaded to your default downloads directory.